Converting a boot-from-image server to boot-from-volume
You can freely move any server between Cleura Cloud regions, provided it boots from a volume. Having boot-from-volume servers is something we generally recommend, since it affords more flexibility than booting from an image.
You may still have boot-from-image servers, though. To verify that a particular server is of that type, you can go to the Cleura Cloud Management Panel, locate the server, and expand its detailed view. Go to the Details tab and pay attention to the Boot Target field. If this is a boot-from-image server, it will say Ephemeral Disk.
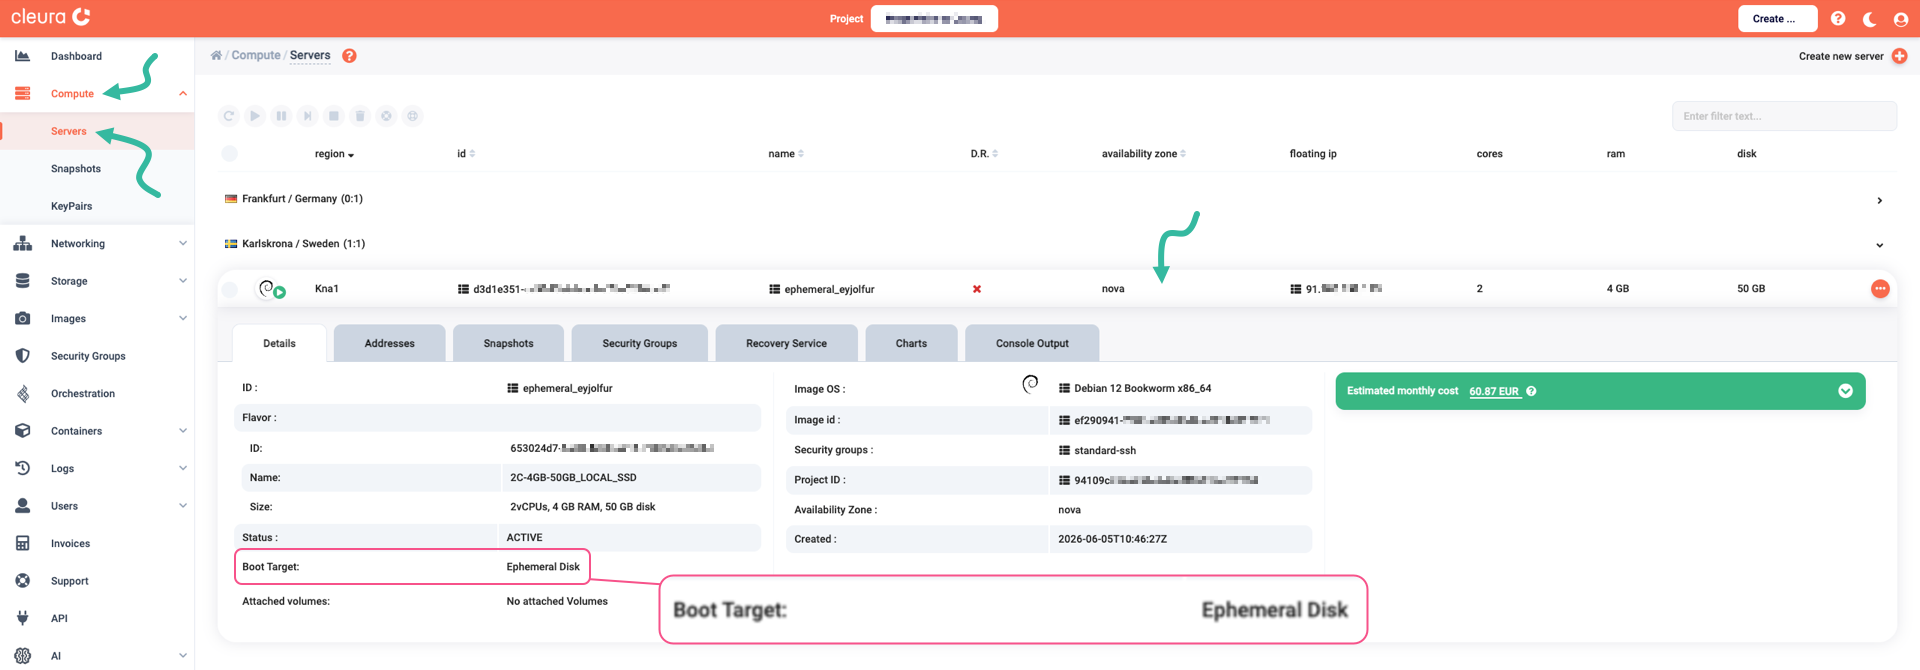
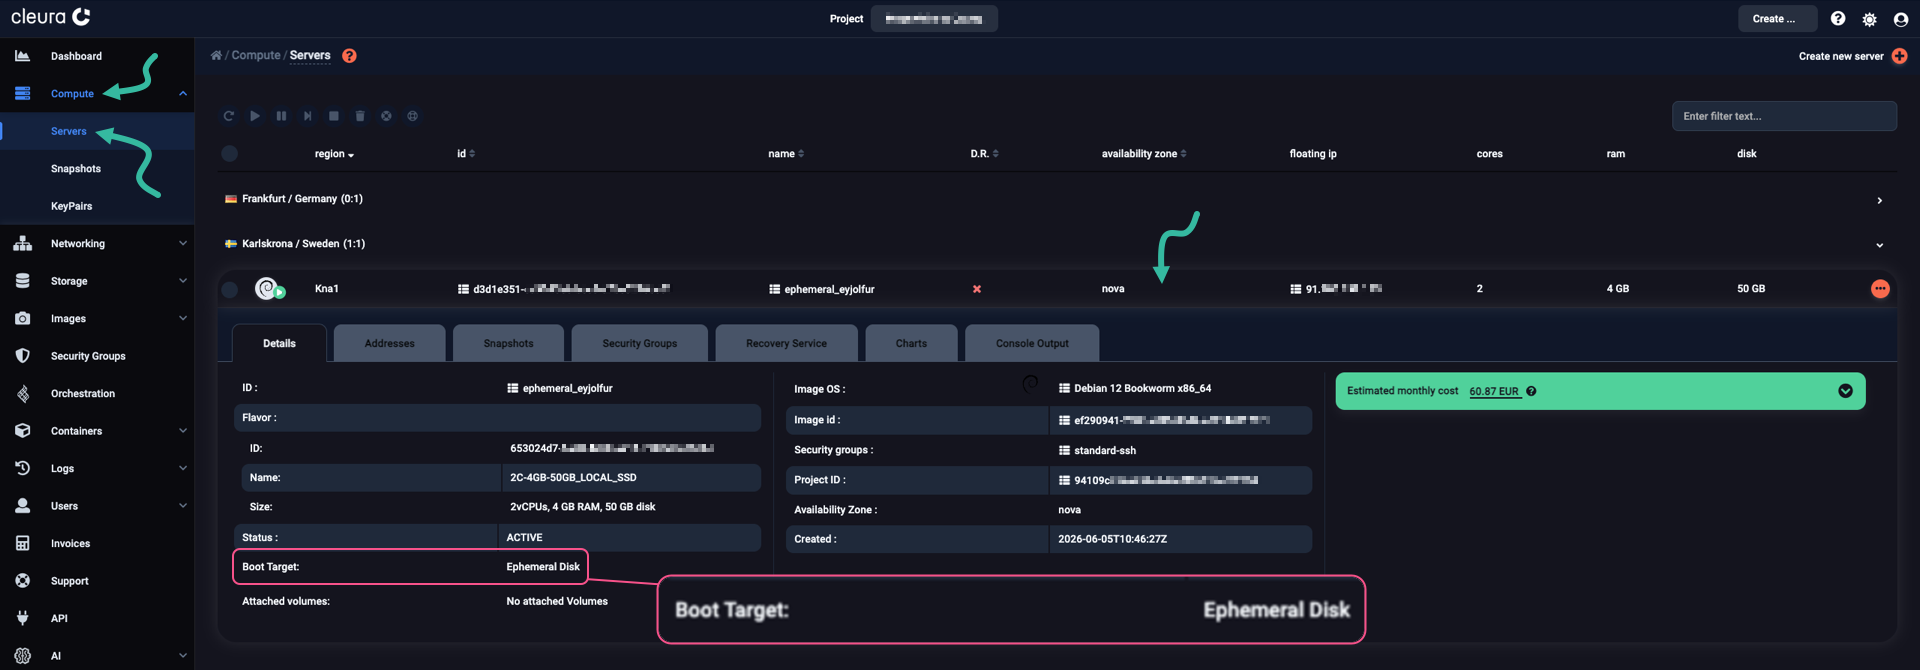
Whenever you decide to move a boot-from-image server between regions, you will discover that you cannot do so. The solution is first to convert it to a boot-from-volume server and then move it. In the following, we show how to perform the conversion using the OpenStack CLI.
Preparation
Fire up your favorite web browser and navigate to the Cleura Cloud Management Panel start page. Log in to your Cleura Cloud account if you have to.
To work with the OpenStack CLI, make sure to properly enable it for the region your boot-from-image server resides in.
Shutting down the server
Make sure the left-hand side vertical pane is in full view, then select Compute → Servers. You will see all supported Cleura Cloud regions in the main pane. Expand the one with the boot-from-image server you want to convert to boot-from-volume. Click the icon at the right of the server row, and from the pop-up menu that appears, select Stop Server.
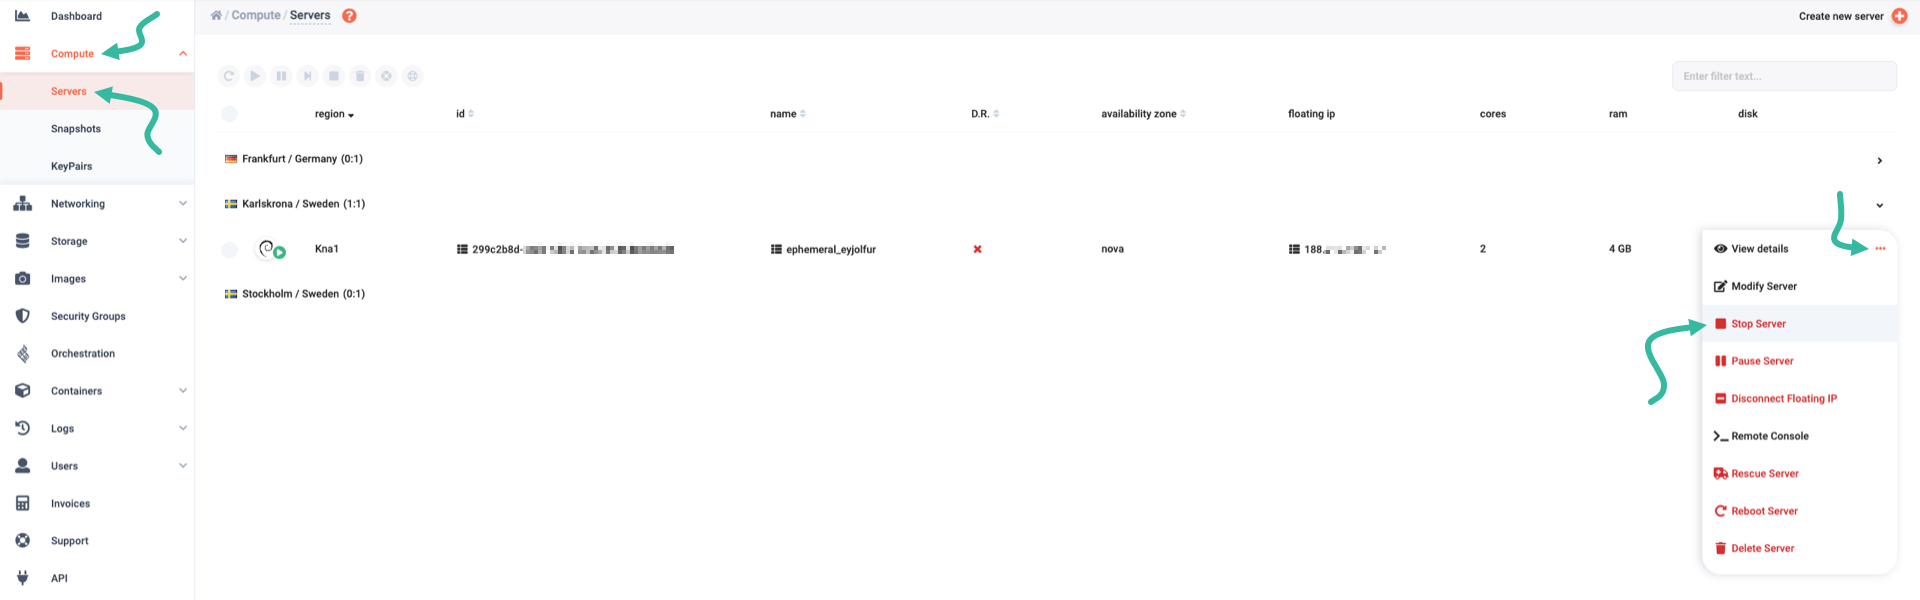
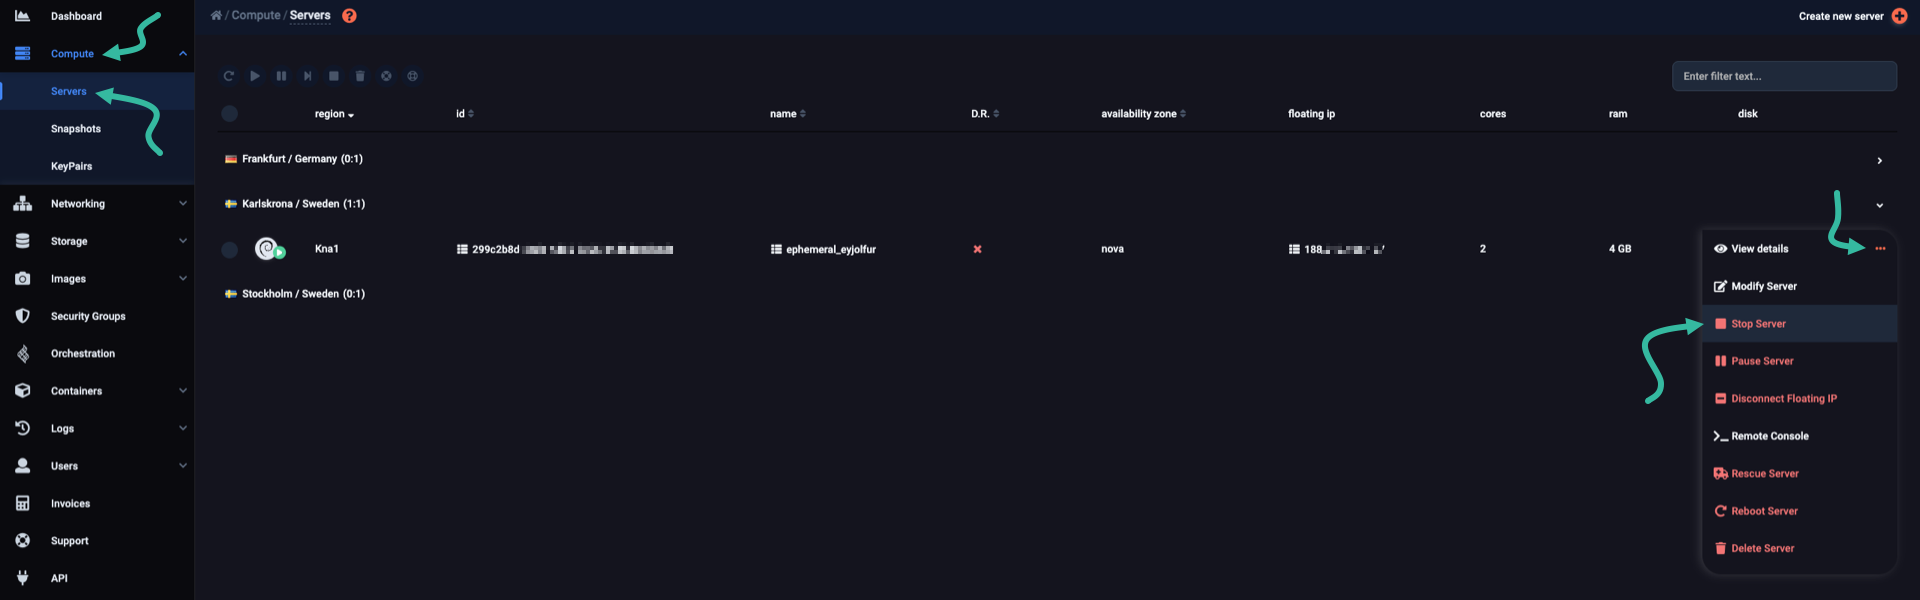
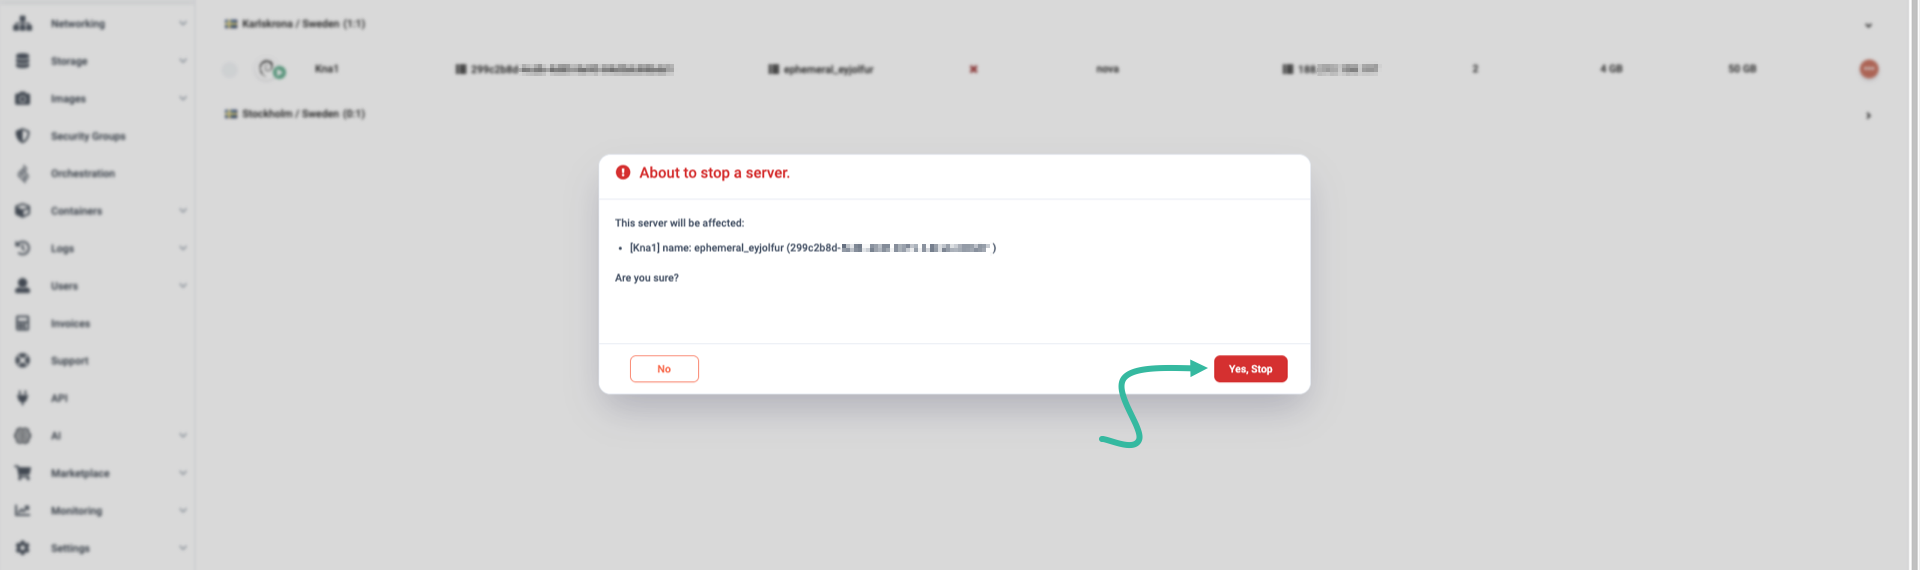
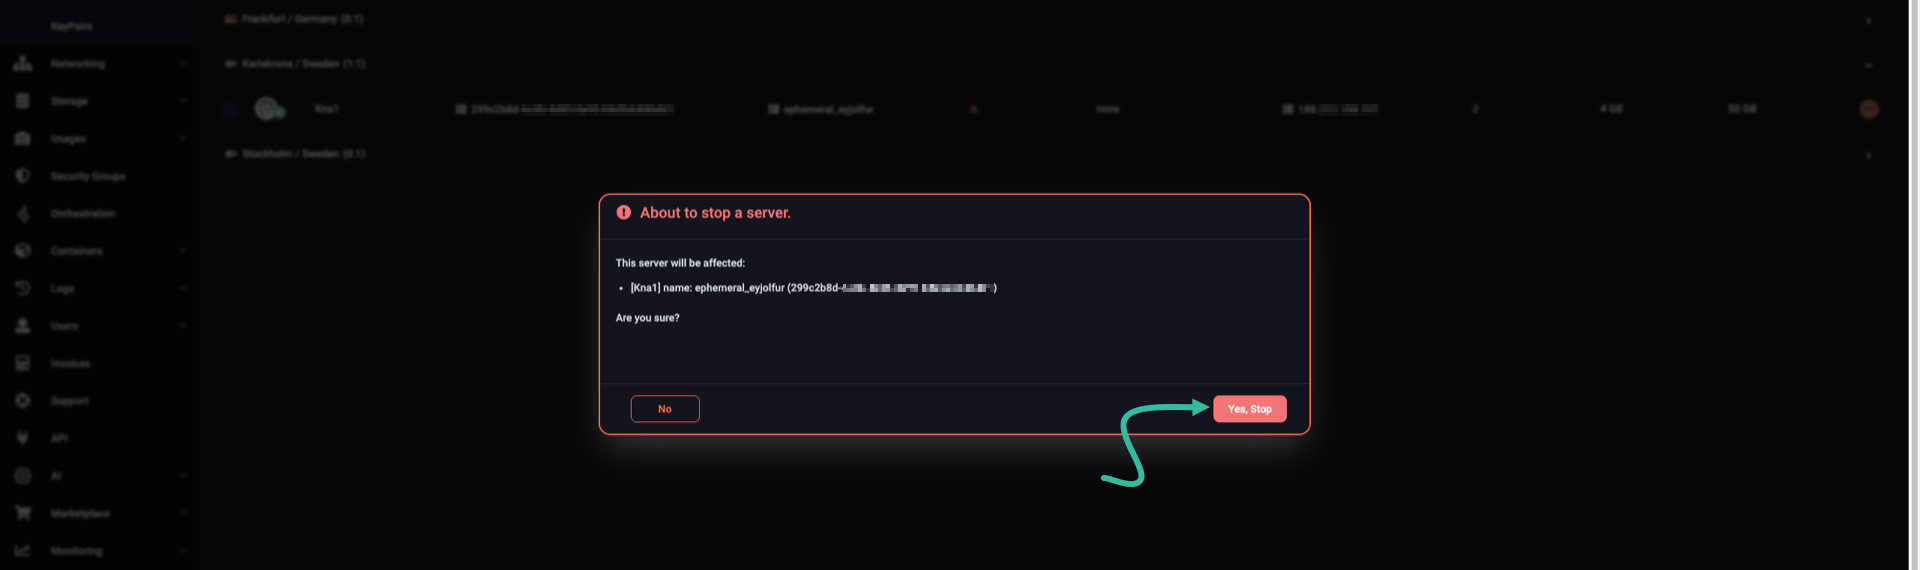
A pop-up window appears, asking if you want to stop the server. Confirm by clicking on the button labeled Yes, Stop.
Assuming your boot-from-image server is named ephemeral_eyjolfur, shut it down by typing the following:
openstack server stop ephemeral_eyjolfur
To confirm that it has finished shutting down, type:
openstack server show ephemeral_eyjolfur -c status -f value
You should see this:
SHUTOFF
Taking a snapshot
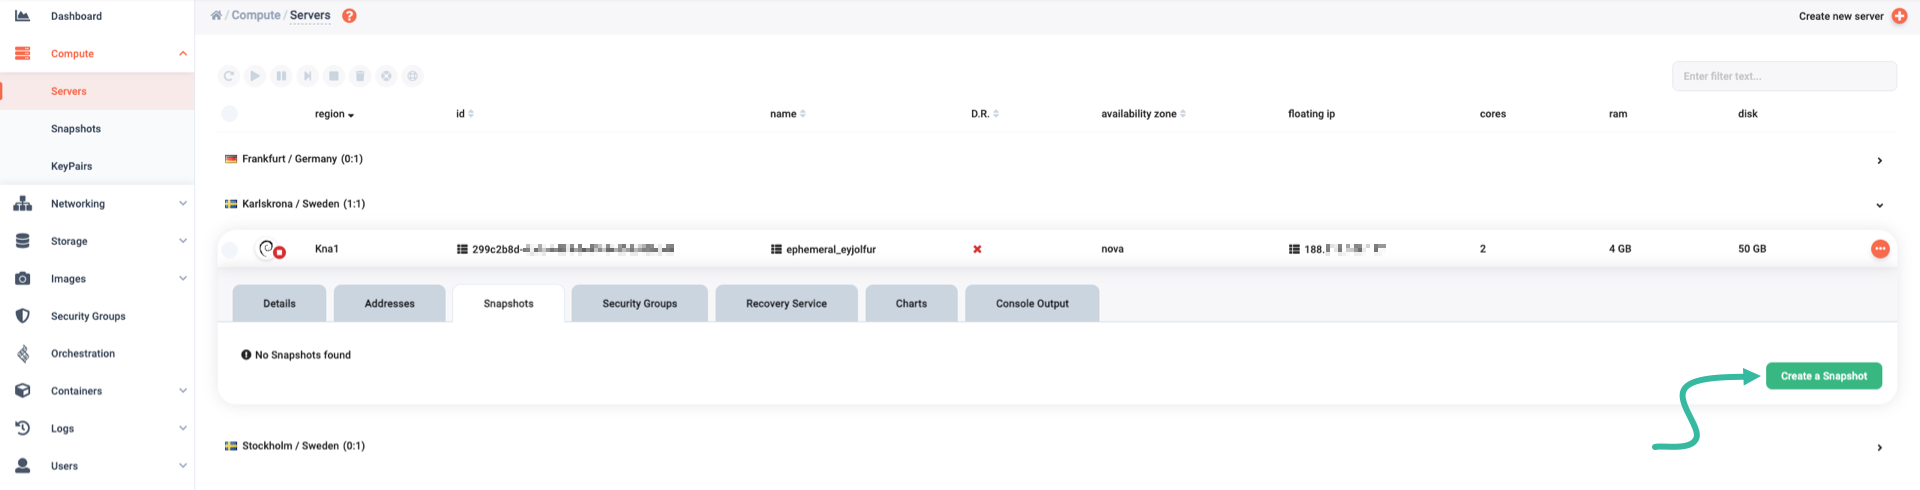
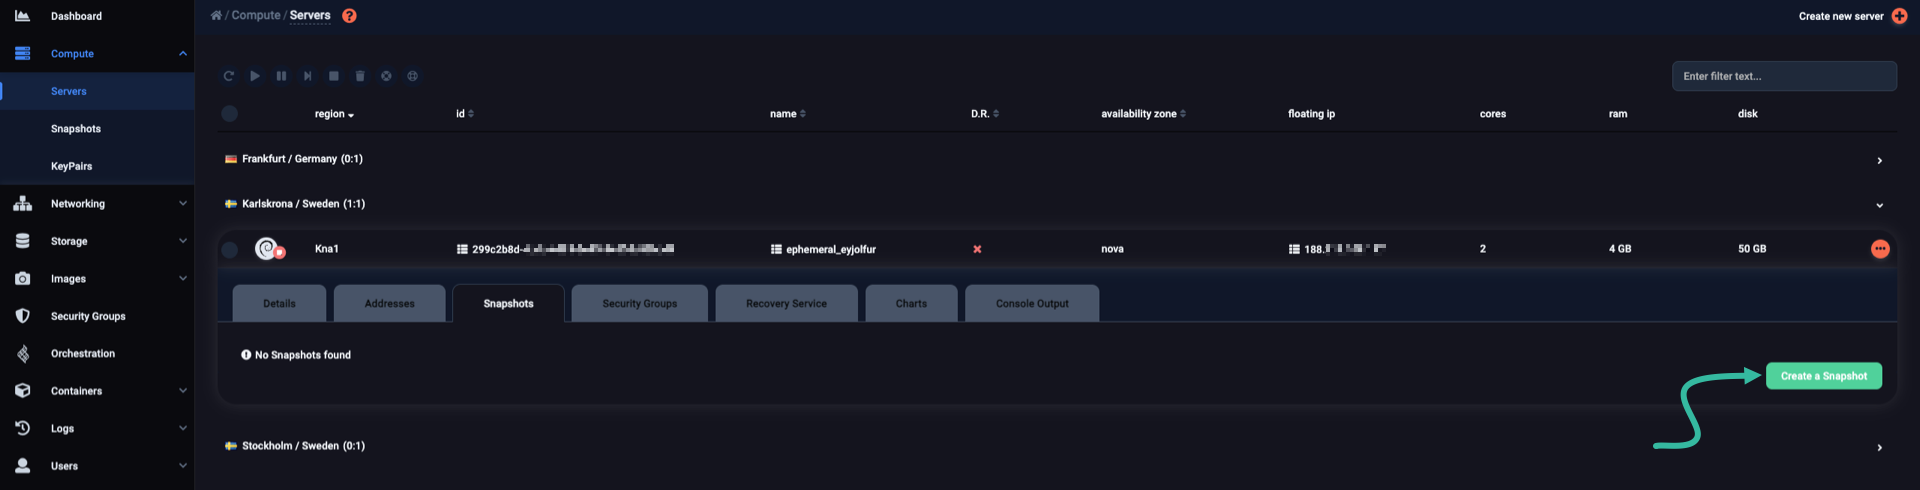
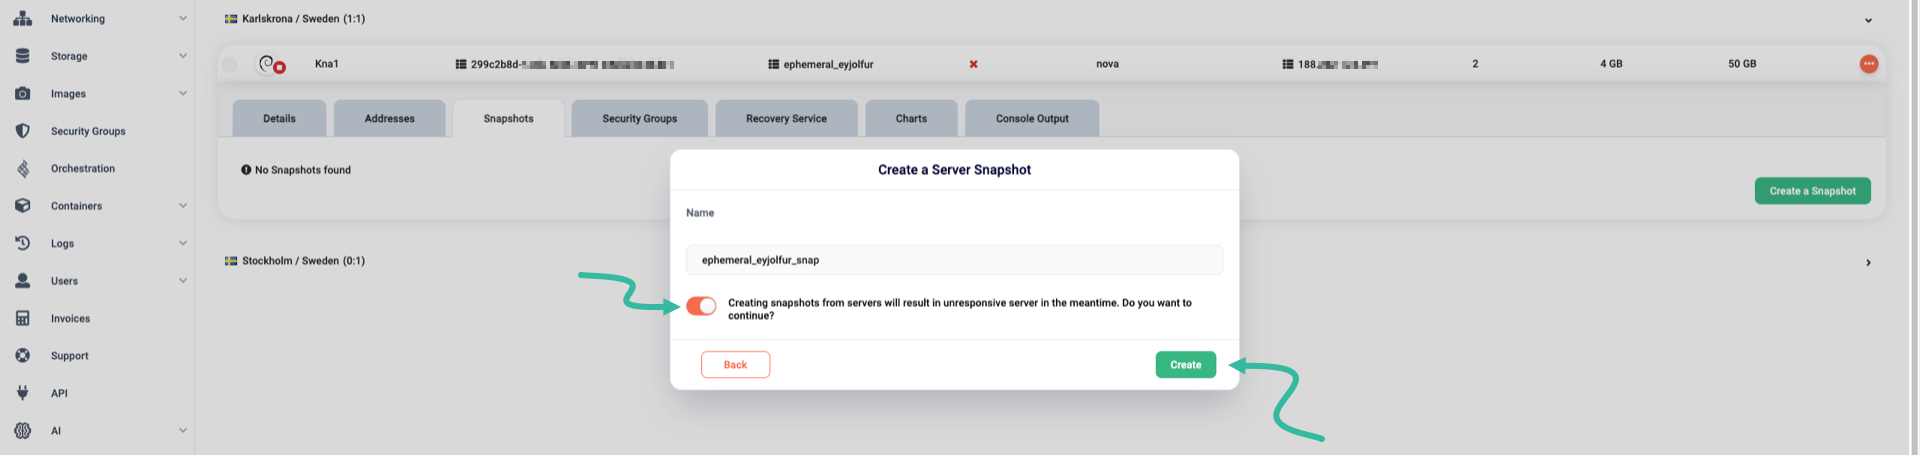
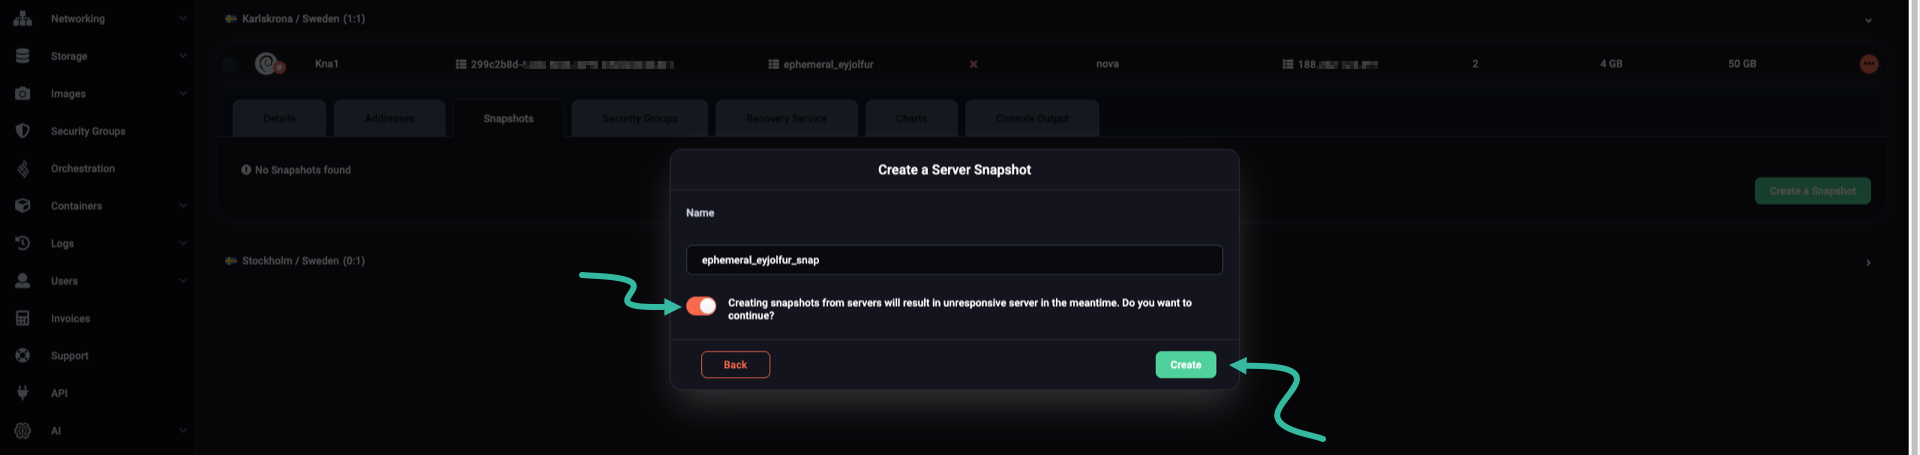
When the server is shut off, click on its row to get the detailed view and go to the Snapshots tab. There, click the button labeled Create a Snapshot.
A pop-up window appears, where you have to type in a name for the snapshot. You must also be explicit regarding the operation you are about to perform, so activate the switch at the left of the corresponding question. When you are ready, click the button labeled Create.
To take a snapshot of the server, all you have to do is type something like the following:
$ openstack server image create --name ephemeral_eyjolfur_snap ephemeral_eyjolfur

+------------+-------------------------------------------------------------------------------------+
| Field      | Value                                                                               |
+------------+-------------------------------------------------------------------------------------+
| created_at | 2026-06-05T11:30:29Z                                                                |
| file       | /v2/images/4a556439-7f97-4808-96db-83ffaa971a1f/file                                |
| id         | 4a556439-7f97-4808-96db-83ffaa971a1f                                                |
| min_disk   | 50                                                                                  |
| min_ram    | 512                                                                                 |
| name       | ephemeral_eyjolfur_snap                                                             |
| owner      | 94109c764a754e24ac0f6b01aef82359                                                    |
| properties | architecture='x86_64', base_image_ref='ef290941-280b-47f5-8bd4-a02f4d0179f1',       |
|            | boot_roles='load-balancer_member,swiftoperator,member,creator,reader',              |
|            | cim_image_name='Debian 12 Bookworm x86_64', cim_time='1778515848',                  |
|            | hw_cdrom_bus='ide', hw_disk_bus='virtio', hw_input_bus='usb', hw_machine_type='pc', |
|            | hw_pointer_model='usbtablet', hw_qemu_guest_agent='yes', hw_video_model='virtio',   |
|            | hw_vif_model='virtio', hypervisor_type='qemu', image_build_date='2026-05-11',       |
|            | image_description='https://docs.cleura.cloud/reference/images/',                    |
|            | image_original_user='debian', image_source='private', image_type='snapshot',        |
|            | instance_uuid='d3d1e351-ca9f-43e6-bcc8-a7be0216bc01', locations='[]',               |
|            | os_distro='debian', os_hidden='False', os_type='linux', os_version='12',            |
|            | owner_project_name='Meanwhile-in-Drama', owner_specified.openstack.md5='',          |
|            | owner_specified.openstack.object='images/Debian 12 Bookworm x86_64 (2026-05-11)',   |
|            | owner_specified.openstack.sha256='', owner_user_name='CCP_User_43597_f1',           |
|            | provided_until='notice', replace_frequency='monthly',                               |
|            | user_id='c096cf99f65a4d22a6954b67d2ec11d7', uuid_validity='last-1'                  |
| protected  | False                                                                               |
| schema     | /v2/schemas/image                                                                   |
| status     | queued                                                                              |
| tags       |                                                                                     |
| updated_at | 2026-06-05T11:30:29Z                                                                |
| visibility | private                                                                             |
+------------+-------------------------------------------------------------------------------------+
At first, the status of the snapshot is queued.
To make sure the snapshot has been successfully created, type:
openstack image show ephemeral_eyjolfur_snap -c status -f value
You should see this:
active
Creating a volume from the snapshot
After a few seconds, the snapshot will be created and listed in the Snapshots tab. Before you proceed, take note of its size. At the right-hand side of the snapshot row, click the icon to create a new volume off of the snapshot you just created.


A new vertical pane will slide over from the right-hand side of the Cleura Cloud Management Panel. Type in a name for the new volume, and choose a volume size bigger than the snapshot size. Then, you need to type in a description regarding the new volume.
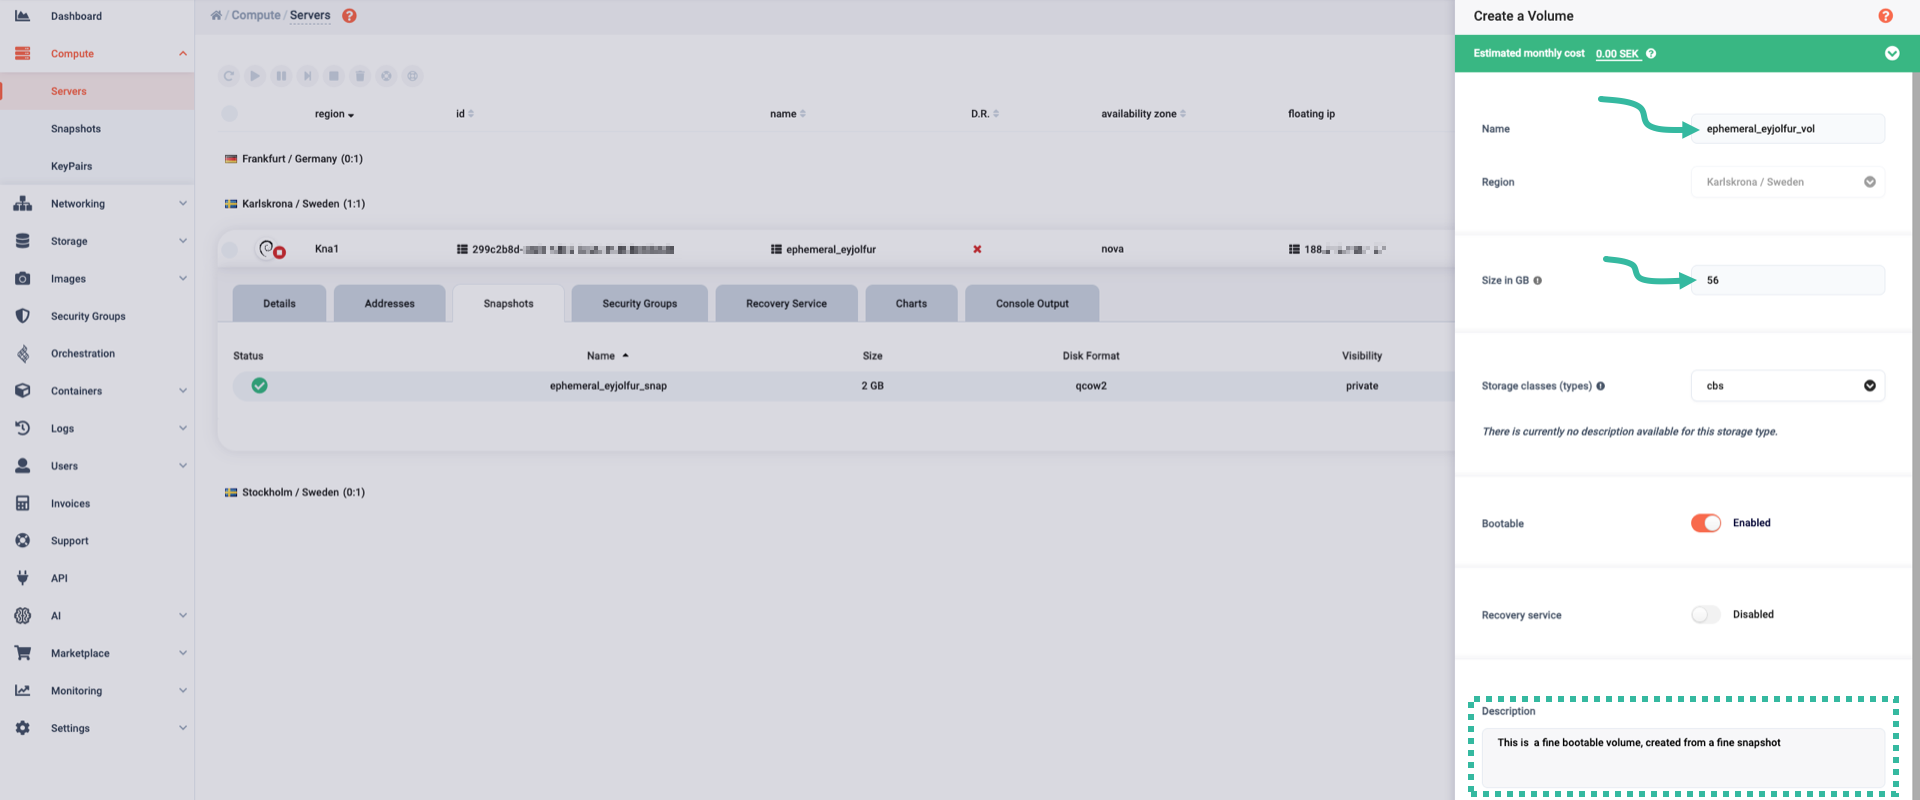
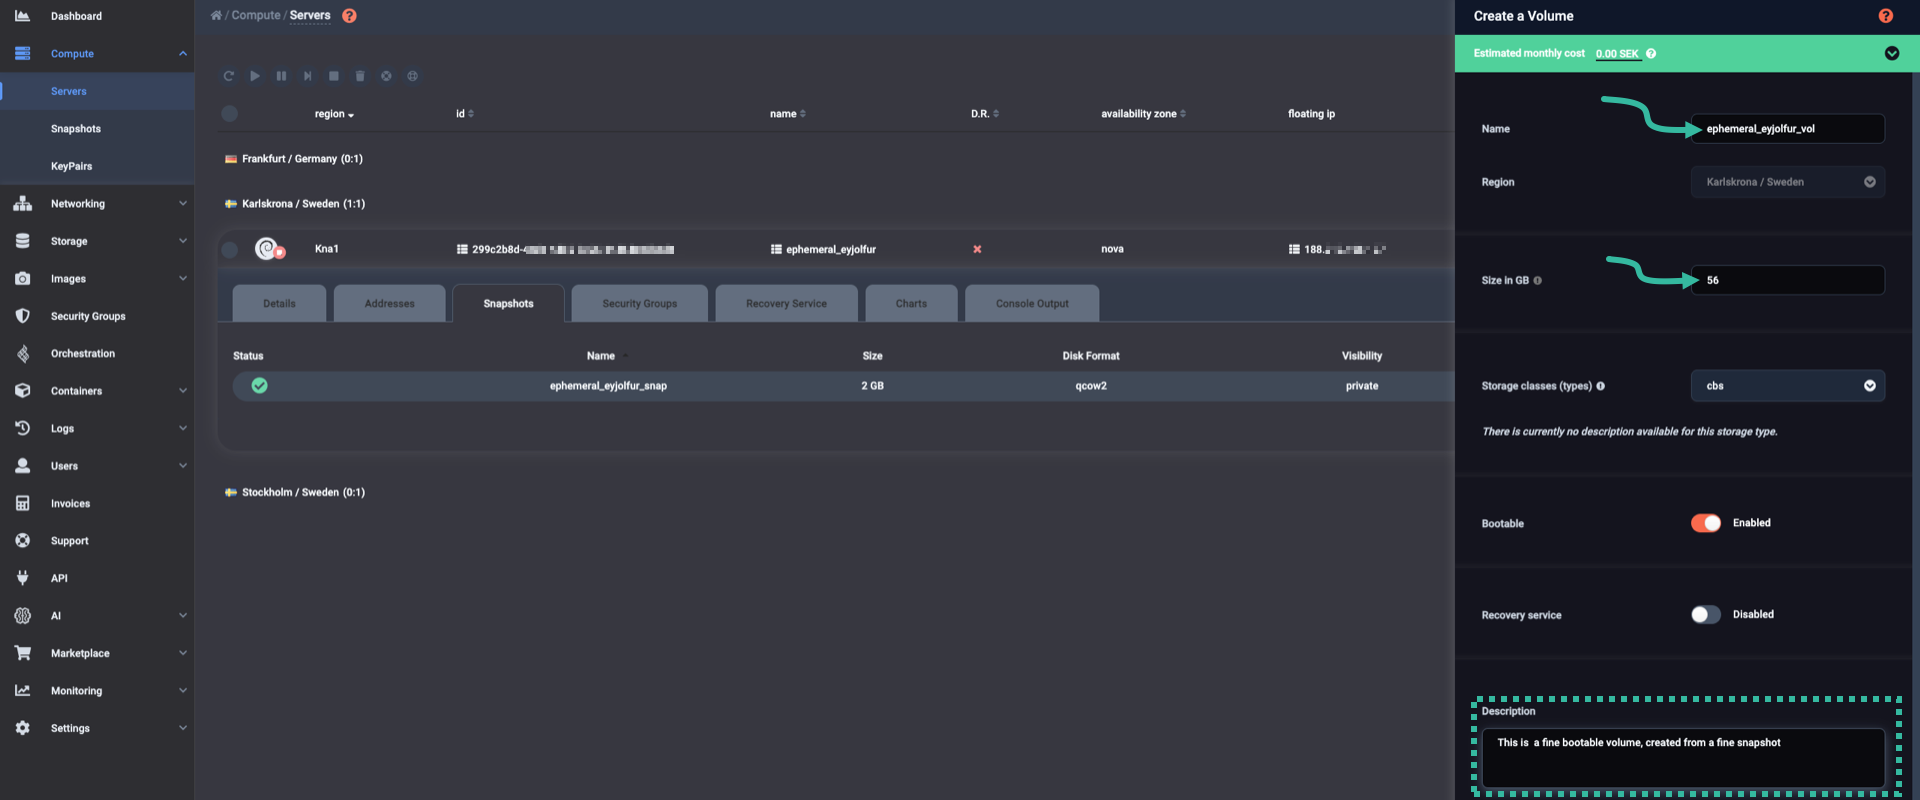
Scroll down a bit if you have to, and click the Create button.


Before creating a volume off of the snapshot you just created, jot down its size like this:
openstack image show nanisivik_snap -c min_disk -f value
In our example, the size of the snapshot is 50 gibibytes.
Now, go ahead and create a volume slightly larger than the size of the snapshot:
$ openstack volume create --size 56 --image ephemeral_eyjolfur_snap ephemeral_eyjolfur_vol

+--------------------------------+--------------------------------------+
| Field                          | Value                                |
+--------------------------------+--------------------------------------+
| attachments                    | []                                   |
| availability_zone              | nova                                 |
| backup_id                      | None                                 |
| bootable                       | False                                |
| cluster_name                   | None                                 |
| consumes_quota                 | True                                 |
| created_at                     | 2026-06-05T11:36:18.033818           |
| description                    | None                                 |
| encrypted                      | False                                |
| group_id                       | None                                 |
| id                             | 07f13557-125e-48d2-a867-21f0a51ea891 |
| multiattach                    | False                                |
| name                           | ephemeral_eyjolfur_vol               |
| os-vol-host-attr:host          | None                                 |
| os-vol-mig-status-attr:migstat | None                                 |
| os-vol-mig-status-attr:name_id | None                                 |
| os-vol-tenant-attr:tenant_id   | None                                 |
| properties                     |                                      |
| provider_id                    | None                                 |
| replication_status             | None                                 |
| service_uuid                   | None                                 |
| shared_targets                 | True                                 |
| size                           | 56                                   |
| snapshot_id                    | None                                 |
| source_volid                   | None                                 |
| status                         | creating                             |
| type                           | cbs                                  |
| updated_at                     | None                                 |
| user_id                        | c096cf99f65a4d22a6954b67d2ec11d7     |
| volume_type_id                 | 5f7ecf32-4b4b-4e95-82c8-5d0eccae887e |
+--------------------------------+--------------------------------------+
As you can see in the example above, we named our volume ephemeral_eyjolfur_vol, and its status was at first creating.
You may check the progress of this operation by typing this:
openstack volume show ephemeral_eyjolfur_vol -c status -f value
As soon as the new volume is ready, the status becomes available.
Viewing the new volume
In the left-hand side vertical pane, select Storage → Volumes. In the main pane, select the region your boot-from-image server resides in. You will see the volume you created in the previous step.
In the intersection of the volume row and the Attached To column, it says -No attachments-. That is expected.
Then, notice that the volume is bootable. That is also expected.
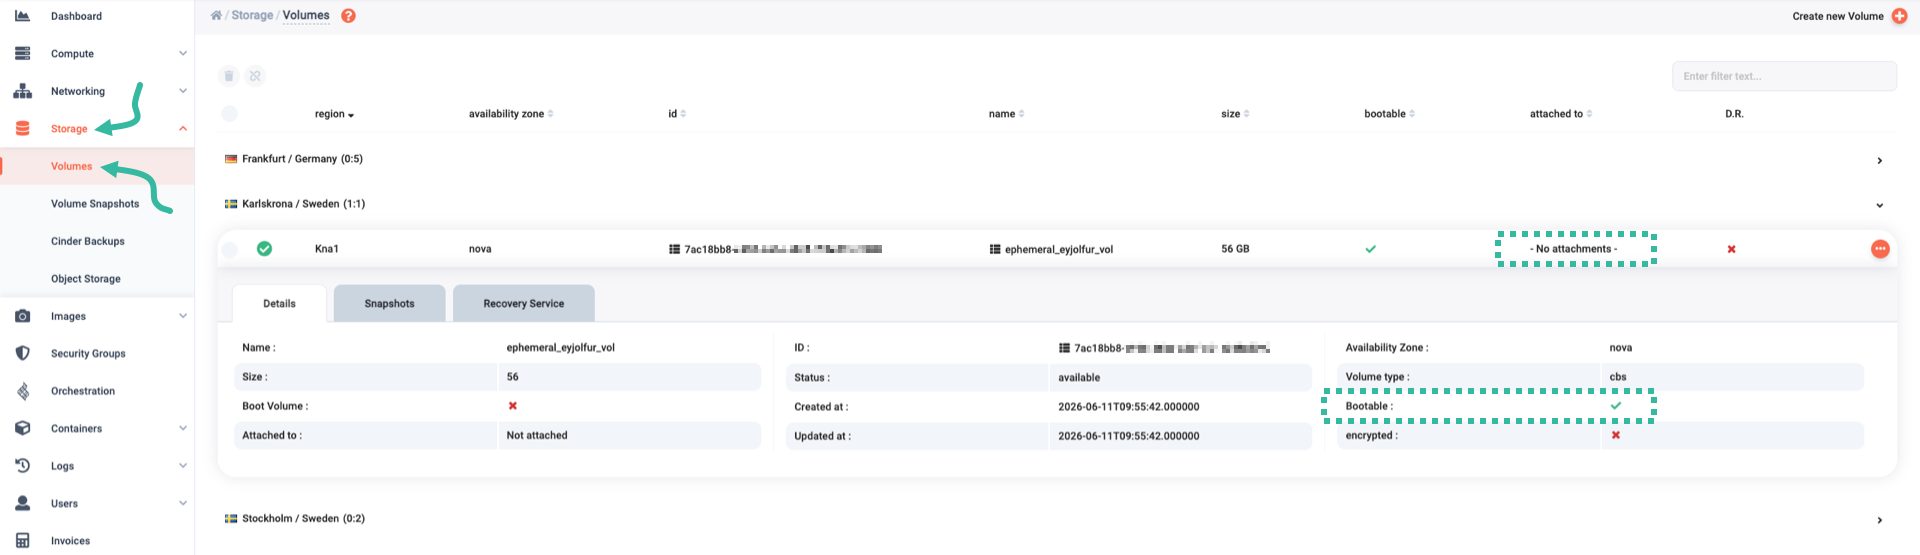
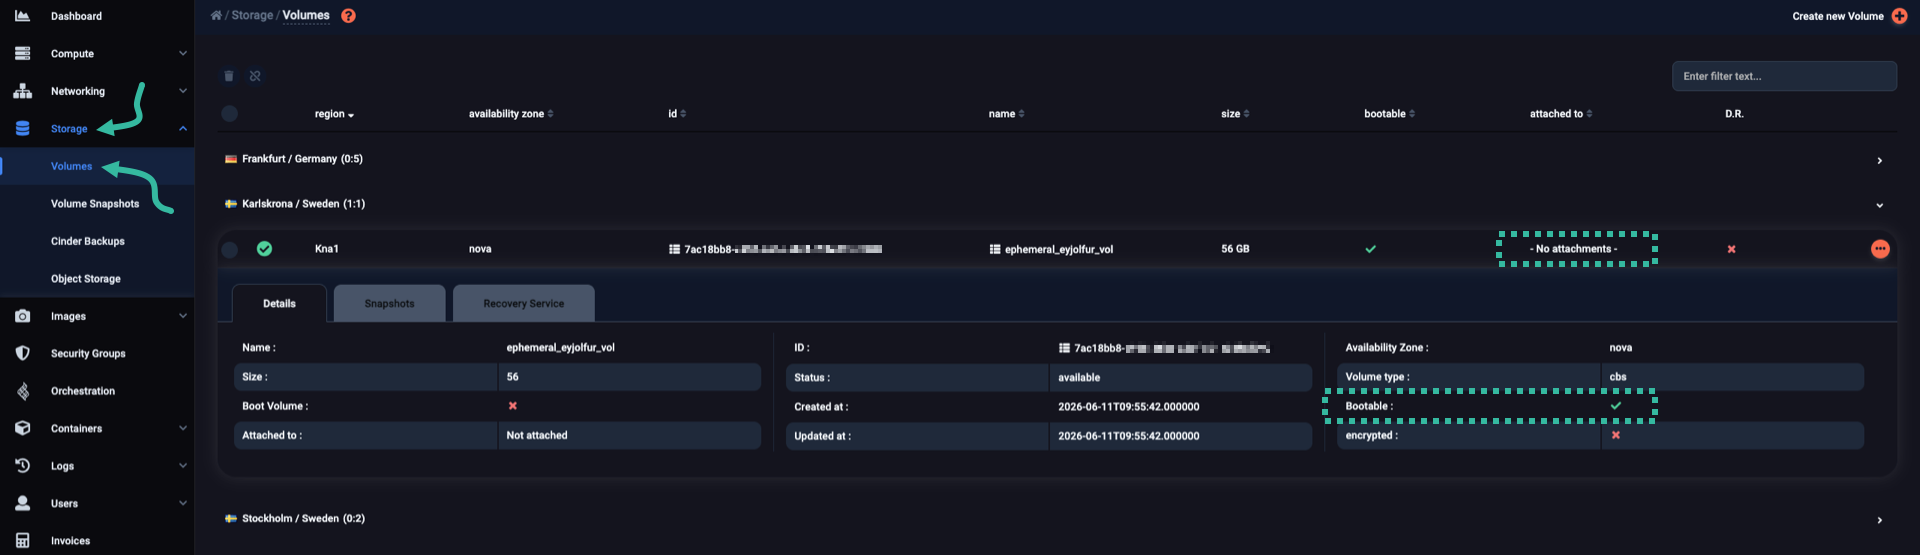
To view all details regarding the volume you just created off of the boot-from-image server snapshot, type the following:
$ openstack volume show ephemeral_eyjolfur_vol

+--------------------------------+-----------------------------------------------------------------+
| Field                          | Value                                                           |
+--------------------------------+-----------------------------------------------------------------+
| attachments                    | []                                                              |
| availability_zone              | nova                                                            |
| backup_id                      | None                                                            |
| bootable                       | True                                                            |
| cluster_name                   | None                                                            |
| consumes_quota                 | True                                                            |
| created_at                     | 2026-06-05T11:36:18.000000                                      |
| description                    | None                                                            |
| encrypted                      | False                                                           |
| group_id                       | None                                                            |
| id                             | 07f13557-125e-48d2-a867-21f0a51ea891                            |
| multiattach                    | False                                                           |
| name                           | ephemeral_eyjolfur_vol                                          |
| os-vol-host-attr:host          | None                                                            |
| os-vol-mig-status-attr:migstat | None                                                            |
| os-vol-mig-status-attr:name_id | None                                                            |
| os-vol-tenant-attr:tenant_id   | 94109c764a754e24ac0f6b01aef82359                                |
| properties                     |                                                                 |
| provider_id                    | None                                                            |
| replication_status             | None                                                            |
| service_uuid                   | cb0af1f1-5c8b-4654-94bc-977e27c9f6a3                            |
| shared_targets                 | False                                                           |
| size                           | 56                                                              |
| snapshot_id                    | None                                                            |
| source_volid                   | None                                                            |
| status                         | available                                                       |
| type                           | cbs                                                             |
| updated_at                     | 2026-06-05T11:37:24.000000                                      |
| user_id                        | c096cf99f65a4d22a6954b67d2ec11d7                                |
| volume_image_metadata          | {'signature_verified': 'False', 'architecture': 'x86_64',       |
|                                | 'base_image_ref': 'ef290941-280b-47f5-8bd4-a02f4d0179f1',       |
|                                | 'boot_roles': 'load-                                            |
|                                | balancer_member,swiftoperator,member,creator,reader',           |

[...]

|                                | 'disk_format': 'qcow2', 'min_disk': '50', 'min_ram': '512',     |
|                                | 'size': '2434793472'}                                           |
| volume_type_id                 | 5f7ecf32-4b4b-4e95-82c8-5d0eccae887e                            |
+--------------------------------+-----------------------------------------------------------------+
Note that the new volume is bootable:
$ openstack volume show ephemeral_eyjolfur_vol -c bootable

+----------+-------+
| Field    | Value |
+----------+-------+
| bootable | True  |
+----------+-------+
Deleting the boot-from-image server
Go to the servers view by selecting Compute → Servers, and locate the boot-from-image server. It is time to delete it, so click the icon at the right of the server row, and from the pop-up menu that appears, select Delete Server.
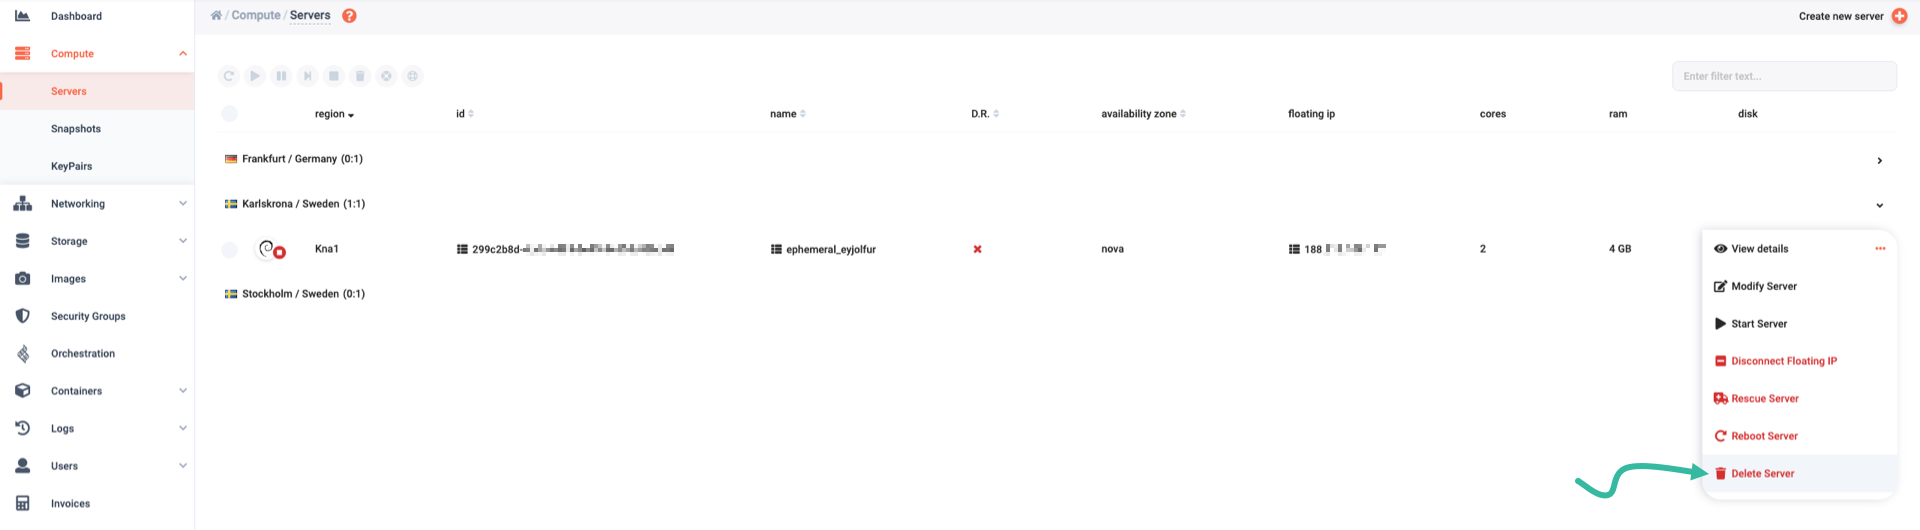
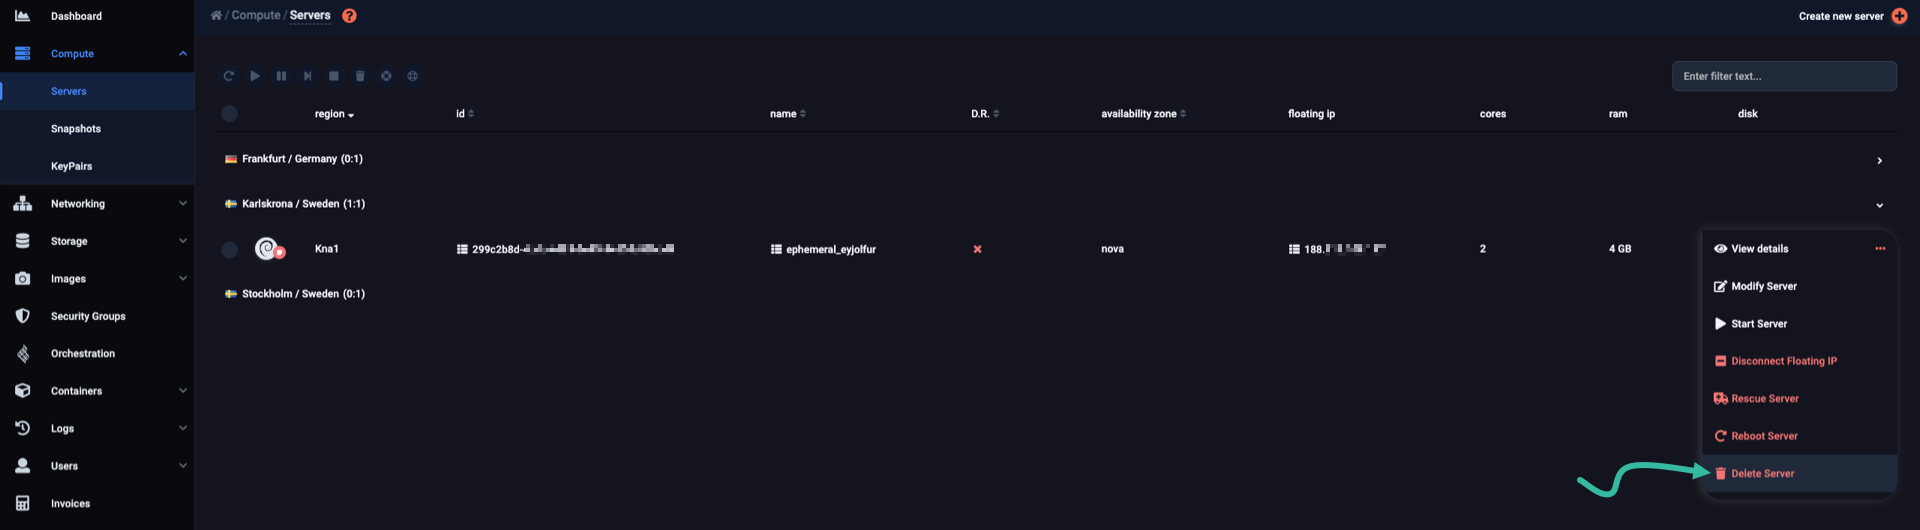
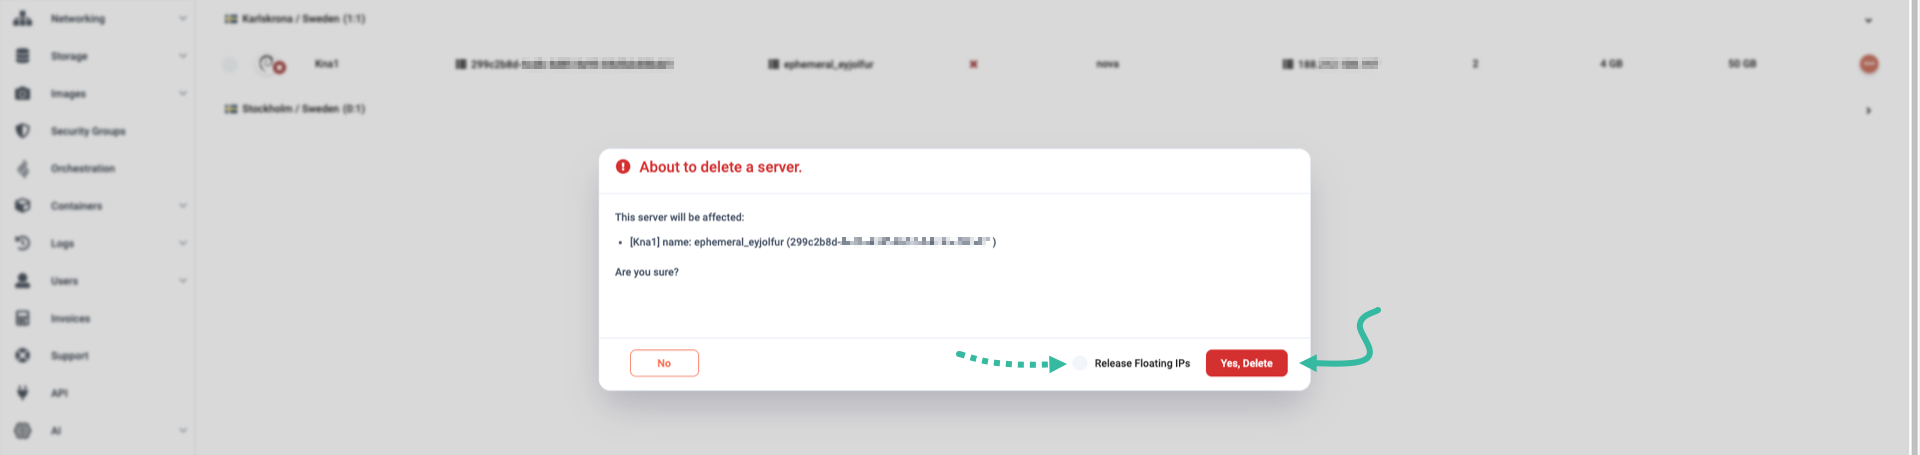
A window titled About to delete a server will appear, asking you if you want to proceed with the deletion. Click the button labeled Yes, Delete.

Since you have a snapshot and a volume of your server, you can now delete it:
openstack server delete ephemeral_eyjolfur
A successful delete operation produces no terminal output.
Creating a new boot-from-volume server
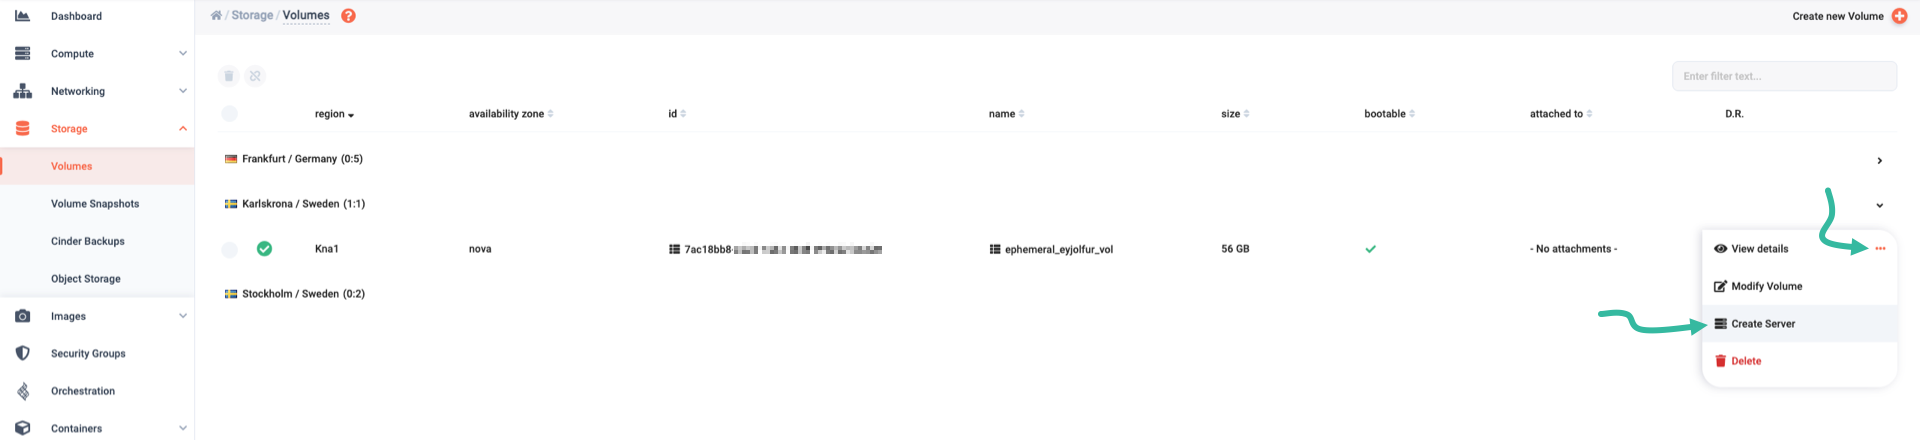
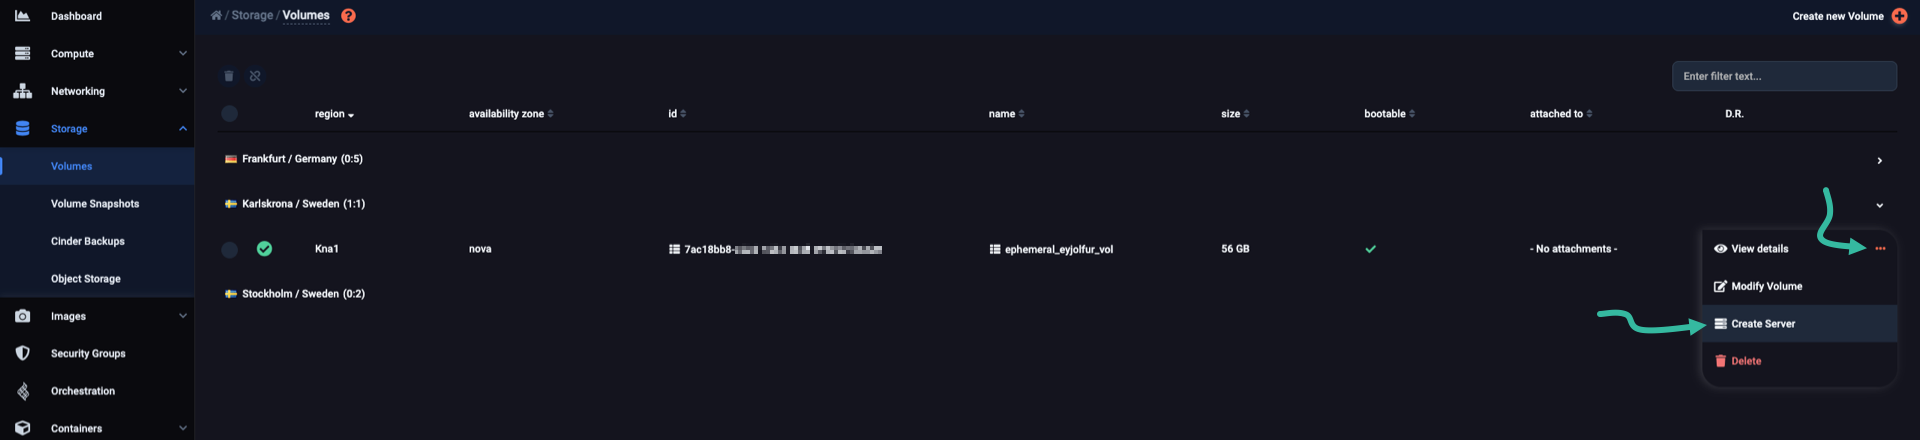
Now, go back to your volumes by selecting Storage → Volumes. Tick the volume you created a bit earlier, click the icon at the right of the volume row, and from the pop-up menu that appears, select Create Server.
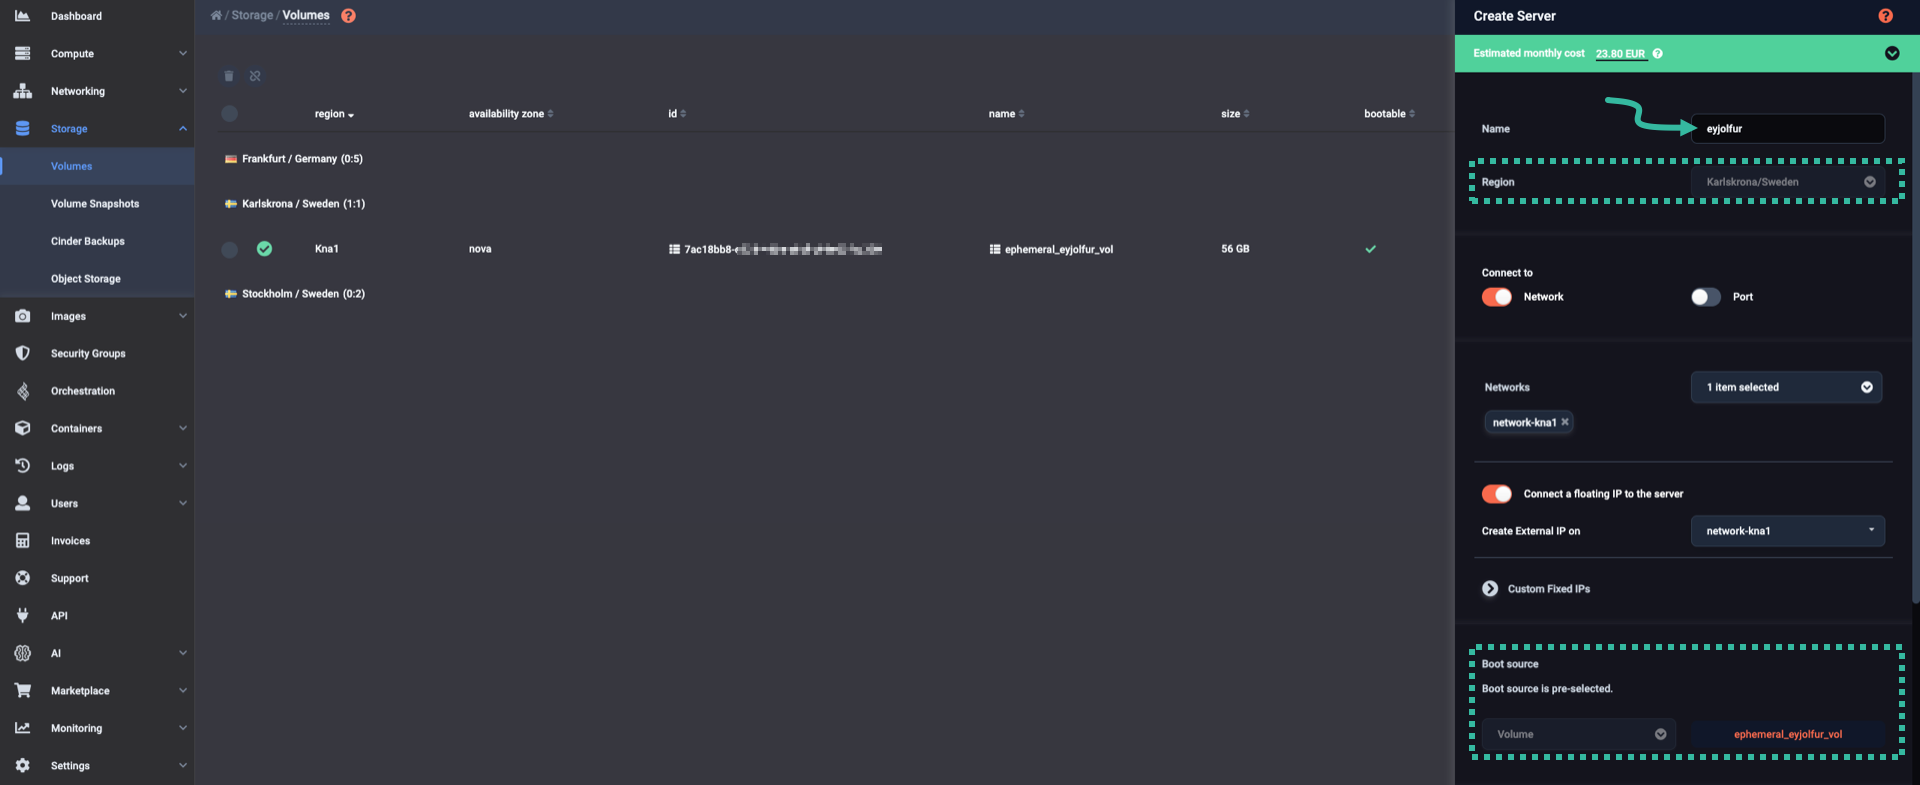
A vertical pane will slide over from the right-hand side of the Cleura Cloud Management Panel, titled Create a Server. Type in a name for the new server. Notice that the server region is pre-selected and the same as the one in which the volume resides. The boot source of the server is also pre-selected and is the volume itself.
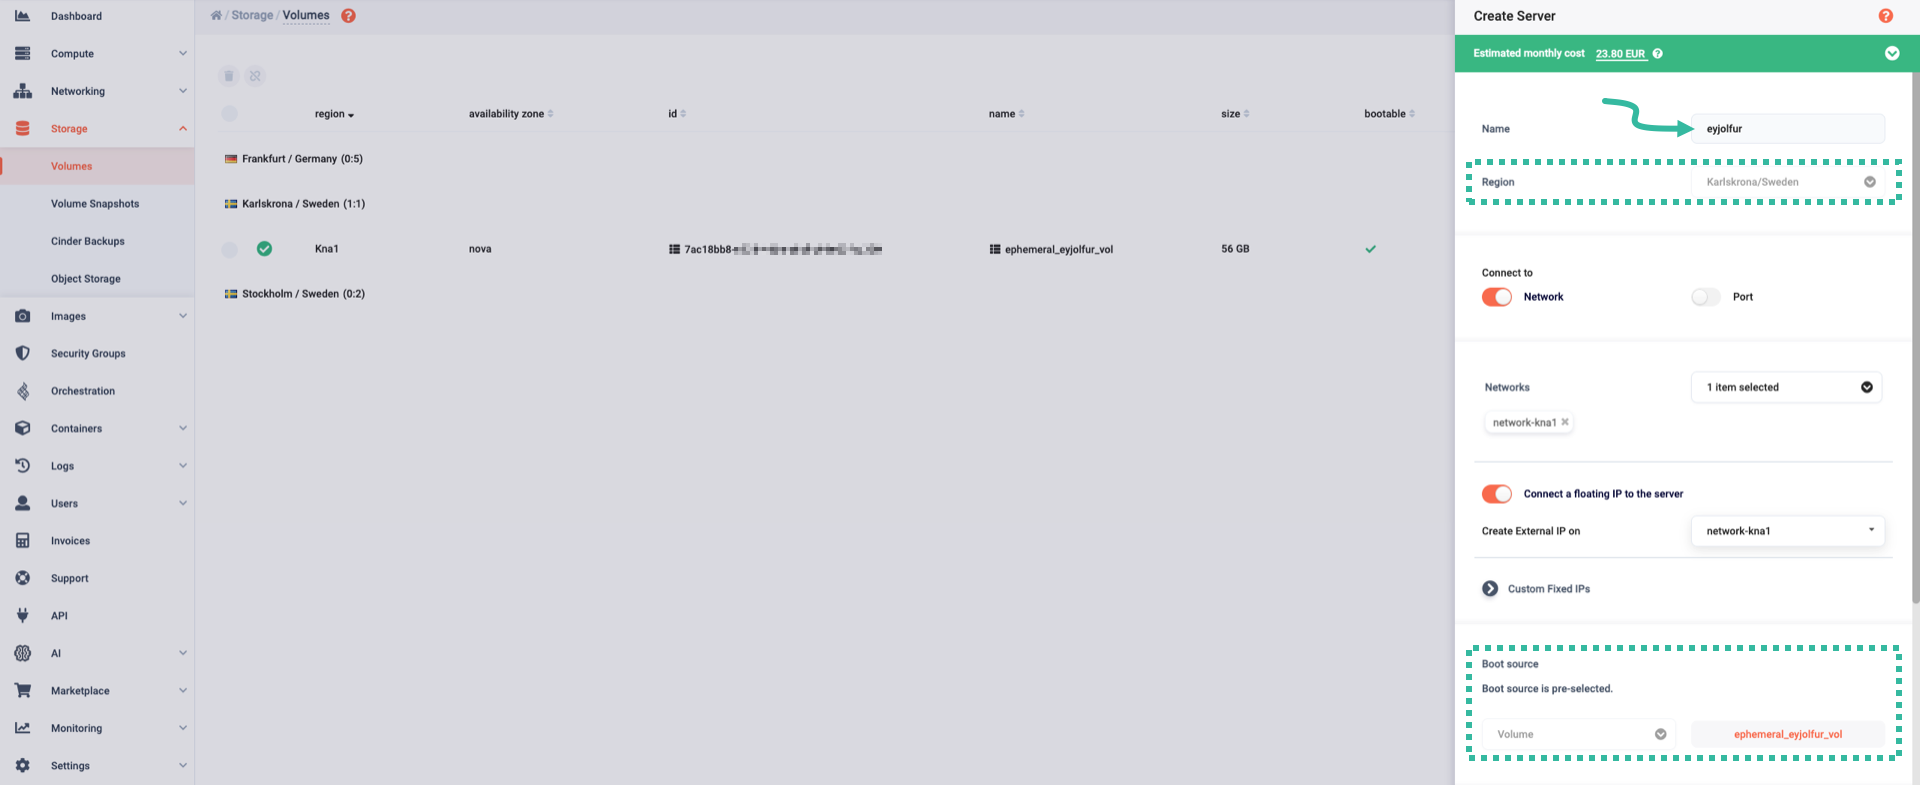
Scroll down a bit if you have to. Take notice of the Boot Target, which should be Volume. Consider leaving the Recovery service option enabled.
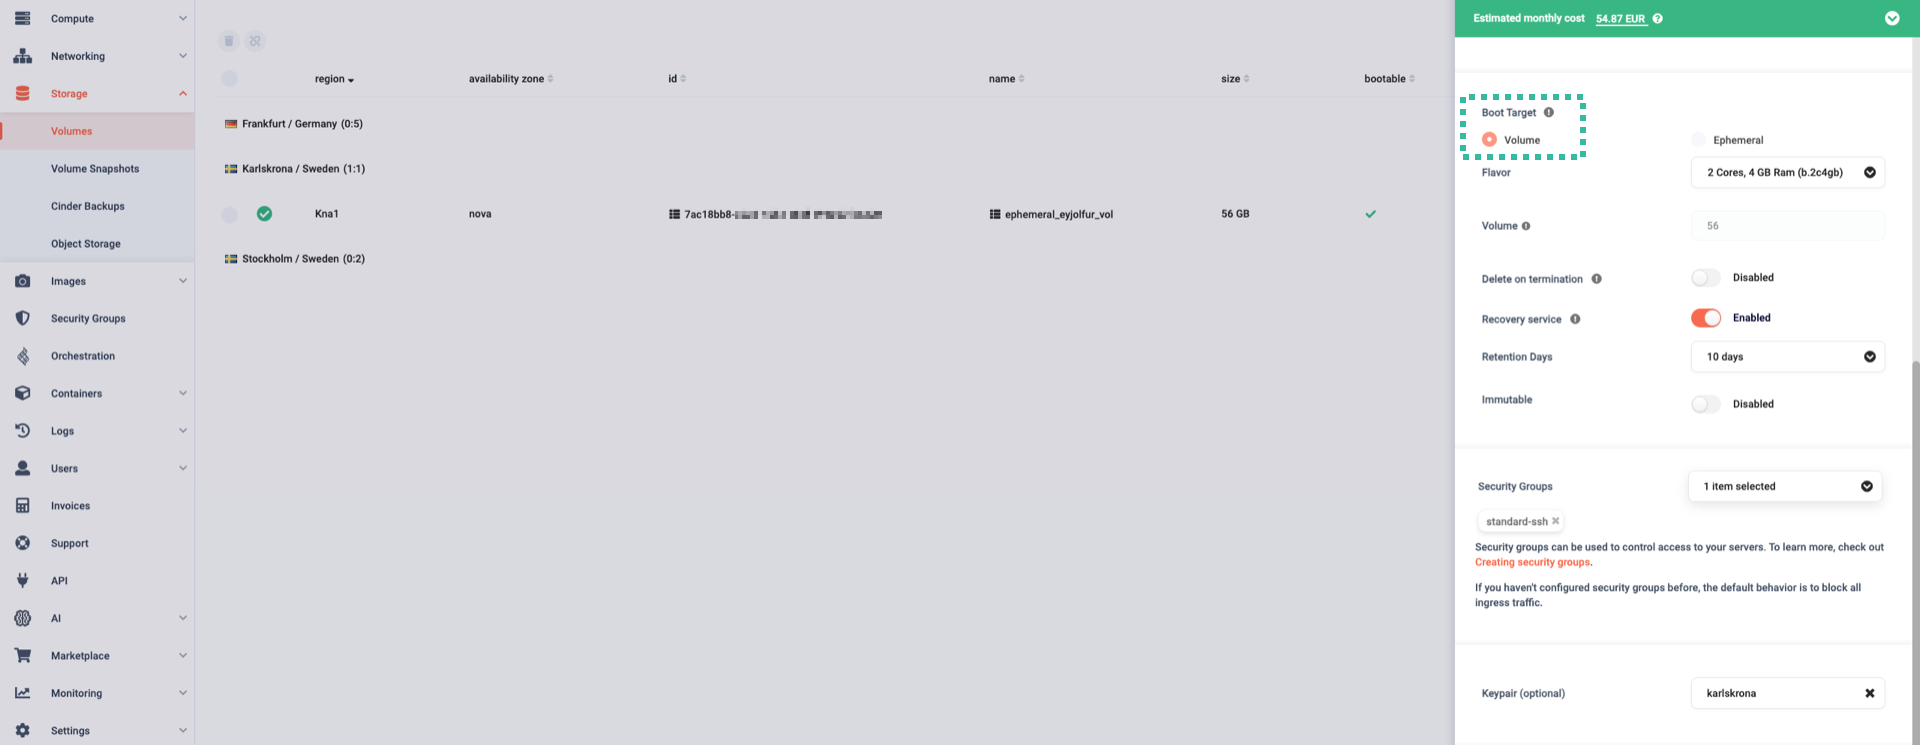
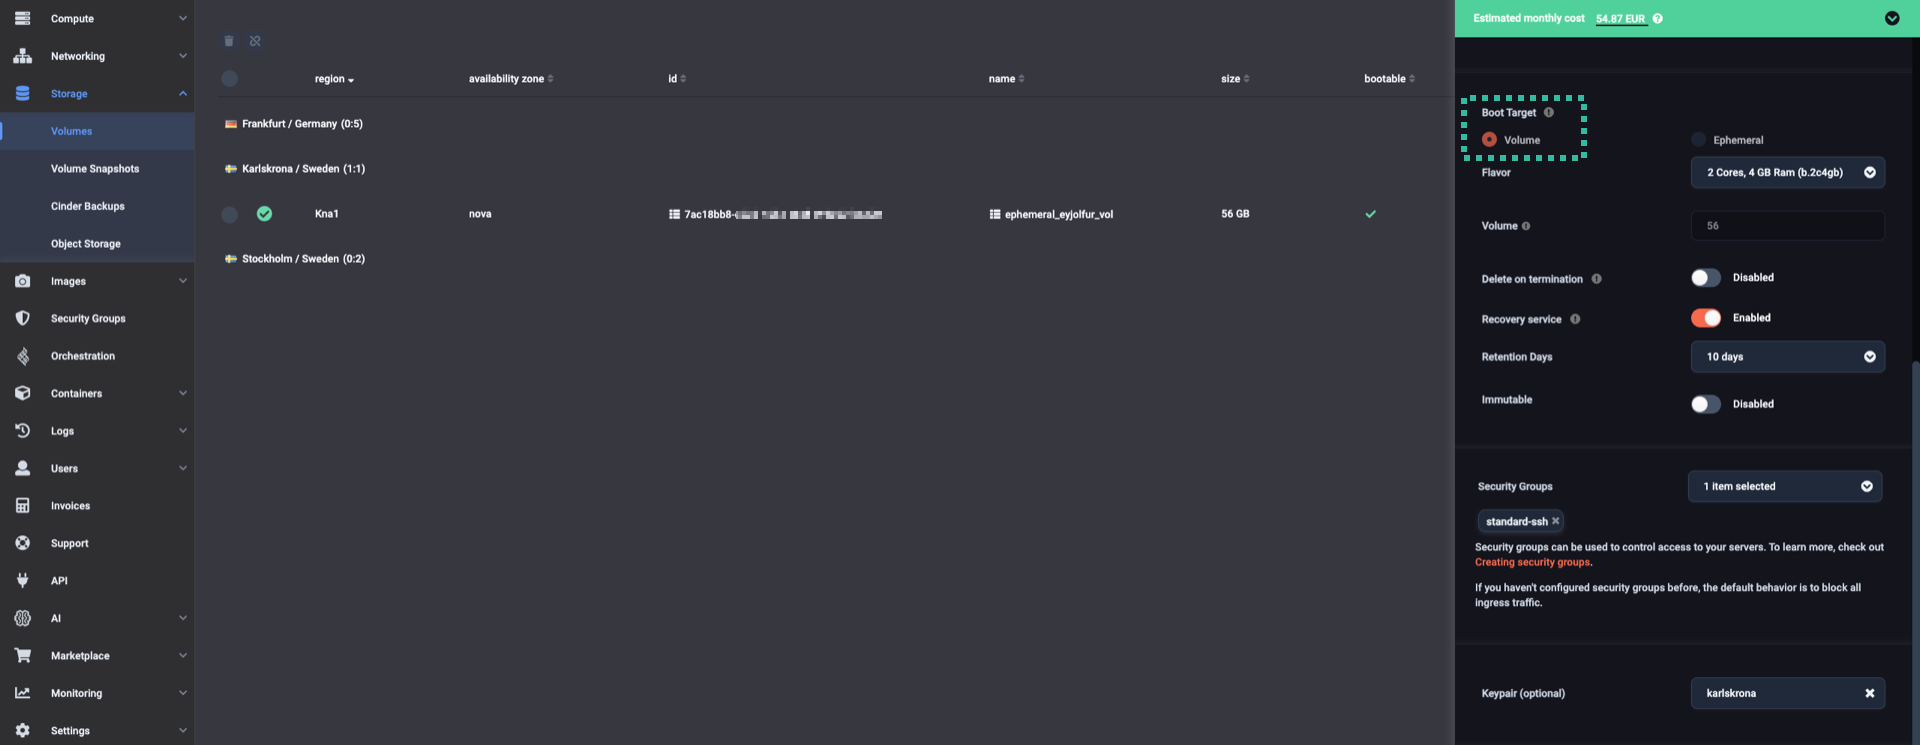
To create the new server, scroll all the way down and click the button labeled Create.


To create your new boot-from-volume server (eyjolfur), using the volume (ephemeral_eyjolfur_vol) you got from the snapshot (ephemeral_eyjolfur_snap) of the old boot-from-image server (ephemeral_eyjolfur), type something like the following:
openstack server create \
    --flavor b.2c4gb \
    --volume ephemeral_eyjolfur_vol \
    --network network-kna1 \
    --security-group default \
    --key-name karlskrona \
    --wait \
    eyjolfur
The most important parameter in the command above is --volume, which is used to specify the boot volume of the server.
Regarding server creation in general, you might want to check the corresponding guide.
Viewing the new server
In the left-hand side vertical pane, select Compute → Servers. In the main pane of the Cleura Cloud Management Panel, go to the region where the new server resides Select the server and click on its row to see all its characteristics. In the Details tab, you will notice, among other things, that it has one attached volume; that would be the one you created from the snapshot you created from the old boot-from-image server.
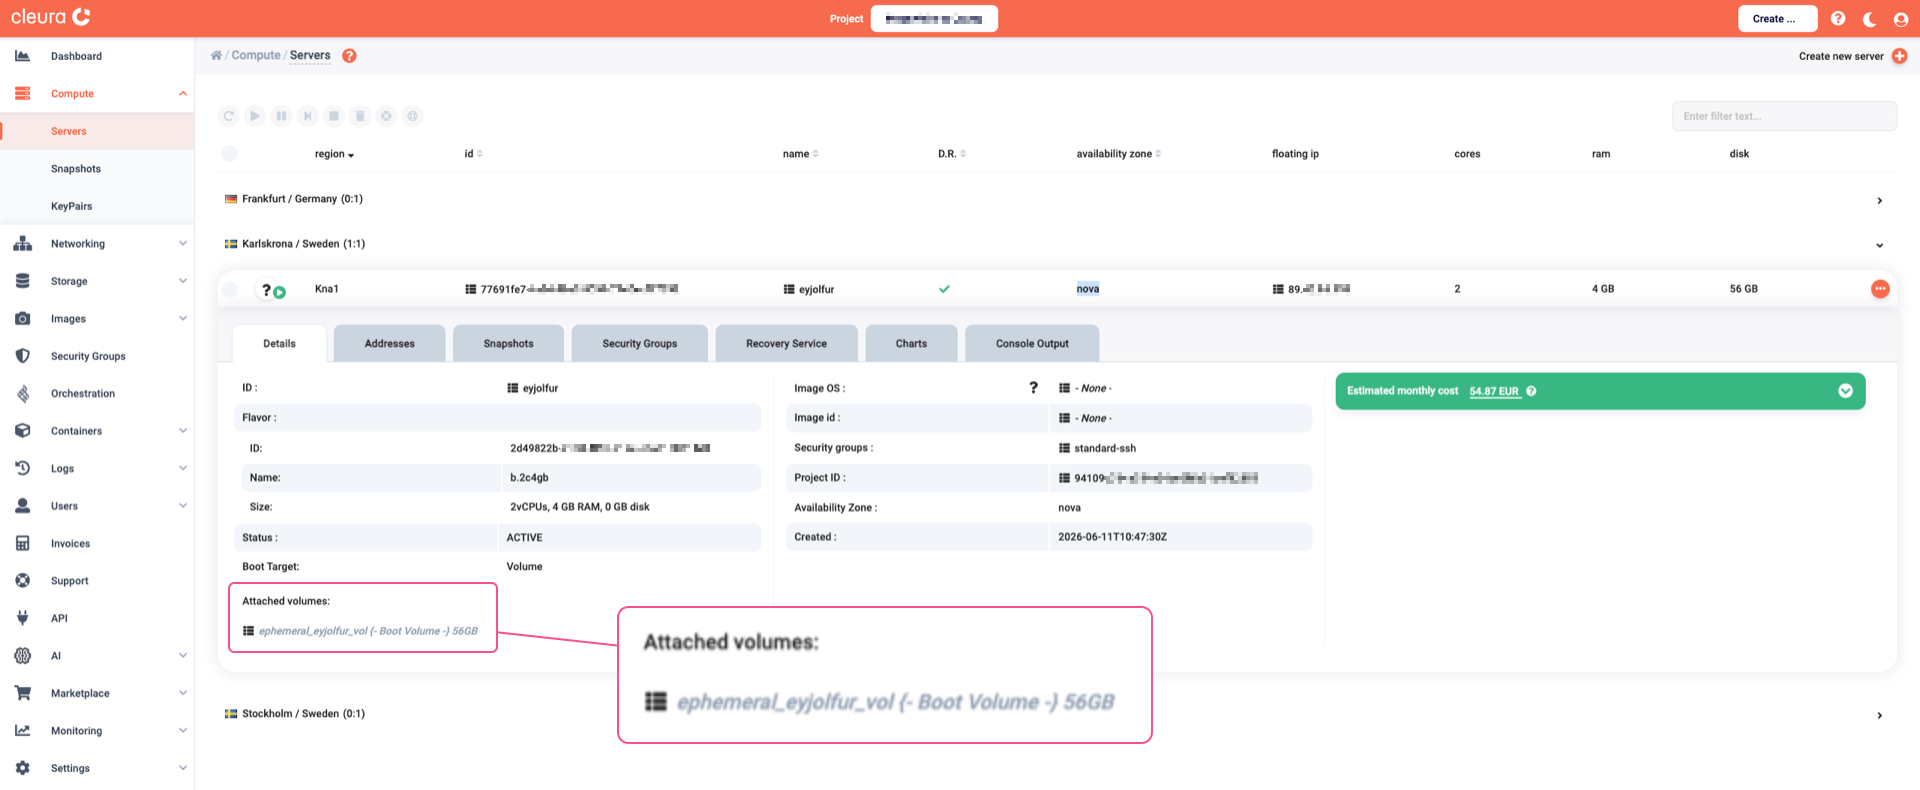
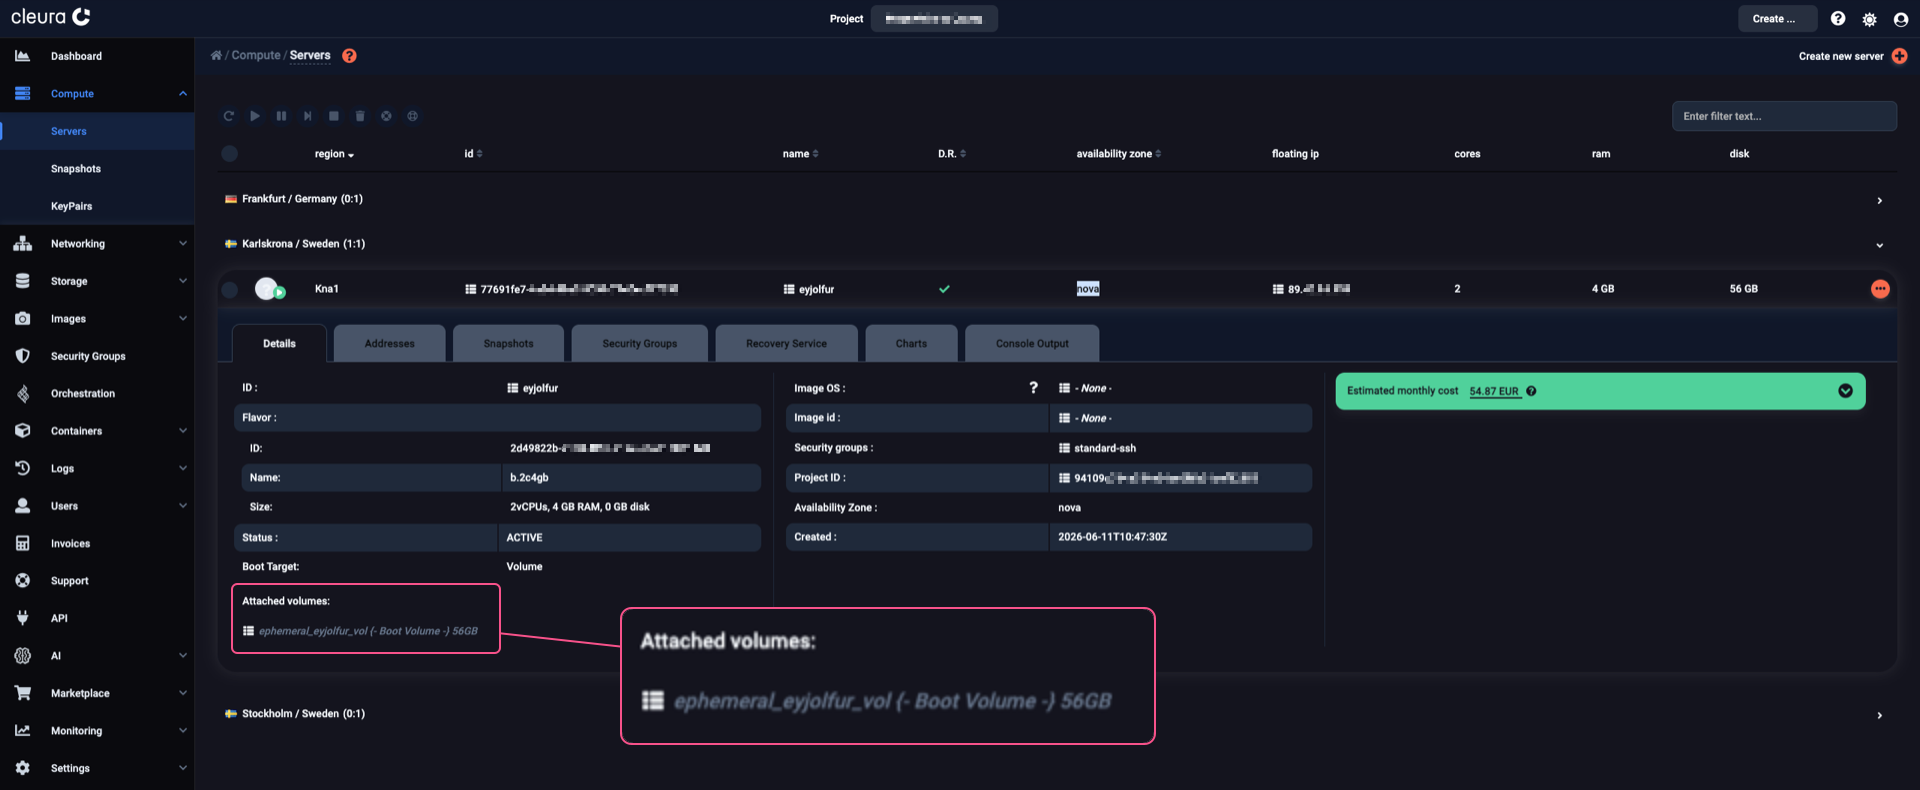
You may see all details regarding the new boot-from-volume server by typing something like the following:
$ openstack server show eyjolfur

+-------------------------------------+------------------------------------------------------------+
| Field                               | Value                                                      |
+-------------------------------------+------------------------------------------------------------+
| OS-DCF:diskConfig                   | MANUAL                                                     |
| OS-EXT-AZ:availability_zone         | nova                                                       |
| OS-EXT-SRV-ATTR:host                | None                                                       |
| OS-EXT-SRV-ATTR:hostname            | eyjolfur                                                   |

[...]

| addresses                           | network-kna1=10.15.30.181                                  |
| config_drive                        |                                                            |
| created                             | 2026-06-05T12:16:57Z                                       |
| description                         | None                                                       |
| flavor                              | description=, disk='0', ephemeral='0',                     |
|                                     | extra_specs.cleura:flavor_type='generic', id='b.2c4gb',    |
|                                     | is_disabled=, is_public='True', location=, name='b.2c4gb', |
|                                     | original_name='b.2c4gb', ram='4096', rxtx_factor=,         |
|                                     | swap='0', vcpus='2'                                        |
| hostId                              | 431c867fc15bbf17cc956c4666cec40ef295ed2f469ee836b70c43aa   |
| host_status                         | None                                                       |
| id                                  | 55a42291-5ec1-491e-9683-7e6297417be7                       |
| image                               | N/A (booted from volume)                                   |
| key_name                            | karlskrona                                                 |
| locked                              | False                                                      |
| locked_reason                       | None                                                       |
| name                                | eyjolfur                                                   |
| pinned_availability_zone            | nova                                                       |
| progress                            | 0                                                          |
| project_id                          | 94109c764a754e24ac0f6b01aef82359                           |
| properties                          |                                                            |
| scheduler_hints                     |                                                            |
| security_groups                     | name='default'                                             |
| server_groups                       | None                                                       |
| status                              | ACTIVE                                                     |
| tags                                |                                                            |
| trusted_image_certificates          | None                                                       |
| updated                             | 2026-06-05T12:17:14Z                                       |
| user_id                             | c096cf99f65a4d22a6954b67d2ec11d7                           |
| volumes_attached                    | delete_on_termination='False',                             |
|                                     | id='07f13557-125e-48d2-a867-21f0a51ea891'                  |
+-------------------------------------+------------------------------------------------------------+
Pay attention to the value of the image field, which confirms that this is indeed a boot-from-volume server.