Creating new networks
Before creating a server in Cleura Cloud, you need at least one network to make the new server a member of. Since you may have more than one network per region, let us now walk through creating a new network using the Cleura Cloud Management Panel or the OpenStack CLI.
Prerequisites
Whether you choose to work from the Cleura Cloud Management Panel or with the OpenStack CLI, you need to have an account in Cleura Cloud. Additionally, to use the OpenStack CLI make sure to enable it first.
Creating a network
To create a network from the Cleura Cloud Management Panel, fire up your favorite web browser, navigate to the Cleura Cloud start page, and login into your Cleura Cloud account. On the other hand, if you prefer to work with OpenStack CLI, please do not forget to source the RC file first.
On the top right-hand side of the Cleura Cloud Management Panel, click the Create button. A new pane will slide into view from the right-hand side of the browser window, titled Create.
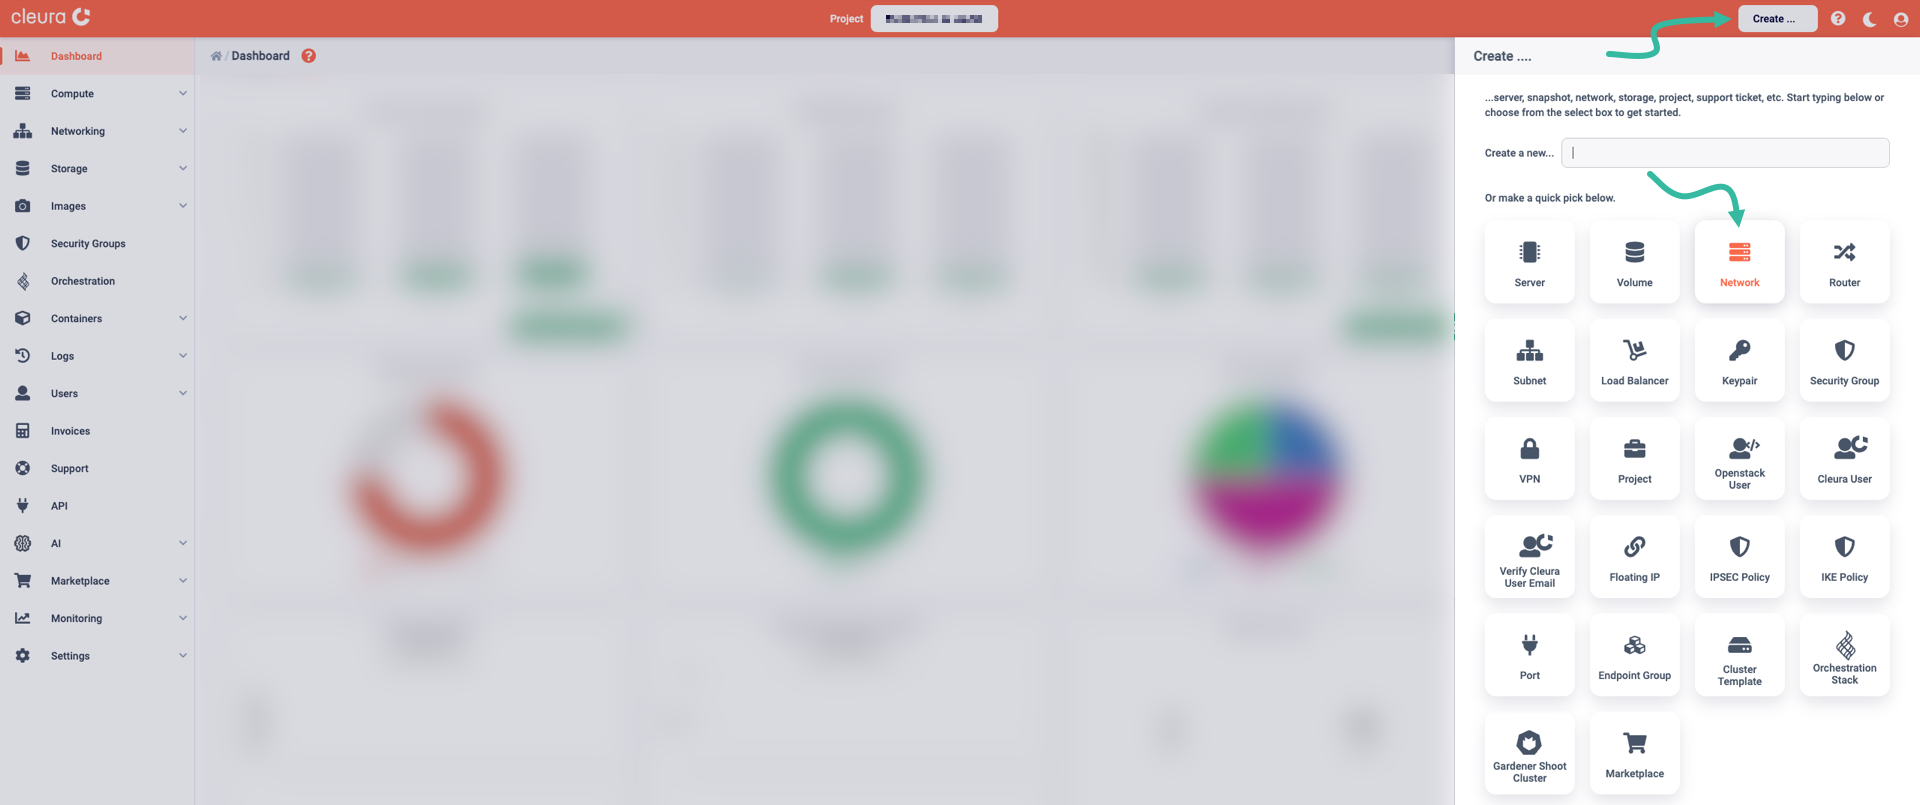
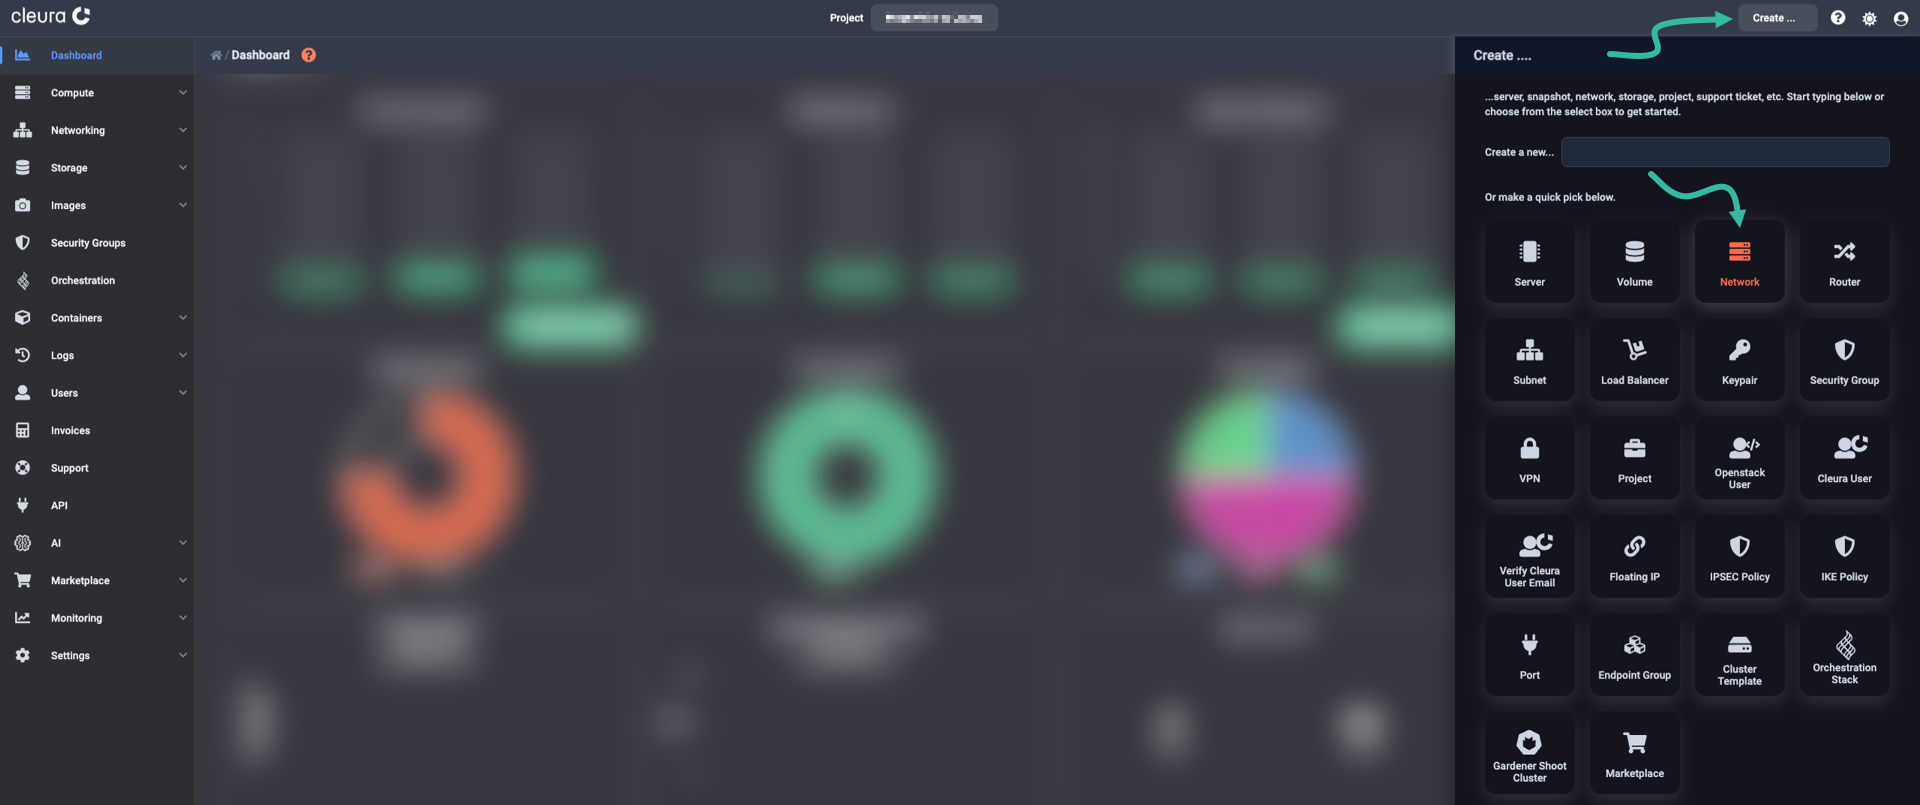
You will notice several rounded boxes prominently displayed on that pane, each for defining, configuring, and instantiating a different Cleura Cloud object. Go ahead and click the Network box. A new pane titled Create Network will slide over. At the top, type in a name and select one of the available regions for the new network.


Start by creating a new network.
In our example, let’s name it nordostbahnhof:
openstack network create nordostbahnhof
After issuing the command above, you immediately get information regarding the new network:
+---------------------------+------------------------------------------------------------+
| Field                     | Value                                                      |
+---------------------------+------------------------------------------------------------+
| admin_state_up            | UP                                                         |
| availability_zone_hints   |                                                            |
| availability_zones        |                                                            |
| created_at                | 2025-05-07T17:38:31Z                                       |
| description               |                                                            |
| dns_domain                |                                                            |
| id                        | f1f1b1f6-2b65-11f0-9769-080027af5a23                       |
| ipv4_address_scope        | None                                                       |
| ipv6_address_scope        | None                                                       |
| is_default                | False                                                      |
| is_vlan_transparent       | None                                                       |
| location                  | cloud='', project.domain_id=,                              |
|                           | project.domain_name='CCP_Domain_pqrxy',                    |
|                           | project.id='hdzqyxmxnixcdtgldkhhwdewfacyjdbub',            |
|                           | project.name='Nuuk-to-Iqaluit', region_name=' Kna1',        |
|                           | zone=                                                      |
| mtu                       | 1500                                                       |
| name                      | nordostbahnhof                                             |
| port_security_enabled     | True                                                       |
| project_id                | hdzqyxmxnixcdtgldkhhwdewfacyjdbub                          |
| provider:network_type     | None                                                       |
| provider:physical_network | None                                                       |
| provider:segmentation_id  | None                                                       |
| qos_policy_id             | None                                                       |
| revision_number           | 1                                                          |
| router:external           | Internal                                                   |
| segments                  | None                                                       |
| shared                    | False                                                      |
| status                    | ACTIVE                                                     |
| subnets                   |                                                            |
| tags                      |                                                            |
| updated_at                | 2025-05-07T17:38:31Z                                       |
+---------------------------+------------------------------------------------------------+
Adding a subnet and a router
Creating a new network does not necessarily mean it has all the features you most likely would expect. Unless you work from the Cleura Cloud Management Panel, where almost every component is activated for you with a few clicks here and there, when you use the OpenStack CLI there is some extra work you need to do before you get a network you would characterize as useful.
Expand the Advanced Options section below, make sure Port Security is enabled, and leave the MTU parameter blank.


Assuming you are going for a full-featured network, activate the Create a complete network, containing a subnet and a router option.
Notice that, by default, this sets things up for the the creation of an IPv4-based subnet. In particular, by looking at the new Subnet Name (#1) section, it is immediately apparent that you get the following:
- A subnet expressed in CIDR notation,
- two DNS servers,
- a Gateway, and
- a DHCP server.
For the Gateway IP, accept the suggested address, or type in one chosen from the subnet above. As for the DHCP, either accept the defaults or type in Start and End addresses – again chosen from the subnet above.
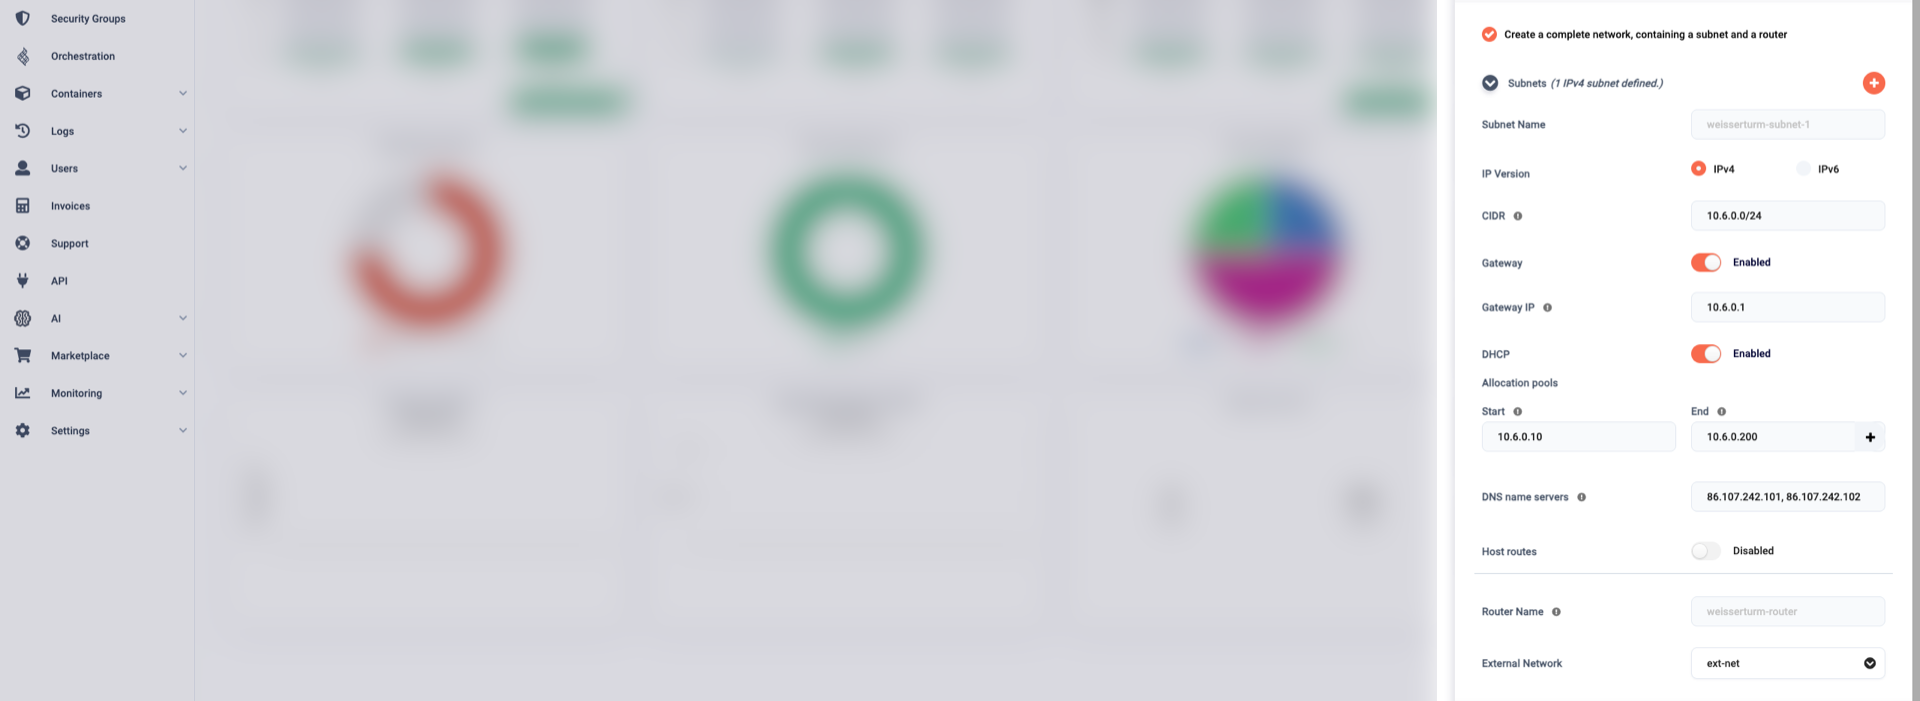
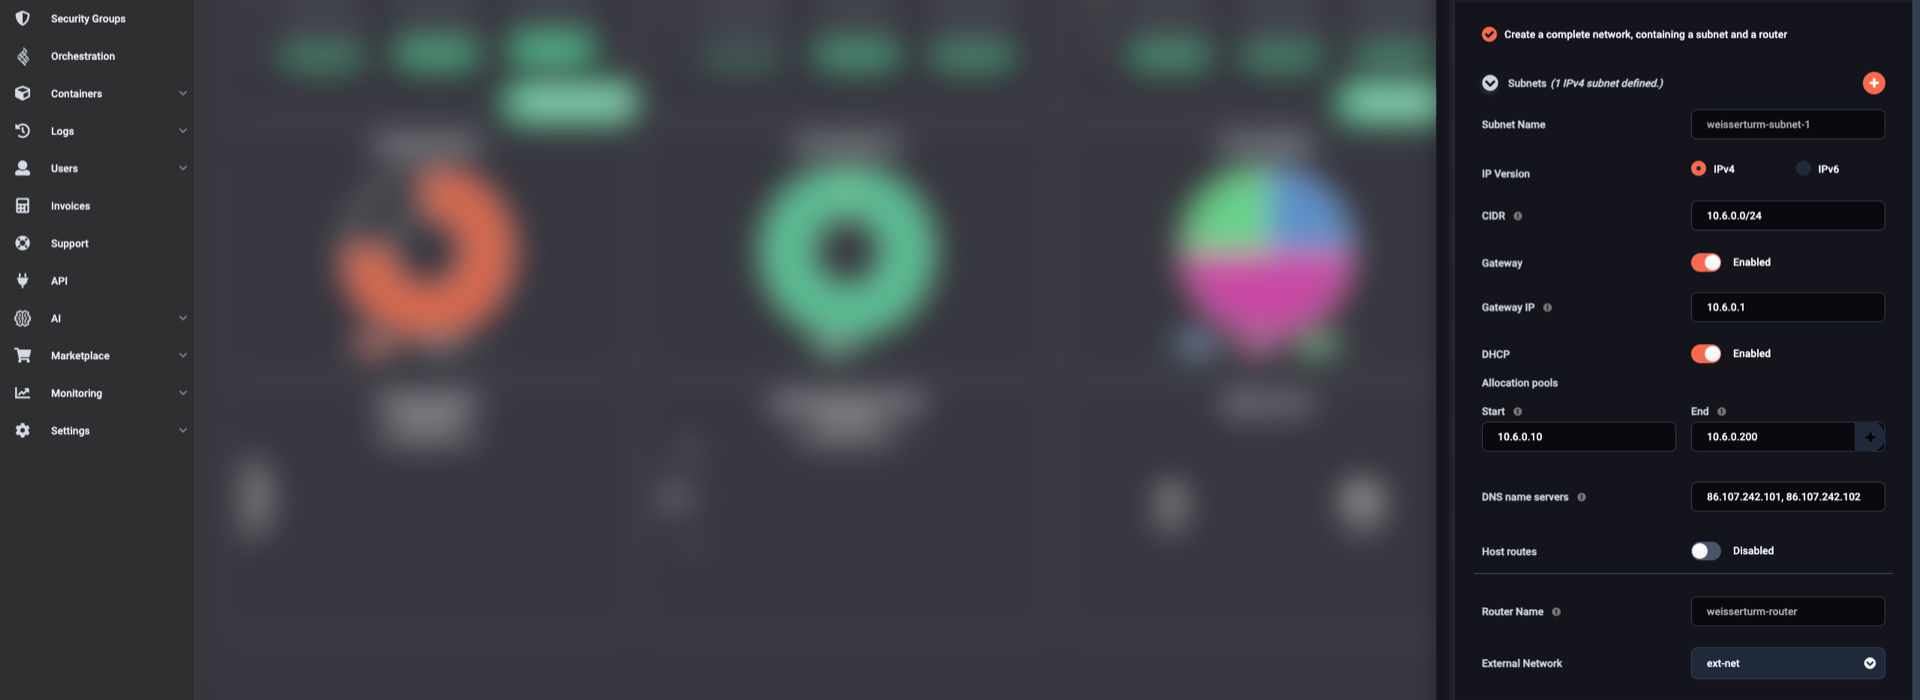
Alongside your IPv4-based subnet, you may also have an IPv6-based subnet; both subnets will be members of the network you are now creating.
To create a second, IPv6-based subnet, click the icon at the top of the Subnet Name (#1) section. In the new Subnet Name (#2) section that appears, be sure to set IP Version to IPv6 abd you will get the following:
- One 64bit-prefixed subnet with
- SLAAC addressing, and
- two DNS servers with IPv6 addresses.
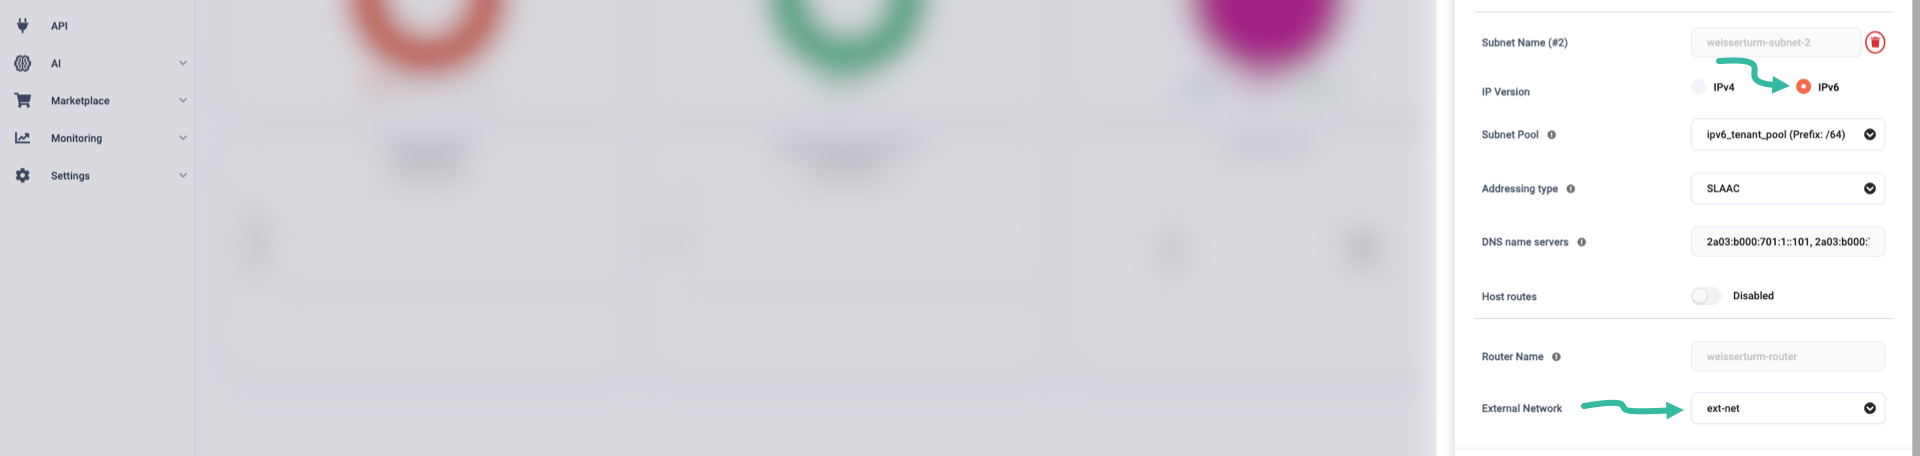

Scroll down a bit if you have to. Assuming you want your cloud servers to reach hosts on the Internet, for the External network parameter make sure you select ext-net. Then, click the Create button. In a few seconds, the new network will be readily available.


You now have to create a subnet for the new network.
Since Neutron networks can have more than one subnets, and subnets can be either IPv4-based or IPv6-based, let us now create two;
one IPv4-based (nordostbahnhof-subnet-ipv4), and one IPv4-based (nordostbahnhof-subnet-ipv6).
For the IPv4-based subnet, type the following:
openstack subnet create nordostbahnhof-subnet-ipv4 \
    --network nordostbahnhof --subnet-range 10.20.30.0/24
You will get detailed information regarding subnet nordostbahnhof-subnet-ipv4:
+----------------------+-----------------------------------------------------------------+
| Field                | Value                                                           |
+----------------------+-----------------------------------------------------------------+
| allocation_pools     | 10.20.30.2-10.20.30.254                                         |
| cidr                 | 10.20.30.0/24                                                   |
| created_at           | 2025-05-07T17:45:06Z                                            |
| description          |                                                                 |
| dns_nameservers      |                                                                 |
| dns_publish_fixed_ip | None                                                            |
| enable_dhcp          | True                                                            |
| gateway_ip           | 10.20.30.1                                                      |
| host_routes          |                                                                 |
| id                   | 4231daa6-a619-468e-9283-520054810eca                            |
| ip_version           | 4                                                               |
| ipv6_address_mode    | None                                                            |
| ipv6_ra_mode         | None                                                            |
| location             | cloud='', project.domain_id=,                                   |
|                      | project.domain_name='CCP_Domain_pqrxy',                         |
|                      | project.id='hdzqyxmxnixcdtgldkhhwdewfacyjdbub',                 |
|                      | project.name='Nuuk-to-Iqaluit', region_name=' Kna1', zone=       |
| name                 | nordostbahnhof-subnet-ipv4                                      |
| network_id           | f1f1b1f6-2b65-11f0-9769-080027af5a23                            |
| prefix_length        | None                                                            |
| project_id           | hdzqyxmxnixcdtgldkhhwdewfacyjdbub                               |
| revision_number      | 0                                                               |
| segment_id           | None                                                            |
| service_types        |                                                                 |
| subnetpool_id        | None                                                            |
| tags                 |                                                                 |
| updated_at           | 2025-05-07T17:45:06Z                                            |
+----------------------+-----------------------------------------------------------------+
For the IPv6-based subnet, type the following:
openstack subnet create nordostbahnhof-subnet-ipv6 --network nordostbahnhof \
    --ip-version 6 \
    --ipv6-ra-mode slaac \
    --ipv6-address-mode slaac \
    --use-default-subnet-pool
Again, you will get detailed information regarding subnet nordostbahnhof-subnet-ipv6:
+----------------------+-----------------------------------------------------------------+
| Field                | Value                                                           |
+----------------------+-----------------------------------------------------------------+
| allocation_pools     | 2a03:b000:702:13::2-2a03:b000:702:13:ffff:ffff:ffff:ffff        |
| cidr                 | 2a03:b000:702:13::/64                                           |
| created_at           | 2025-05-07T17:48:33Z                                            |
| description          |                                                                 |
| dns_nameservers      |                                                                 |
| dns_publish_fixed_ip | None                                                            |
| enable_dhcp          | True                                                            |
| gateway_ip           | 2a03:b000:702:13::1                                             |
| host_routes          |                                                                 |
| id                   | c787c7fc-9405-443c-99bf-fefd8df0ec7f                            |
| ip_version           | 6                                                               |
| ipv6_address_mode    | slaac                                                           |
| ipv6_ra_mode         | slaac                                                           |
| location             | cloud='', project.domain_id=,                                   |
|                      | project.domain_name='CCP_Domain_pqrxy',                         |
|                      | project.id='hdzqyxmxnixcdtgldkhhwdewfacyjdbub',                 |
|                      | project.name='Nuuk-to-Iqaluit', region_name=' Kna1', zone=       |
| name                 | nordostbahnhof-subnet-ipv6                                      |
| network_id           | f1f1b1f6-2b65-11f0-9769-080027af5a23                            |
| prefix_length        | None                                                            |
| project_id           | hdzqyxmxnixcdtgldkhhwdewfacyjdbub                               |
| revision_number      | 0                                                               |
| segment_id           | None                                                            |
| service_types        |                                                                 |
| subnetpool_id        | d21fa4e4-2b67-11f0-b570-080027af5a23                            |
| tags                 |                                                                 |
| updated_at           | 2025-05-07T17:48:33Z                                            |
+----------------------+-----------------------------------------------------------------+
If you want servers connected to the nordostbahnhof network to have Internet access, you need a router in front of the network.
Following our unofficial naming convention, go ahead and create a new router called nordostbahnhof-router:
openstack router create nordostbahnhof-router
As expected, you will see lots of information regarding the new router:
+-------------------------+--------------------------------------------------------------+
| Field                   | Value                                                        |
+-------------------------+--------------------------------------------------------------+
| admin_state_up          | UP                                                           |
| availability_zone_hints |                                                              |
| availability_zones      |                                                              |
| created_at              | 2025-05-07T17:52:39Z                                         |
| description             |                                                              |
| external_gateway_info   | null                                                         |
| flavor_id               | None                                                         |
| ha                      | True                                                         |
| id                      | 1ca6aaf8-2b68-11f0-833a-080027af5a23                         |
| location                | cloud='', project.domain_id=,                                |
|                         | project.domain_name='CCP_Domain_pqrxy',                      |
|                         | project.id='hdzqyxmxnixcdtgldkhhwdewfacyjdbub',              |
|                         | project.name='Nuuk-to-Iqaluit', region_name=' Kna1', zone=    |
| name                    | nordostbahnhof-router                                        |
| project_id              | hdzqyxmxnixcdtgldkhhwdewfacyjdbub                            |
| revision_number         | 1                                                            |
| routes                  |                                                              |
| status                  | ACTIVE                                                       |
| tags                    |                                                              |
| updated_at              | 2025-05-07T17:52:39Z                                         |
+-------------------------+--------------------------------------------------------------+
You want the nordostbahnhof-router connected to the external network.
The name of this network is ext-net:
openstack router set nordostbahnhof-router --external-gateway ext-net
Please note that if the command above is successful, you will get no output on your terminal.
There is one last step to take, and that is to connect router nordostbahnhof-router to the subnet nordostbahnhof-subnet-ipv4…
openstack router add subnet nordostbahnhof-router nordostbahnhof-subnet-ipv4
…and to the subnet nordostbahnhof-subnet-ipv6 of network nordostbahnhof:
openstack router add subnet nordostbahnhof-router nordostbahnhof-subnet-ipv6
Again, if the commands above are successful, you will get no output.
Listing networks and getting information
At any time, you may connect to the Cleura Cloud Management Panel, list all networks you have already created, and get detailed information for any of these networks. Alternatively, you may get all that information using the OpenStack CLI.
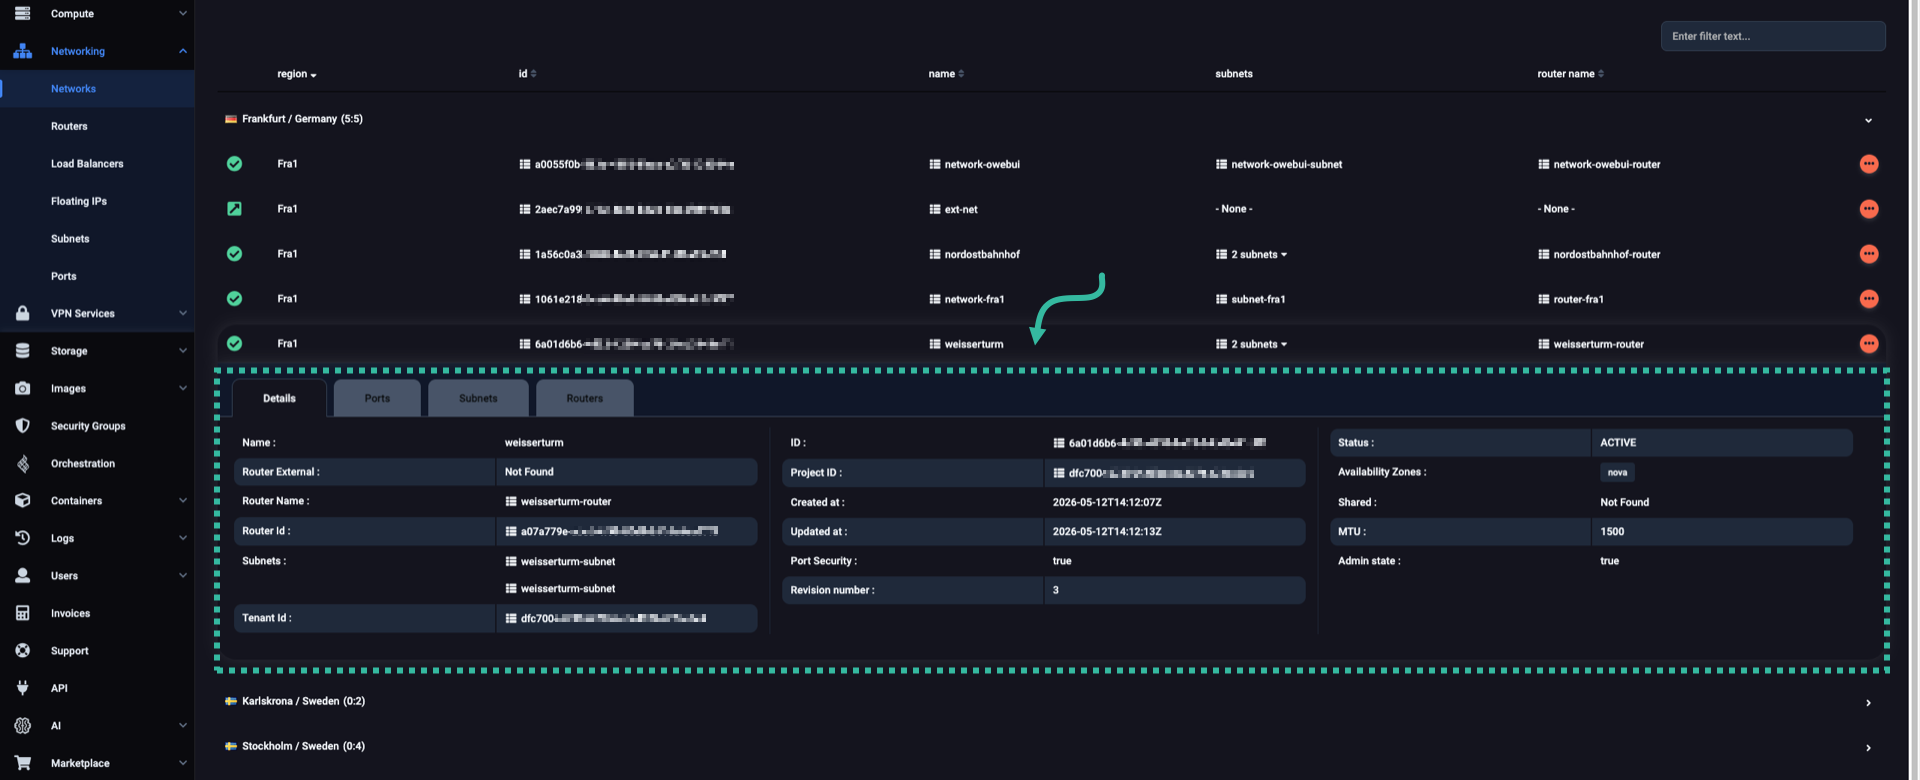
You may see all defined networks, in all supported regions, by selecting Networking > Networks (see the left-hand side pane on the Cleura Cloud Management Panel).
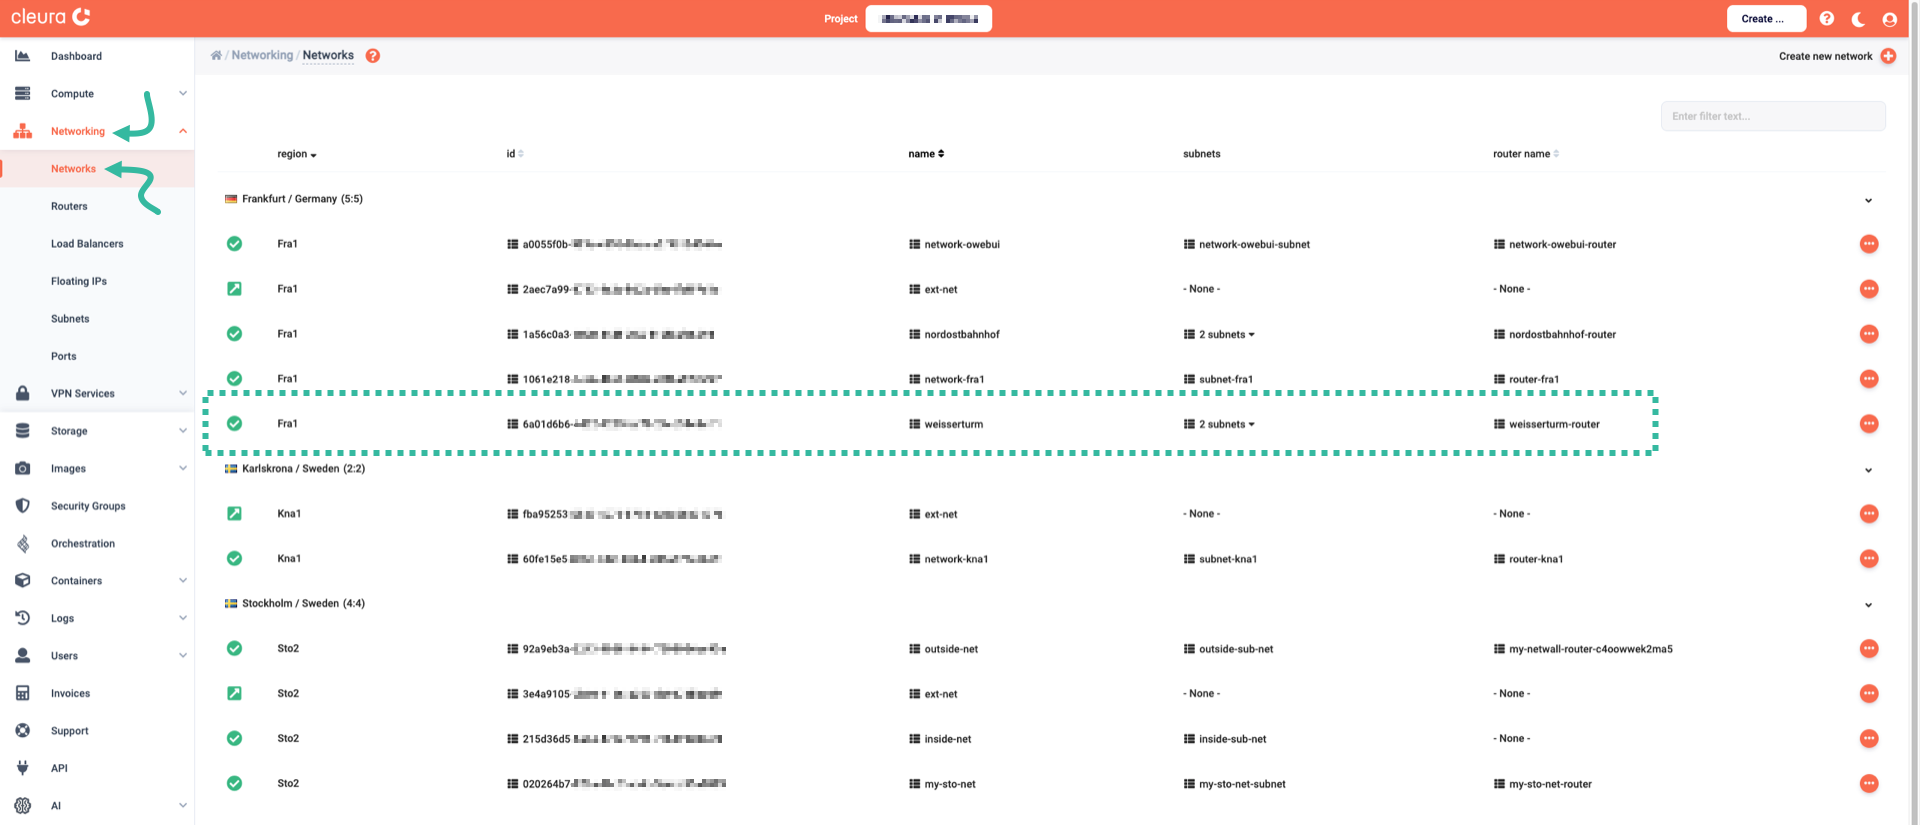
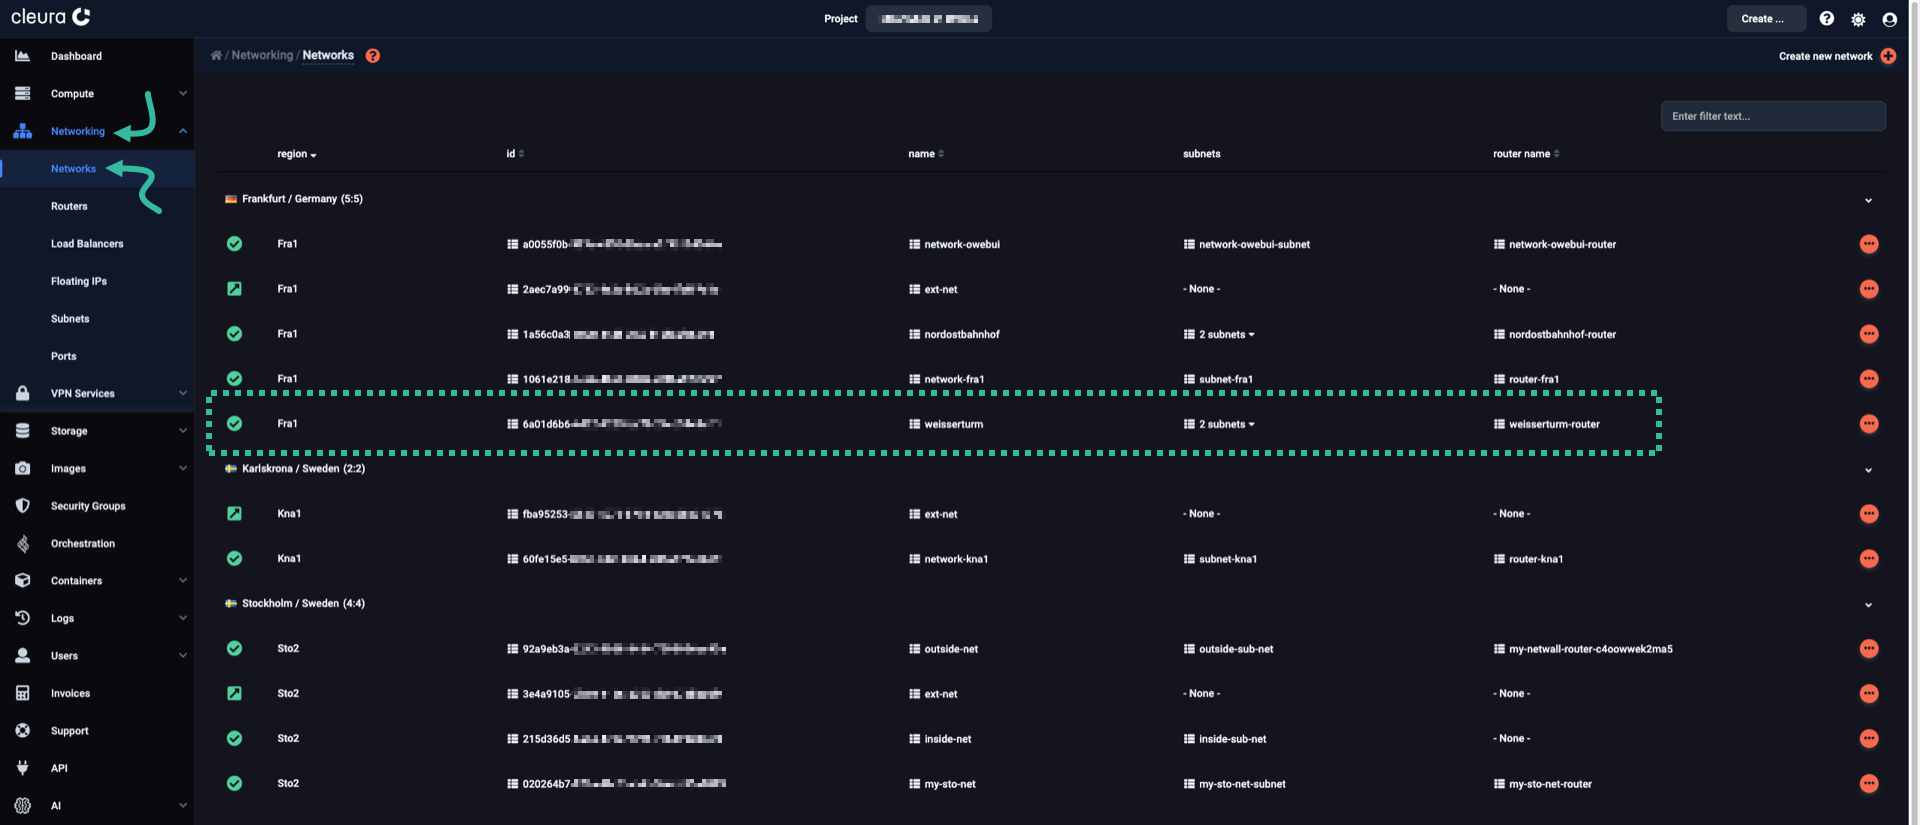
For more information regarding a specific network, select View details. Then, you can glance over all the details regarding the selected network’s ports, subnets, and routers. For more information on the network subnets specifically, in the left-hand side pane on the Cleura Cloud Management Panel select Networking > Subnets.
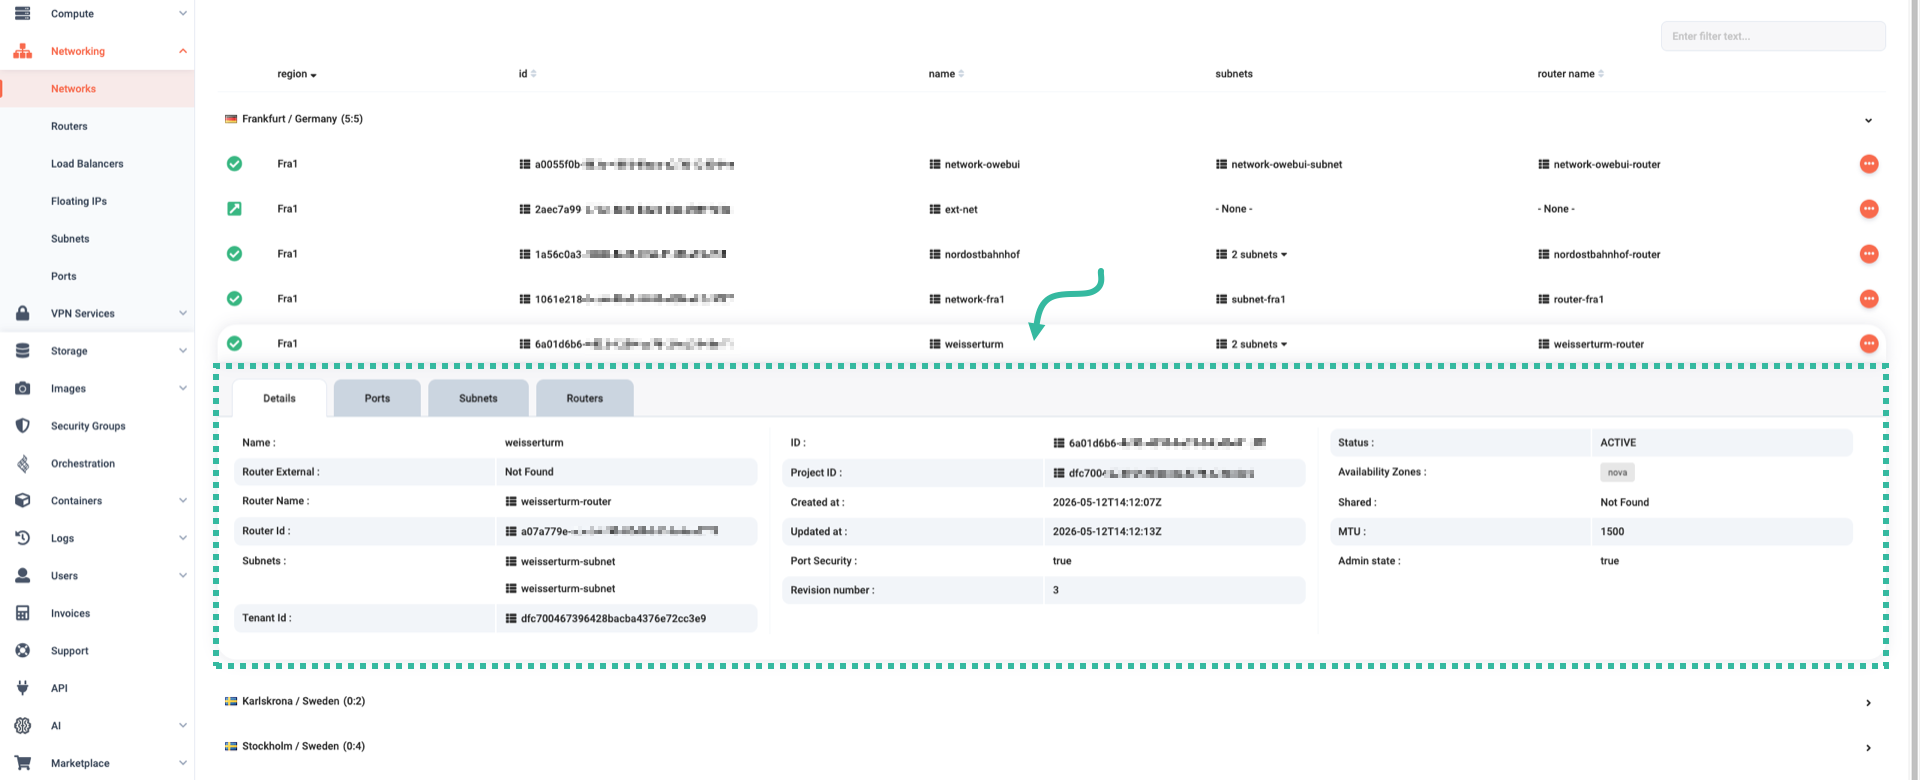
To list all available networks in a specific region, just type:
openstack network list
You can always ask for more specific results. For instance, to see all internal networks only, type the following:
openstack network list --internal
You can also get detailed information about a specific network:
openstack network show nordostbahnhof
At any time, type openstack network list --help or openstack network show --help to see how to get information regarding networks, and what specific pieces of information you can have.