Restoring a server to a snapshot
Servers in Cleura Cloud that have the disaster recovery feature enabled can go back in time, meaning you may restore such a server to one of the available point-in-time snapshots. Here is how you can do that.
How to restore, step by step
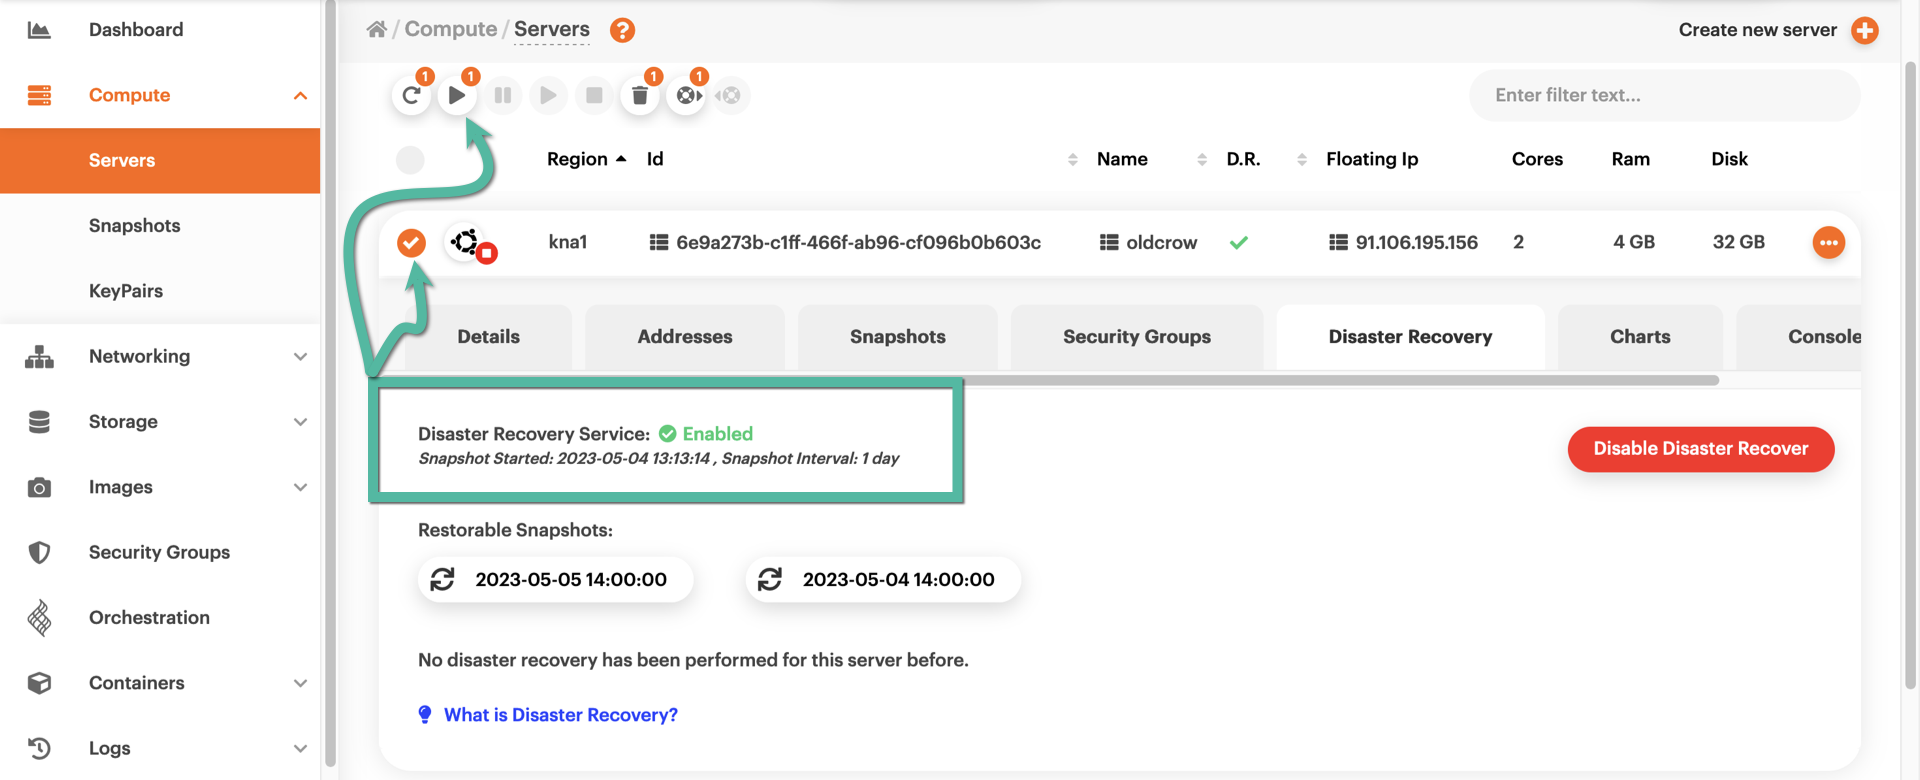
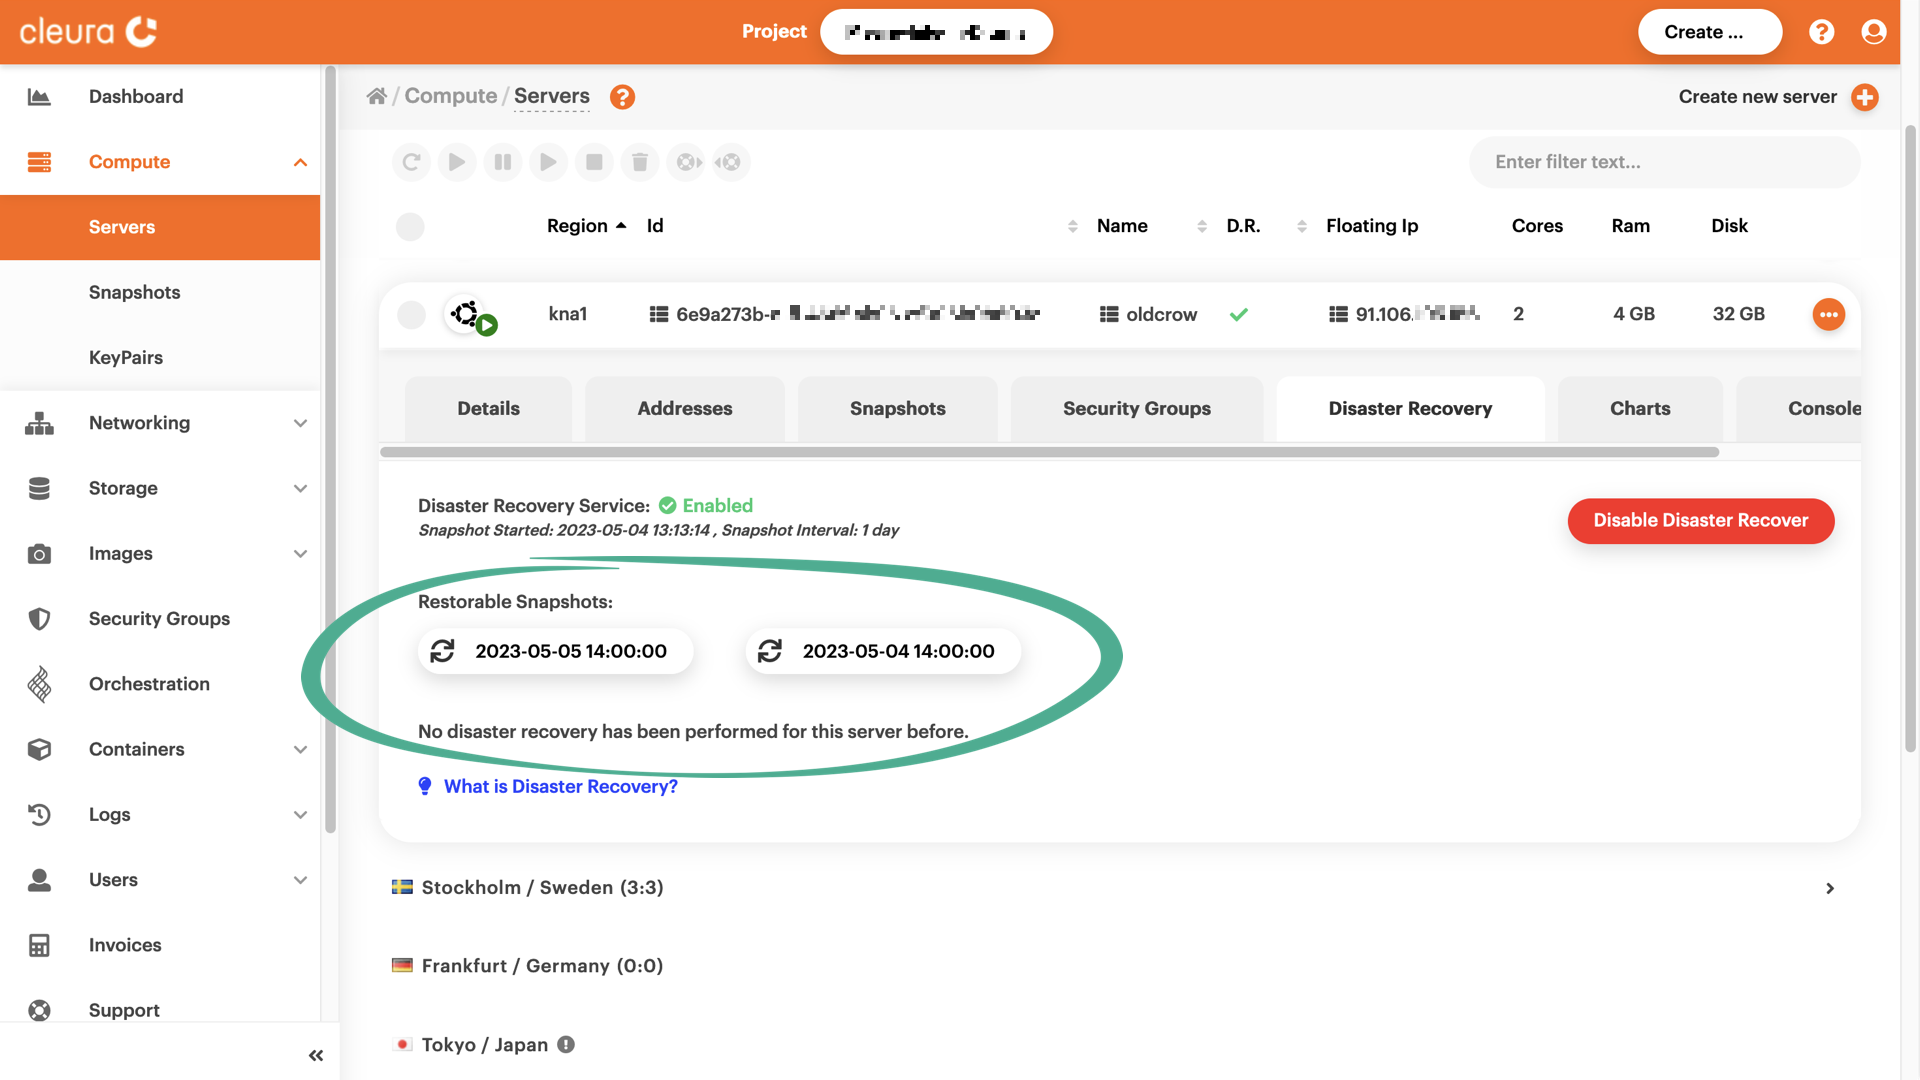
To select a particular snapshot and restore your server to it, first off, navigate to the Cleura Cloud Management Panel. From the left-hand side vertical pane, choose Compute → Servers, then expand the detailed view of the server of interest. Select the Disaster Recovery tab and see all available snapshots listed below. For each one of those, the date and creation time are visible.
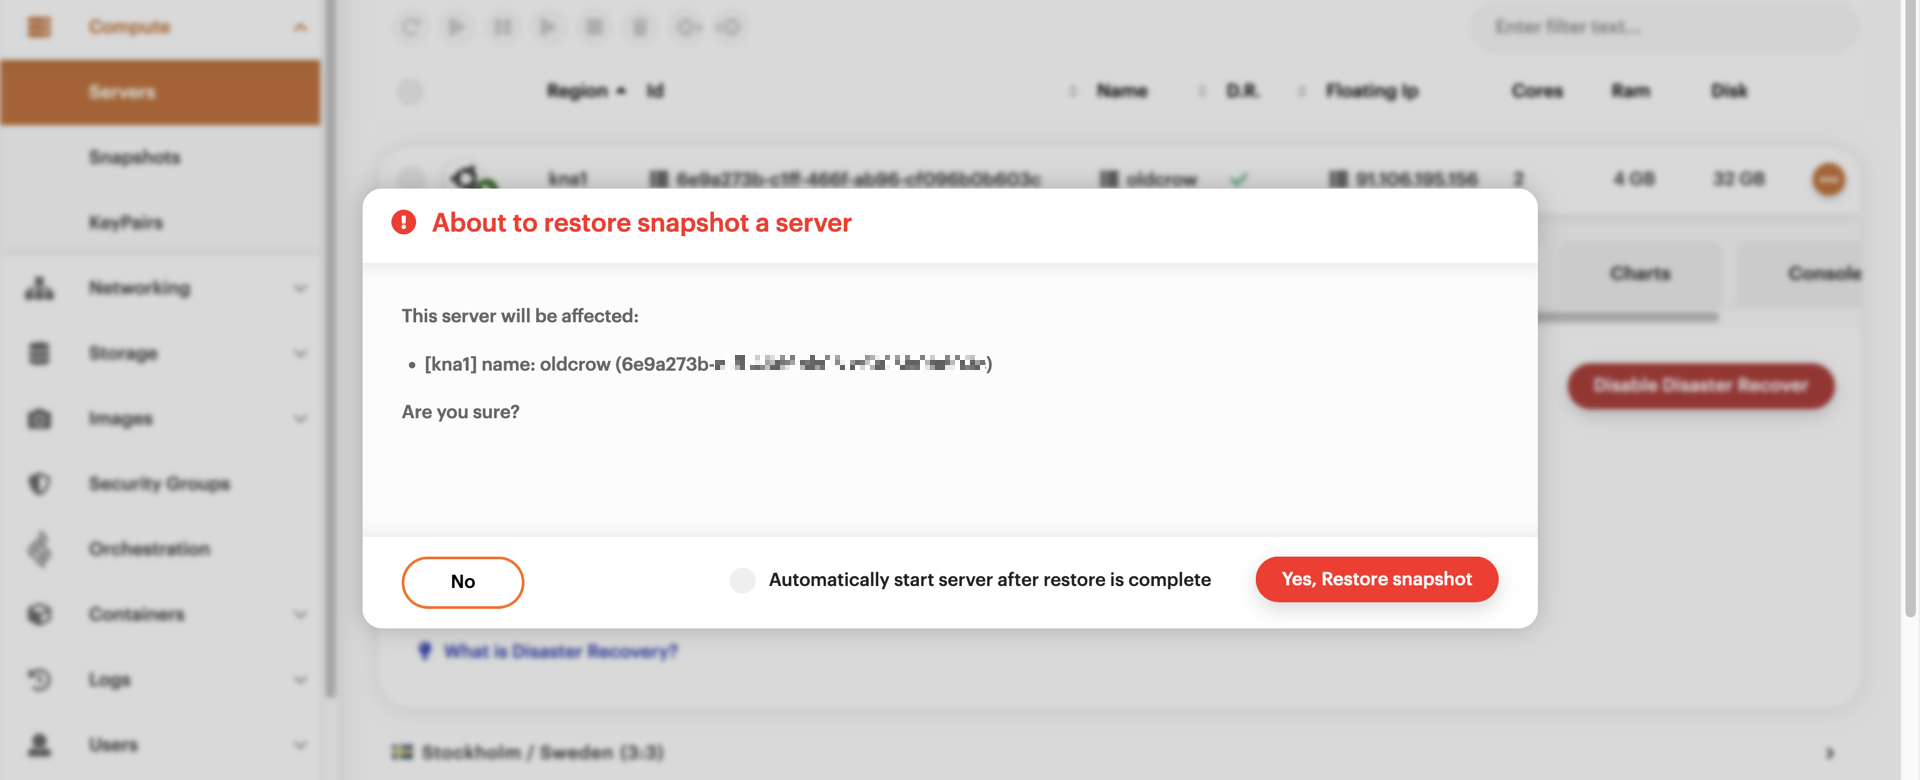
Click on the snapshot you want. A pop-up window will appear, asking for your permission to proceed. Make sure this is indeed the snapshot you want, then click the red button labeled Yes, Restore snapshot.
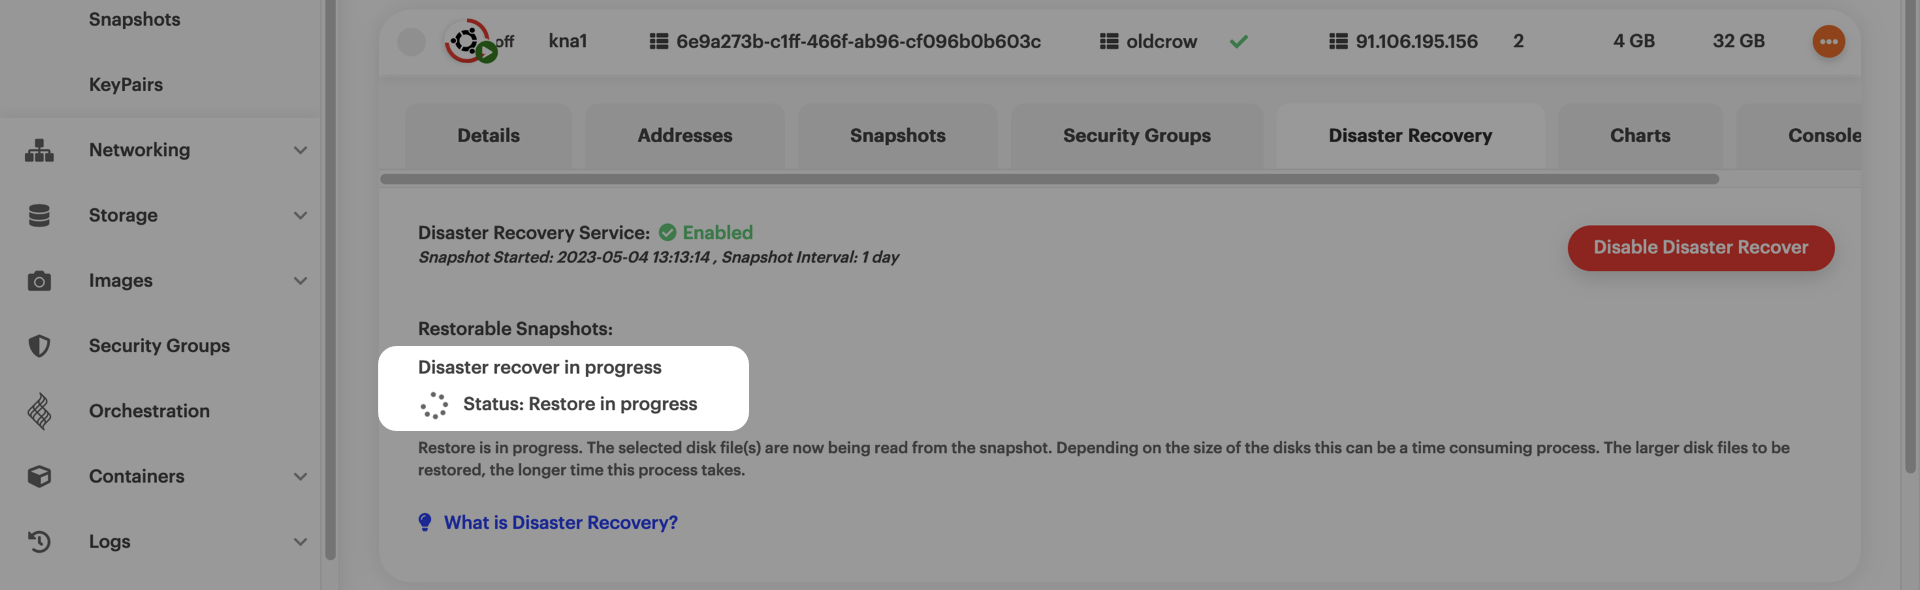
The restore process will begin immediately. You can tell it is progressing by checking the status.
As soon as the snapshot is ready to be used, you will see a message indicating that it has started. Do not forget to activate the server; click on its row to select it, then click the button above.