Launching a server with a configuration drive
Background: OpenStack metadata discovery
OpenStack Compute uses metadata to inject custom configurations to servers on boot. You can add custom scripts, install packages, and add SSH keys to the servers using metadata.
By default, metadata discovery in Cleura Cloud uses an HTTP data source that booting servers connect to. Sometimes, this is undesirable or — for specific server/networking configurations — unreliable. Under those circumstances, you can use an alternate configuration source.
Store metadata on a configuration drive
A configuration drive (config drive) is a read-only virtual drive that gets attached to a server during boot. The server can then mount the drive and read files from it. Configuration drives are used as a data source for cloud-init.
Enable the configuration drive on server creation
Follow our How-To guide to create your new cloud server using either the Cleura Cloud Management Panel or the OpenStack CLI.
When you are done configuring the server, right before creating it notice the icon on the left-hand side of Advanced Options. Click on it to expand all related options.
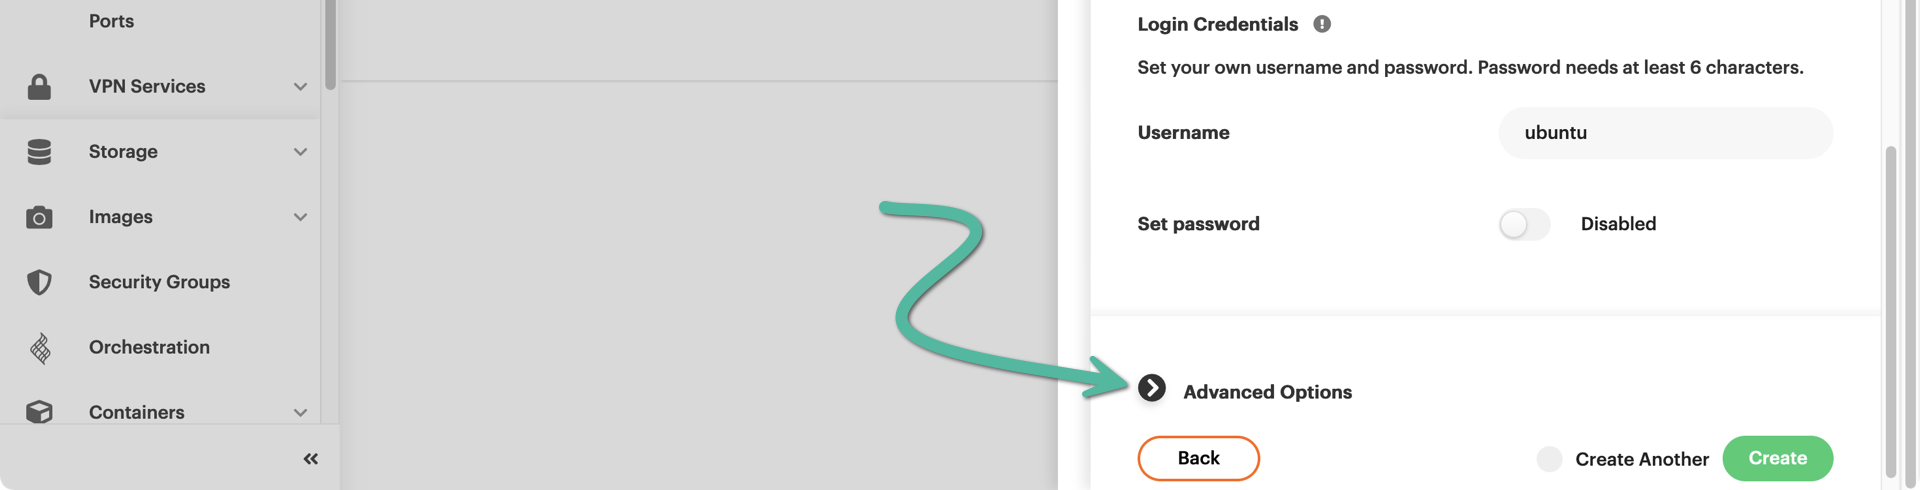
In the User-Data area, you see everything that will be executed upon server boot.
Right below, in the User-data propagation method area, the Use metadata service (Default) option is preselected for you. To opt for the alternative metadata discovery method, select Use configuration drive.
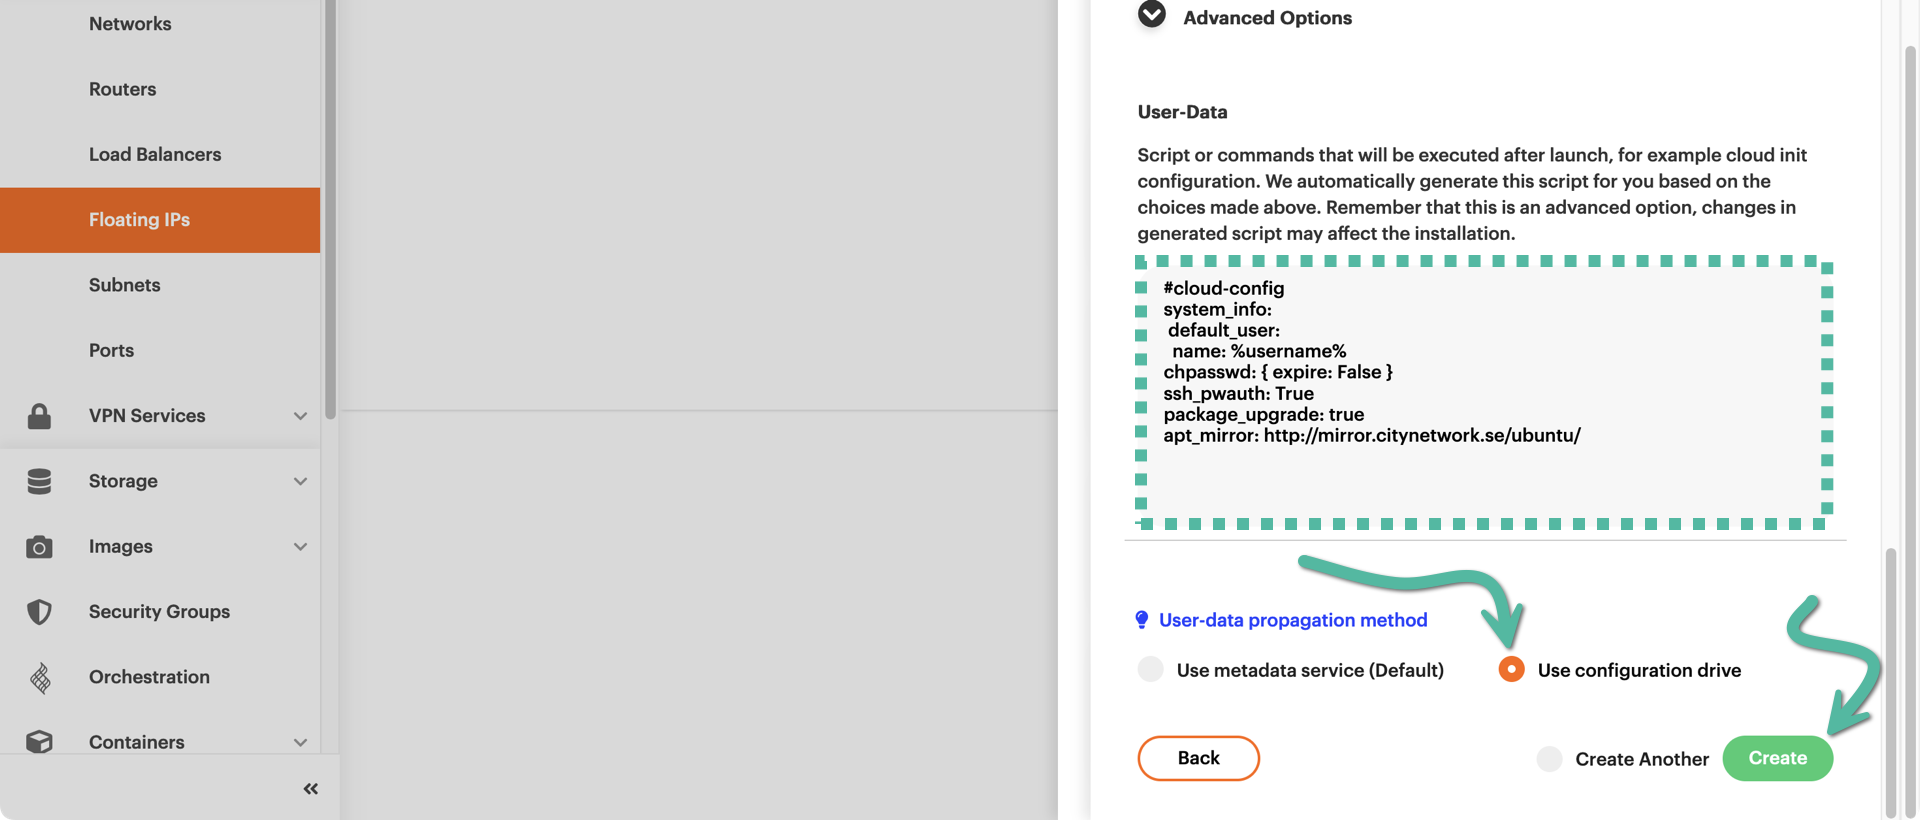
Then, instantiate the server by clicking the green Create button.
Once the server is ready, you may see what happened during configuration by examining the console log. In the Cleura Cloud Management Panel, click on the server line to get an extended view of its characteristics, and then click once more on the Console Output tab.
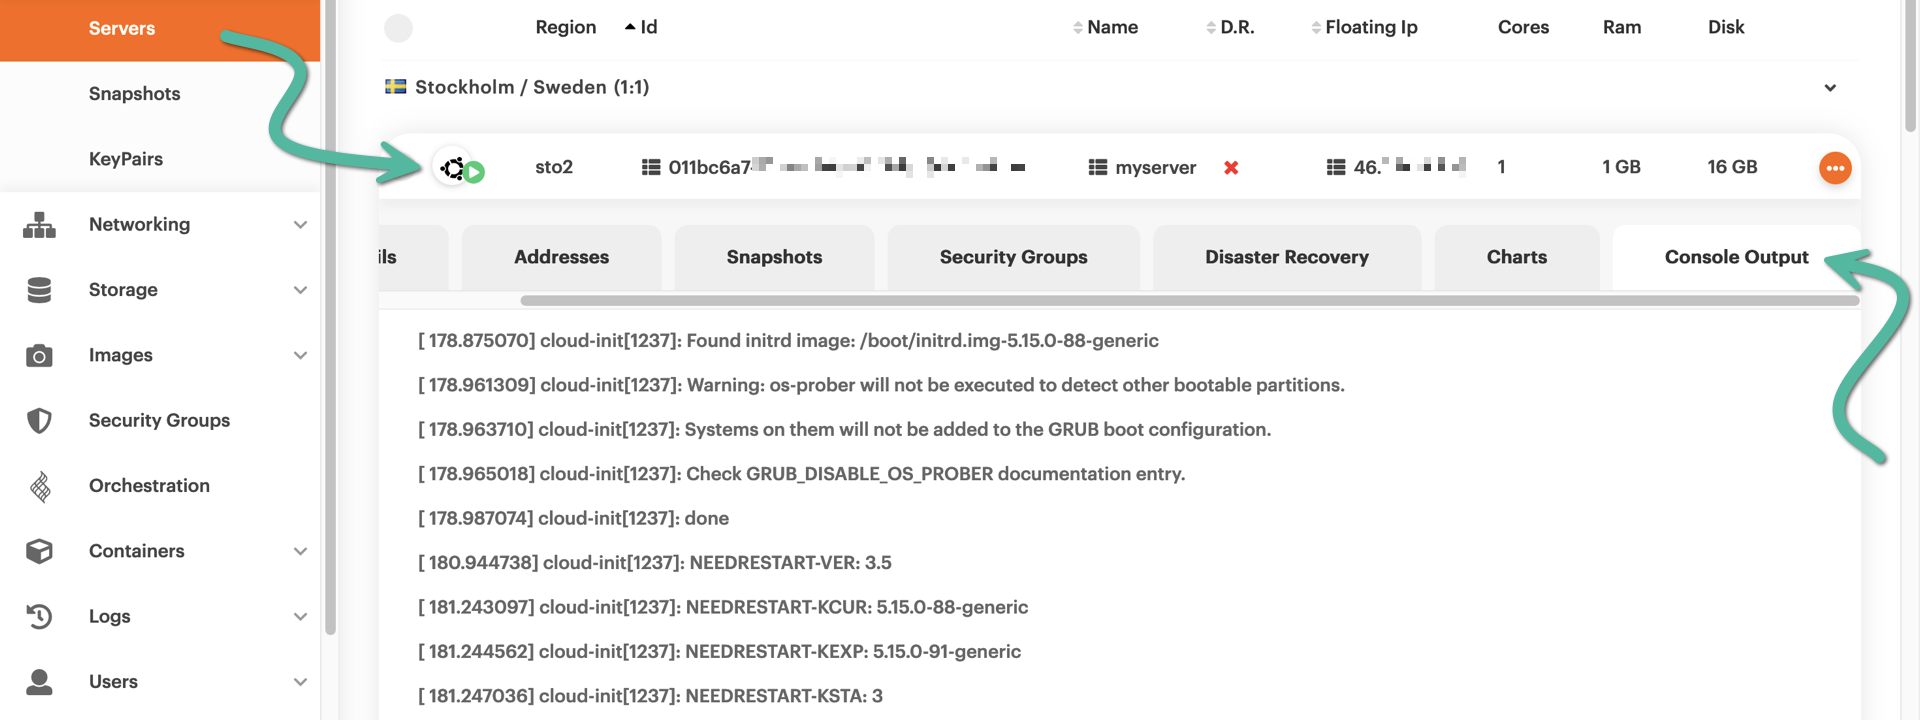
There might be quite a lot of text to sift through, but you can easily
do so by pressing the Up or Down arrow keys.
To enable the configuration drive, you need to pass the parameter
--use-config-drive to the openstack server create command.
In the following example, replace the image, flavor, keypair, and network reference, as well as the server name, to match your desired configuration.
openstack server create \
  --use-config-drive \
  --image "Ubuntu 22.04 Jammy Jellyfish x86_64" \
  --flavor b.1c2gb \
  --keypair mykey
  --nic net-id=3a747038-ee59-404c-973d-5f795e8ebb73 \
  myserver
Once the server launches, you can monitor its configuration process by watching the server console log:
openstack console log show myserver