Managing a Kubernetes cluster
Once you have launched a new cluster, you can interact with it using kubectl with a kubeconfig file.
Prerequisites
On your local computer, you should make sure you have kubectl, the Kubernetes command line tool.
As soon as you do, you may issue commands against your clusters.
To install kubectl, follow the official documentation.
Extracting the kubeconfig file
You can access your shoot cluster using a certificate-based kubeconfig file.
Such a kubeconfig is valid for a predefined amount of time, during which it can be used for accessing the corresponding shoot cluster with cluster-admin privileges.
The credentials associated with this type of kubeconfig are client certificates with time-limited validity.
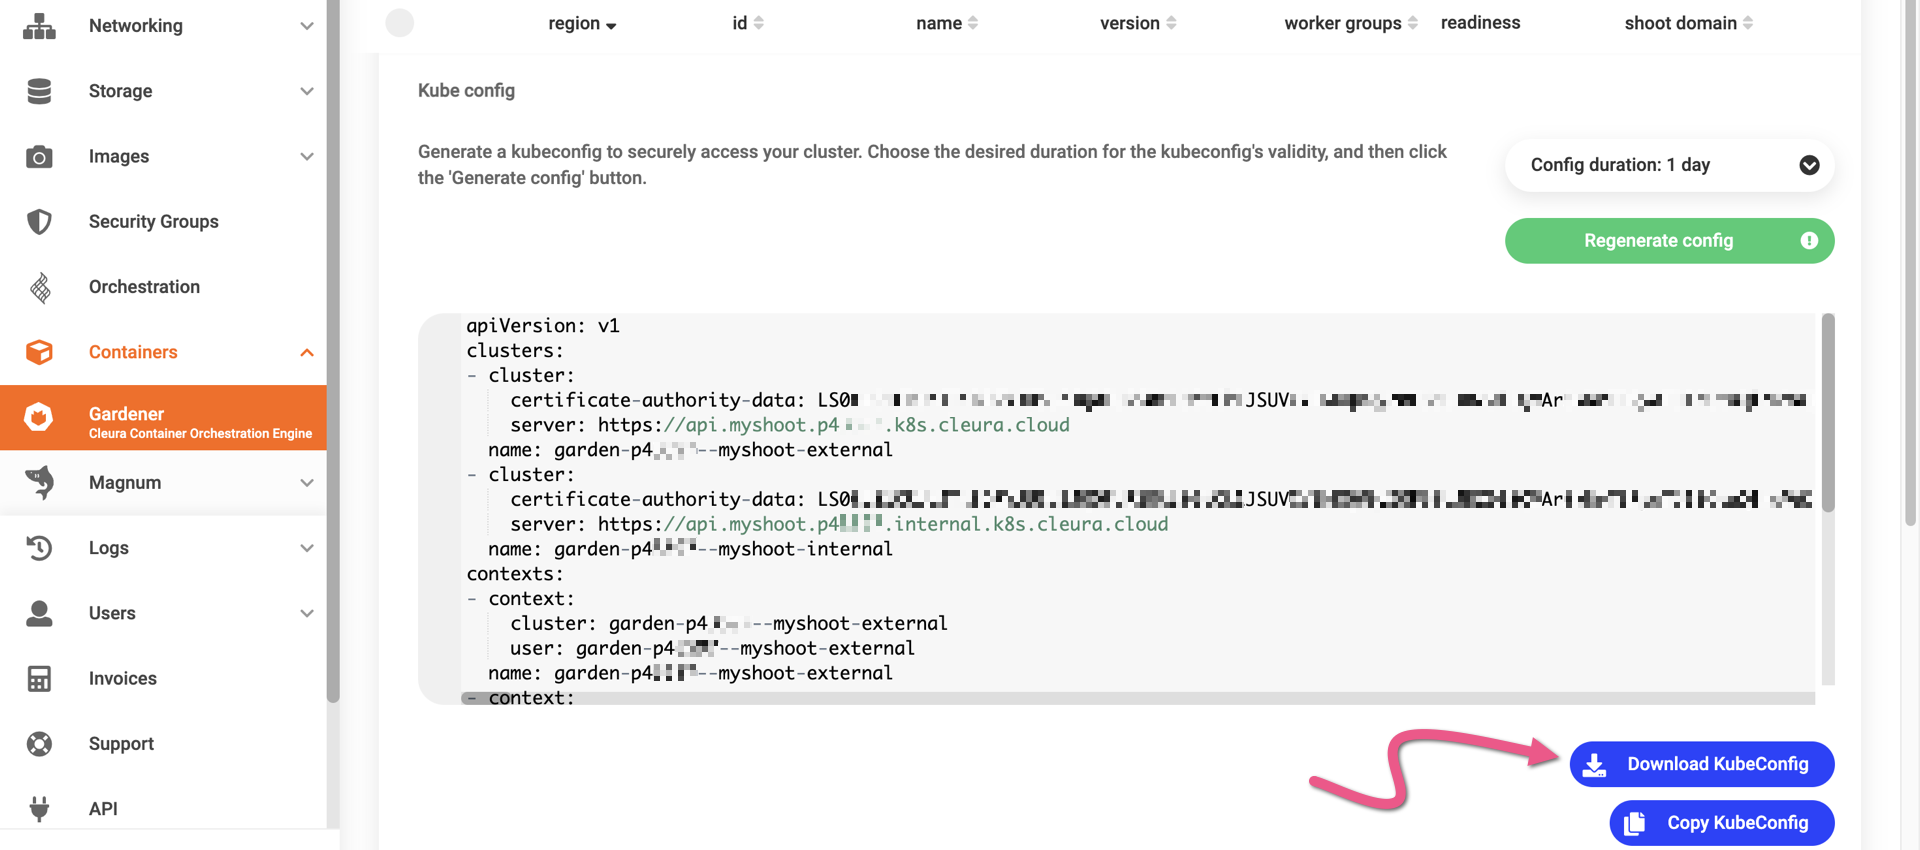
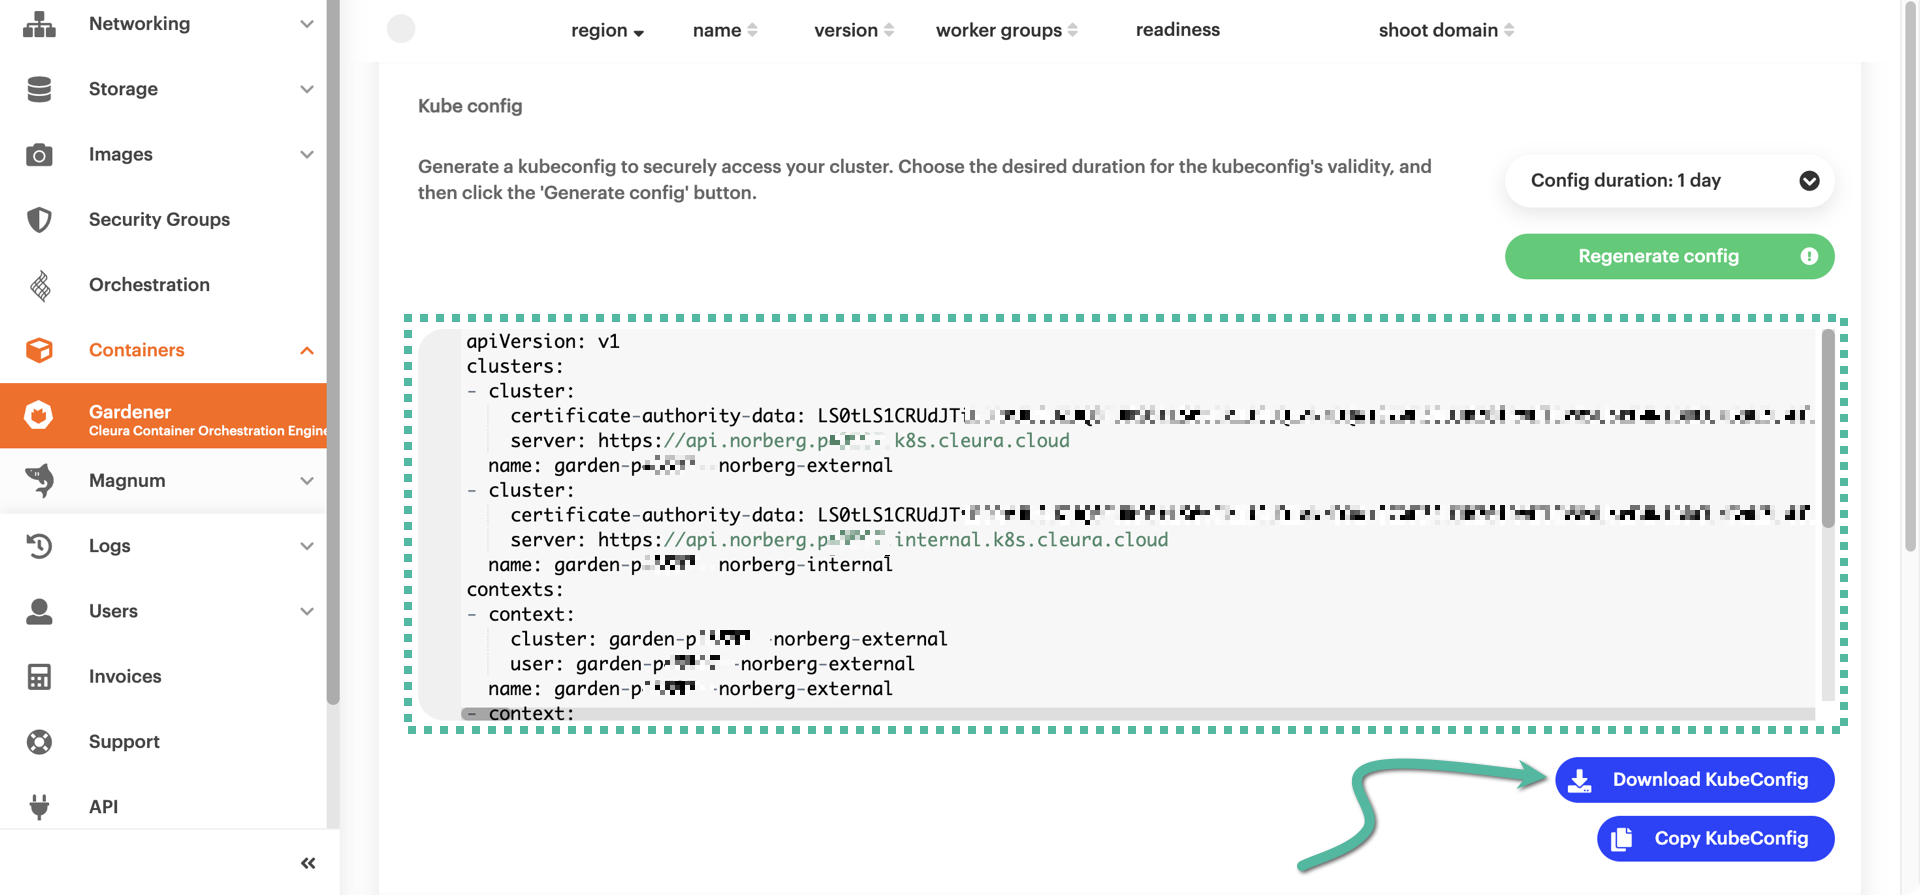
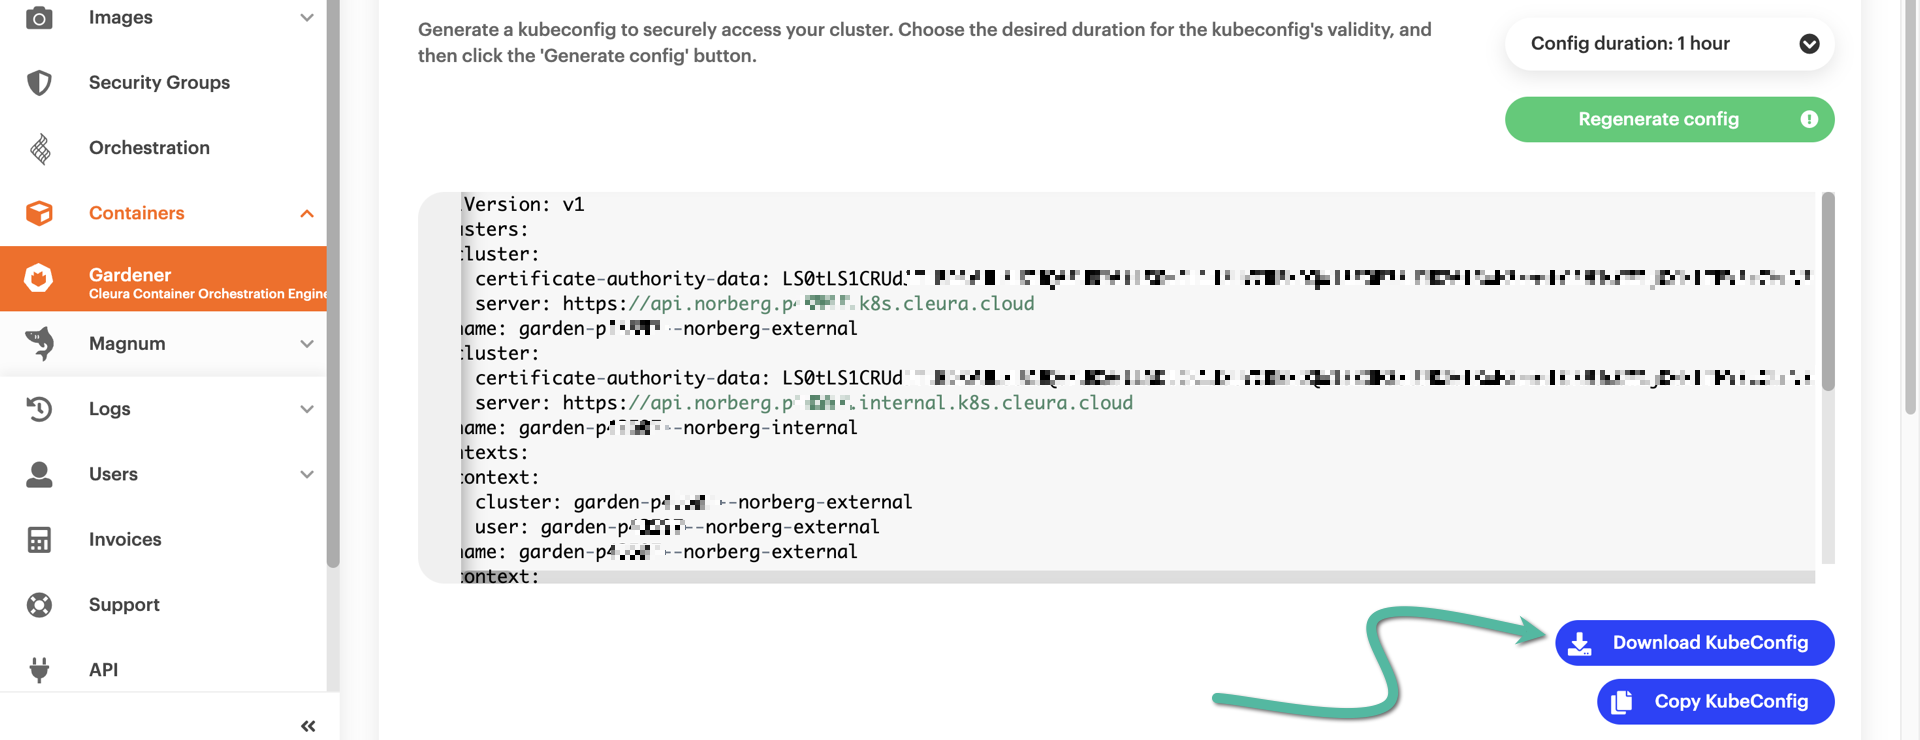
To get a kubeconfig file for a shoot cluster, in the Cleura Cloud Management Panel click on the cluster row to bring its properties into full view and go to the KubeConfig tab.
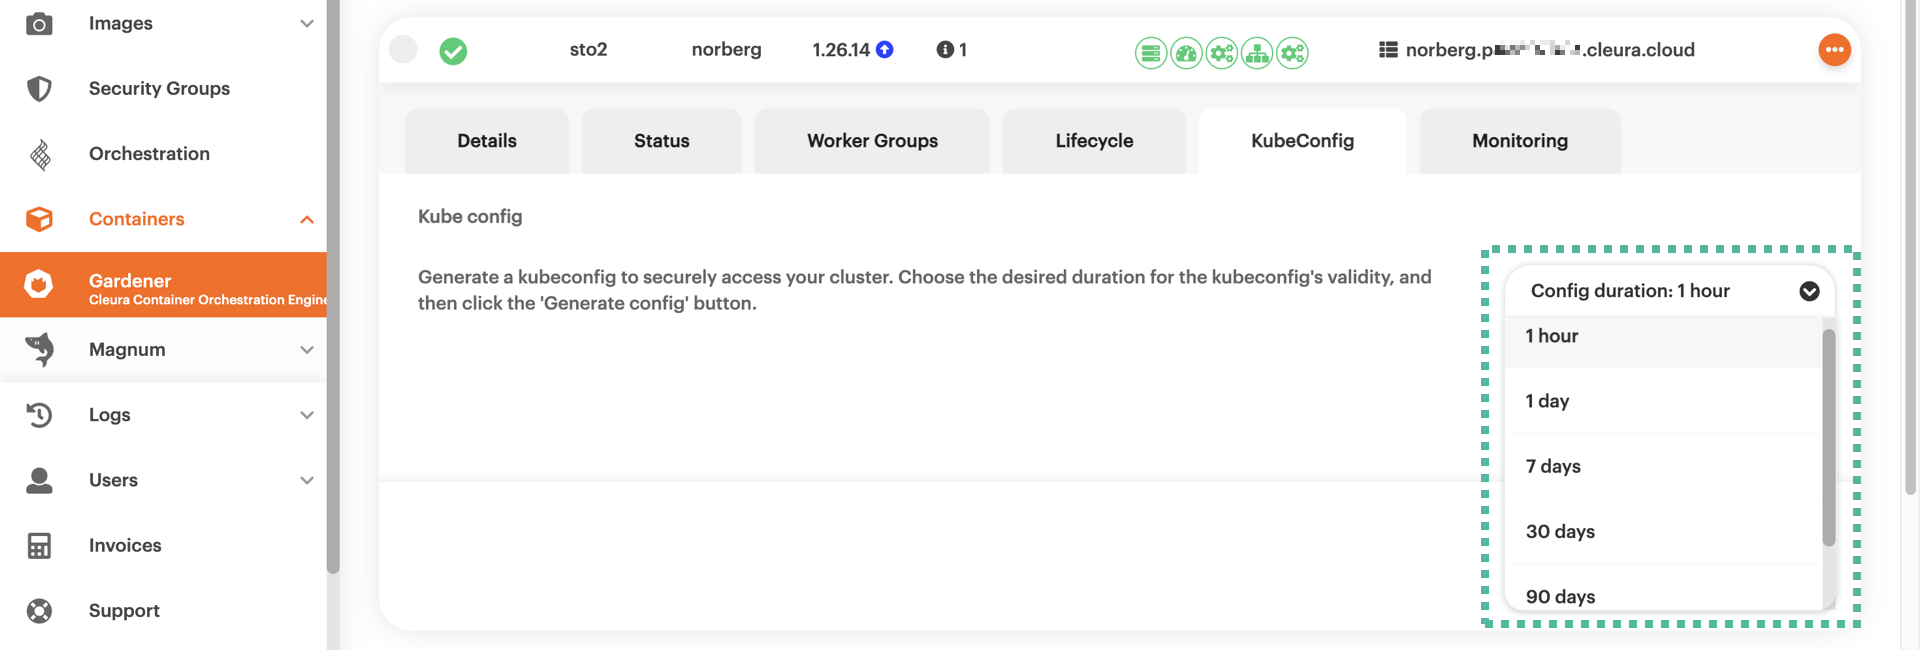
Notice that you may set the duration of the kubeconfig file validity.
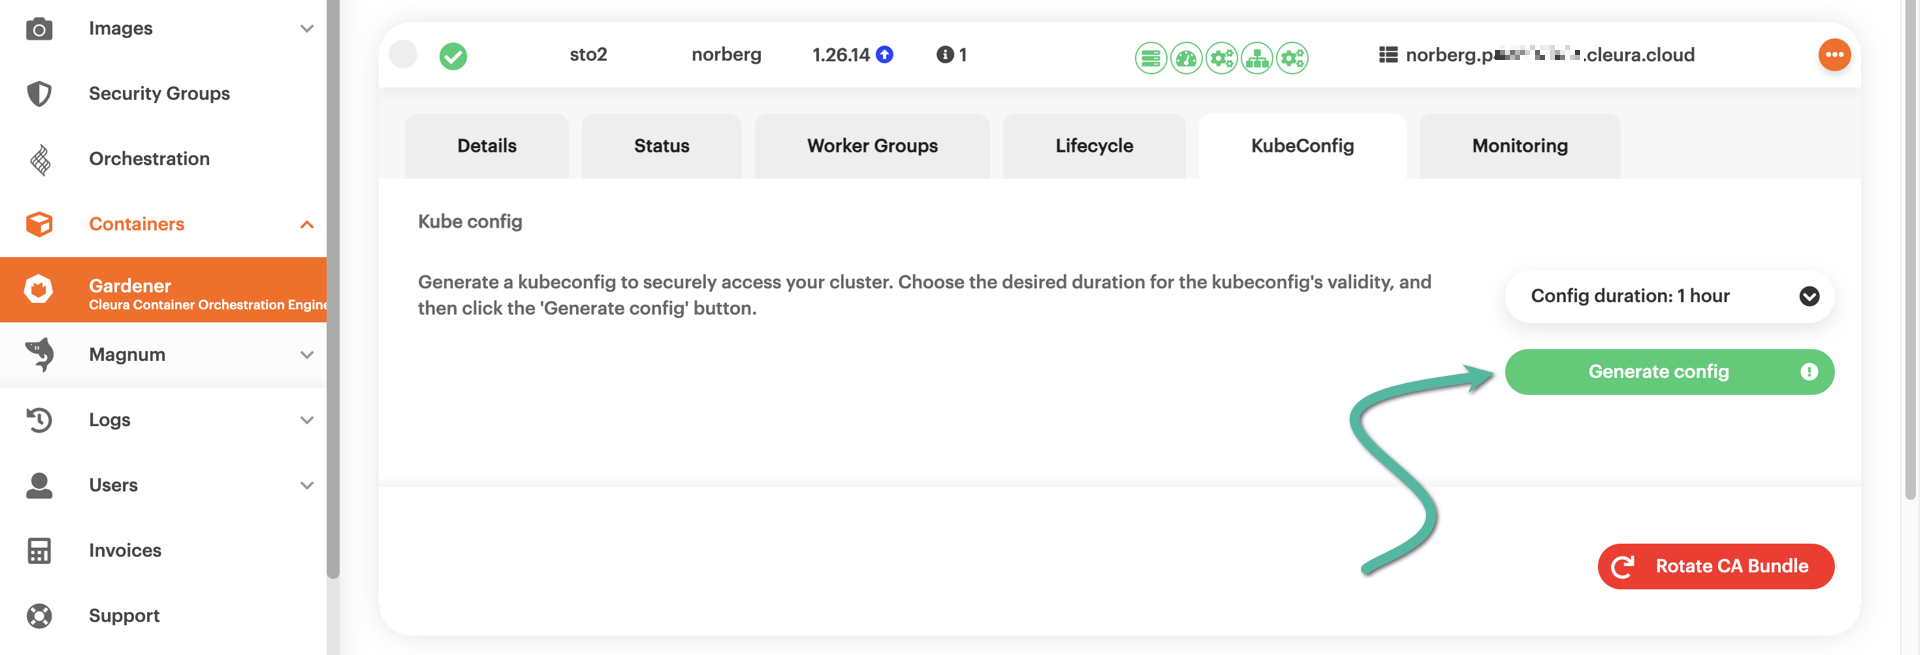
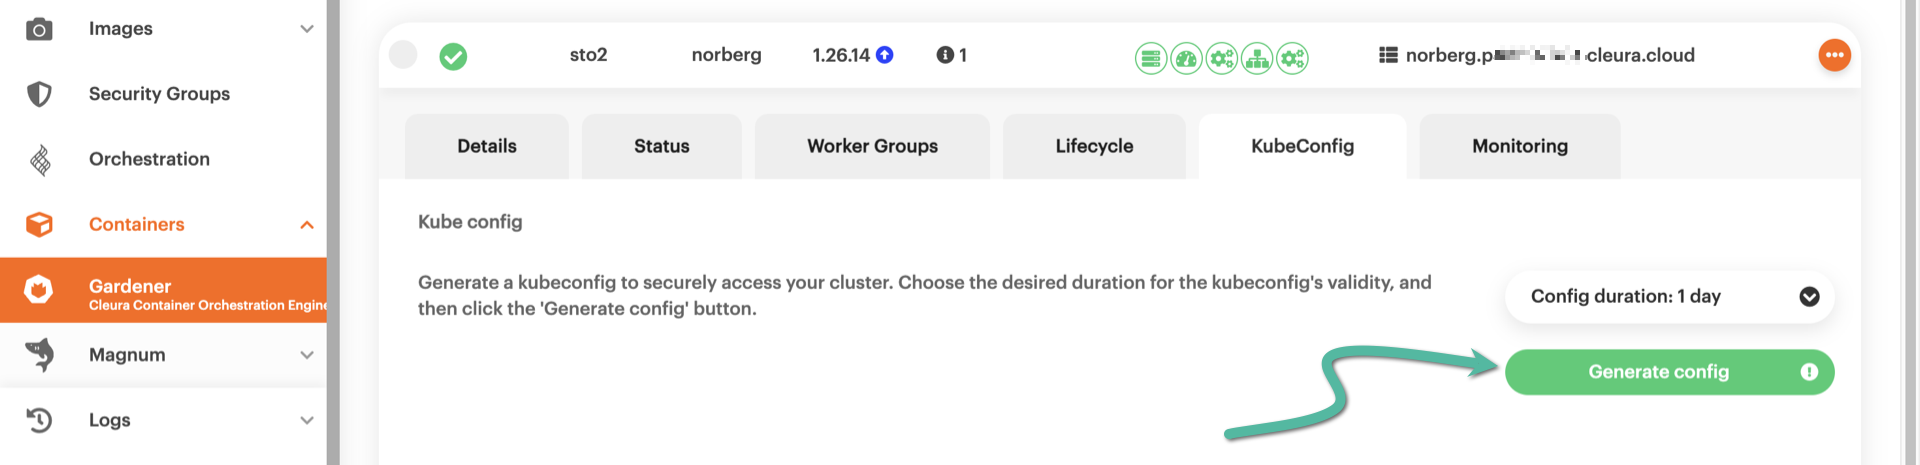
The default validity period is one hour, but you may use the drop-down menu to select a different duration.
When satisfied with the duration, click the green button labeled Generate config.
Right below, you will see the contents of your dynamically generated kubeconfig. To get the file, click the blue button labeled Download KubeConfig.
In the default download folder of your local user account, you will get a configuration file named like so:
kubeconfig--<cluster_name>--<region_name>--<project_id>.yaml
Create a directory named .kube in your local user’s home, then move the YAML file you downloaded into it.
Rename the YAML to config, ending up with ~/.kube/config.
By default, kubectl searches for its configuration in ~/.kube/config.
If necessary, you can modify this behavior by setting the KUBECONFIG environment variable.
For example, if you want to retain the original filename exactly as downloaded, you might type something like the following:
export KUBECONFIG=~/.kube/kubeconfig--<cluster_name>--<region_name>--<project_id>.yaml
If you manage multiple Kubernetes clusters, you will probably prefer this approach.
Verifying your kubeconfig
Check if your kubectl uses the proper configuration by running:
kubectl config view
You should see something like this:
apiVersion: v1
clusters:
- cluster:
    certificate-authority-data: DATA+OMITTED
    server: https://api.myshoot.pqrxyz.k8s.cleura.cloud
  name: garden-pqrxyz--myshoot-external
- cluster:
    certificate-authority-data: DATA+OMITTED
    server: https://api.myshoot.pqrxyz.internal.k8s.cleura.cloud
  name: garden-pqrxyz--myshoot-internal
contexts:
- context:
    cluster: garden-pqrxyz--myshoot-external
    user: garden-pqrxyz--myshoot-external
  name: garden-pqrxyz--myshoot-external
- context:
    cluster: garden-pqrxyz--myshoot-internal
    user: garden-pqrxyz--myshoot-external
  name: garden-pqrxyz--myshoot-internal
current-context: garden-pqrxyz--myshoot-external
kind: Config
preferences: {}
users:
- name: garden-pqrxyz--myshoot-external
  user:
    client-certificate-data: DATA+OMITTED
    client-key-data: DATA+OMITTED
Keep in mind that the cluster API endpoints (the server entries in your kubeconfig) are dynamically managed DNS addresses.
Gardener in Cleura Cloud automatically created the DNS records upon shoot cluster creation.
The DNS records will subsequently disappear when you delete the cluster. They also disappear when you hibernate the shoot cluster, and reappear when you wake it from hibernation.
Accessing your cluster with kubectl
Check your available nodes by running:
kubectl get nodes
Assuming you used the default options when creating the cluster, you should now see the three Gardener worker nodes that are initially available:
NAME                                           STATUS   ROLES    AGE   VERSION
shoot--pqrxyz--myshoot-cwncz1-z1-7656c-cx8zn   Ready    <none>   23h   v1.30.5
shoot--pqrxyz--myshoot-cwncz1-z1-7656c-nvgmc   Ready    <none>   23h   v1.30.5
shoot--pqrxyz--myshoot-cwncz1-z1-7656c-rrkmz   Ready    <none>   23h   v1.30.5
Please note that in contrast to an OpenStack Magnum-managed Kubernetes cluster, where the output of
kubectl get nodesincludes control plane and worker nodes, in a Gardener cluster the same command only lists the worker nodes.
Deploying an application
Create a sample deployment with a Hello World application:
$ kubectl create deployment hello-node --image=registry.k8s.io/echoserver:1.4
deployment.apps/hello-node created

$ kubectl expose deployment hello-node --type=LoadBalancer --port=8080
service/hello-node exposed
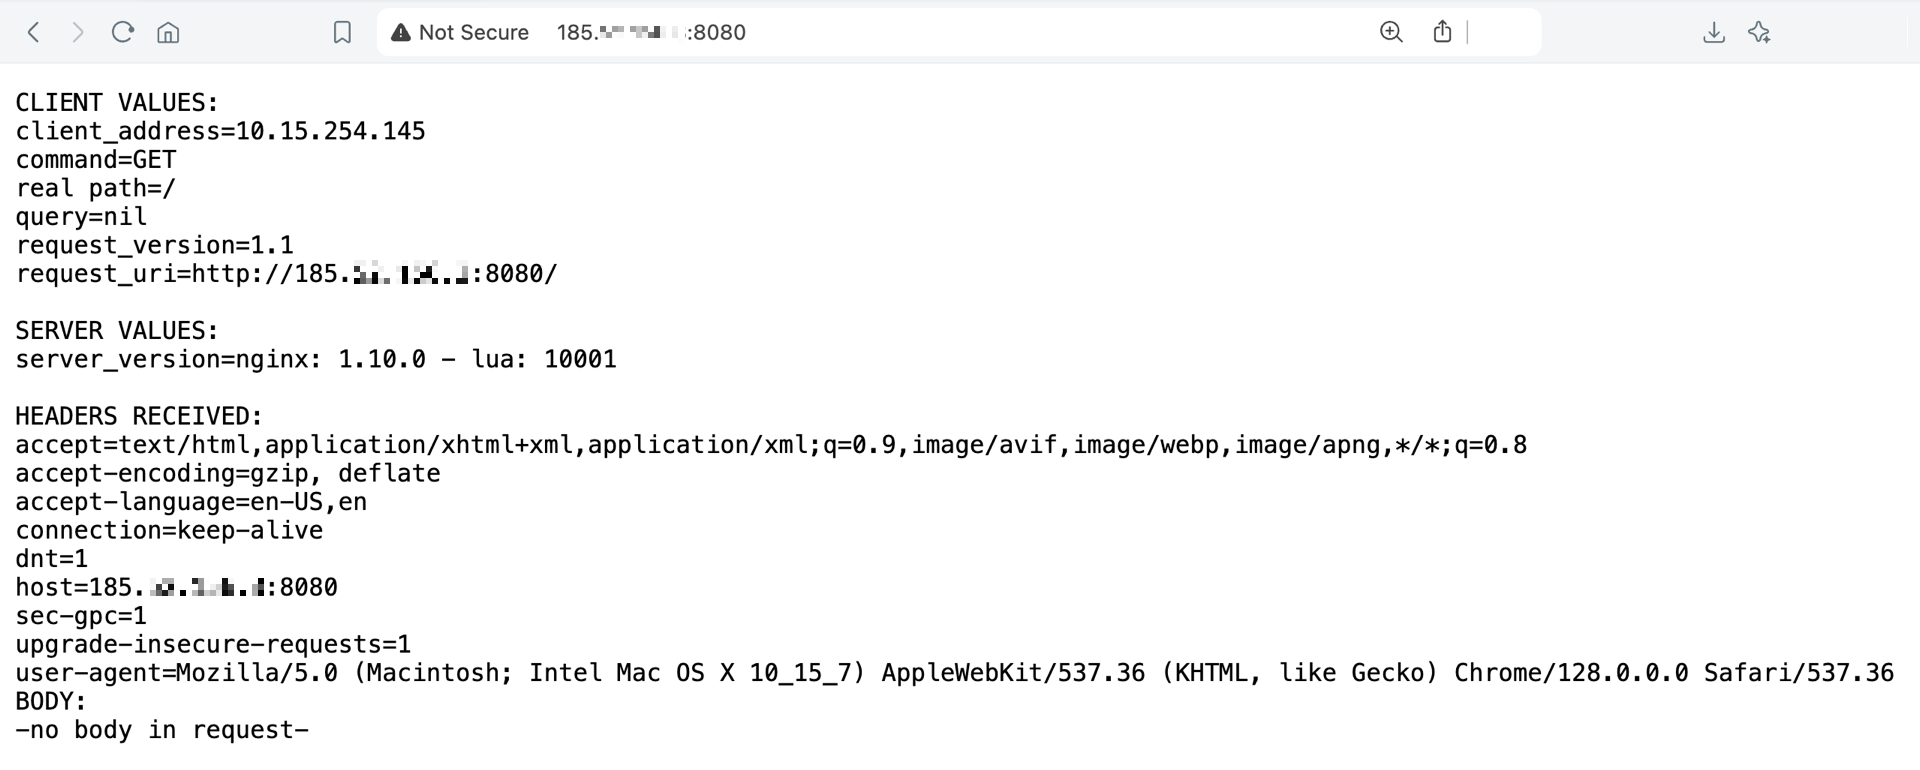
To access the created app, list the available services:
kubectl get services
After a minute or so, you should get the load balancer service with its external IP and port number:
NAME         TYPE           CLUSTER-IP       EXTERNAL-IP    PORT(S)          AGE
hello-node   LoadBalancer   100.70.213.140   198.51.100.42  8080:32421/TCP   2m50s
kubernetes   ClusterIP      100.64.0.1       <none>         443/TCP          23h
Open a browser and navigate to http://198.51.100.42:8080 (substituting the correct EXTERNAL-IP listed for your service).
You should see the page of the Hello World app.
Rotating kubeconfig
You may rotate an existing kubeconfig for a fresh one. Since certificate-based kubeconfig files have time-bound validity, issuing fresh kubeconfig files of this type is standard practice.
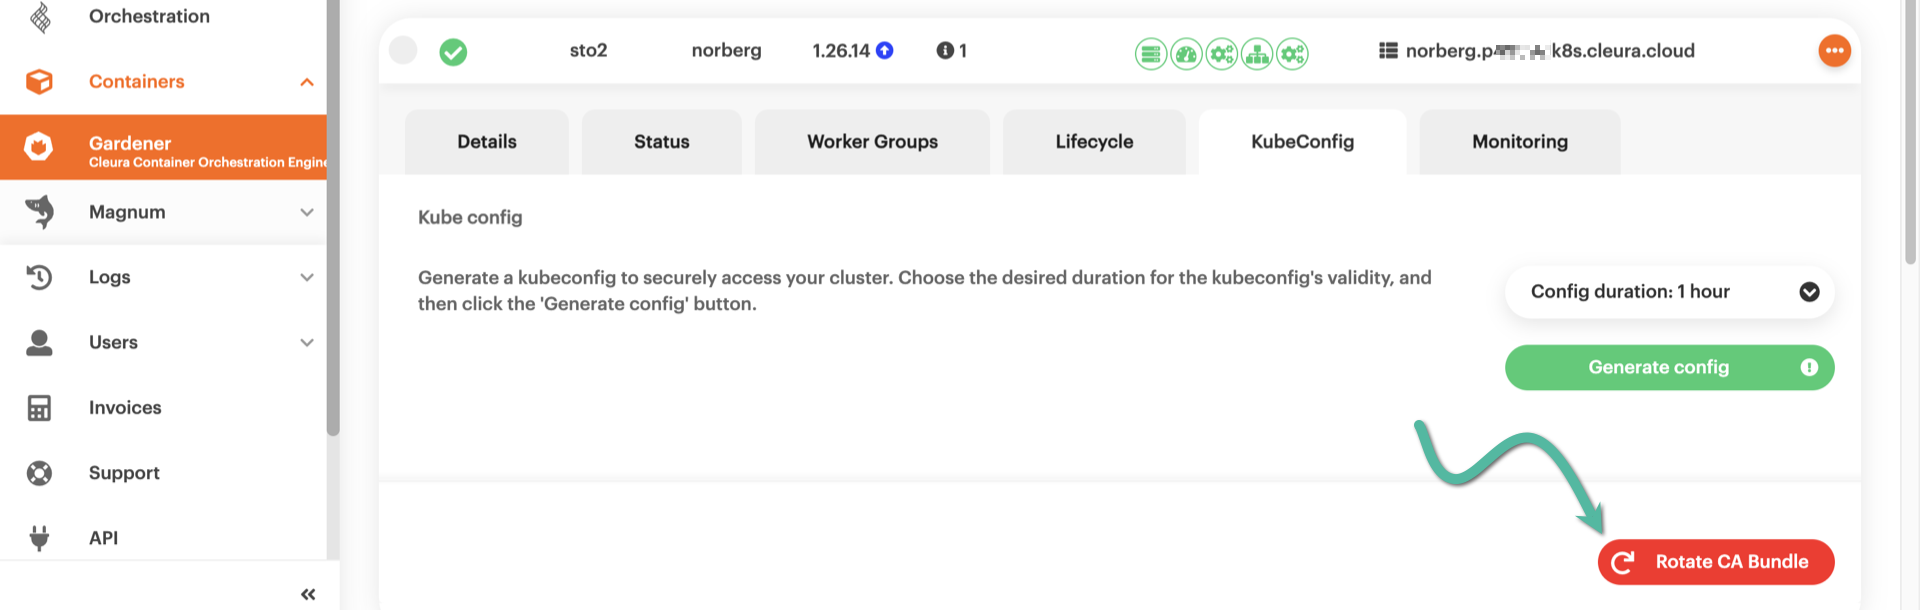
In addition to creating new certificate-based kubeconfig files, it is highly recommended to rotate the CA bundle used for creating them in the first place. Here’s how to go about it, using the Cleura Cloud Management Panel.
Locate the shoot cluster you are interested in. Click on its row to bring all relevant details into view, and go to the KubeConfig tab. Click the red button labeled Rotate CA Bundle.
A new window pops up, informing you in detail about the 3-step process that is about to take place. Please notice that it may take up to twenty minutes to complete. When ready, click the red Start CA rotation button.
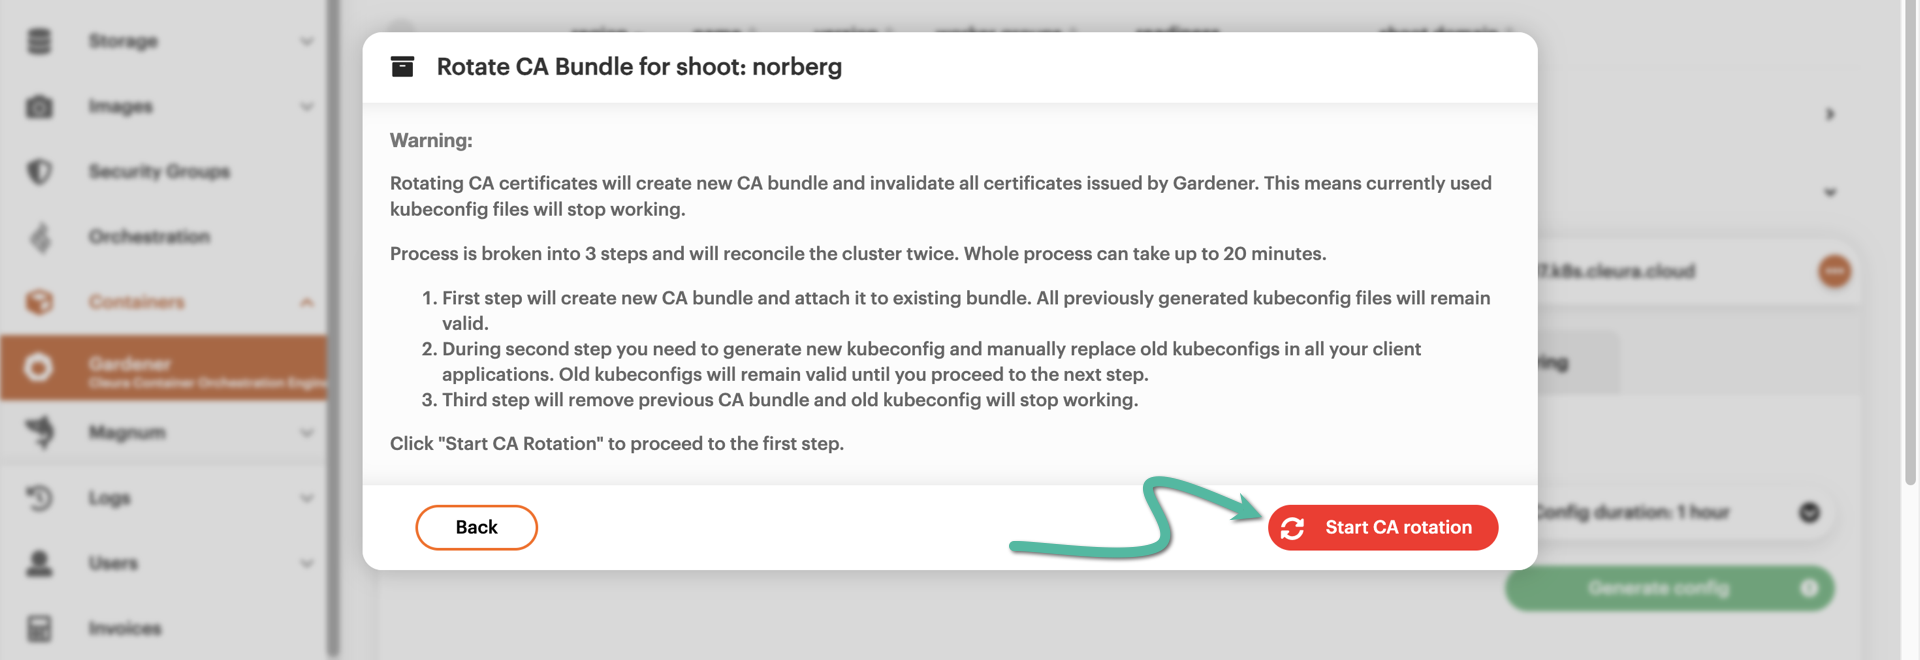
During the first step, a new CA bundle is generated. This may take up to ten minutes to complete. During that time, the existing kubeconfig file still works.
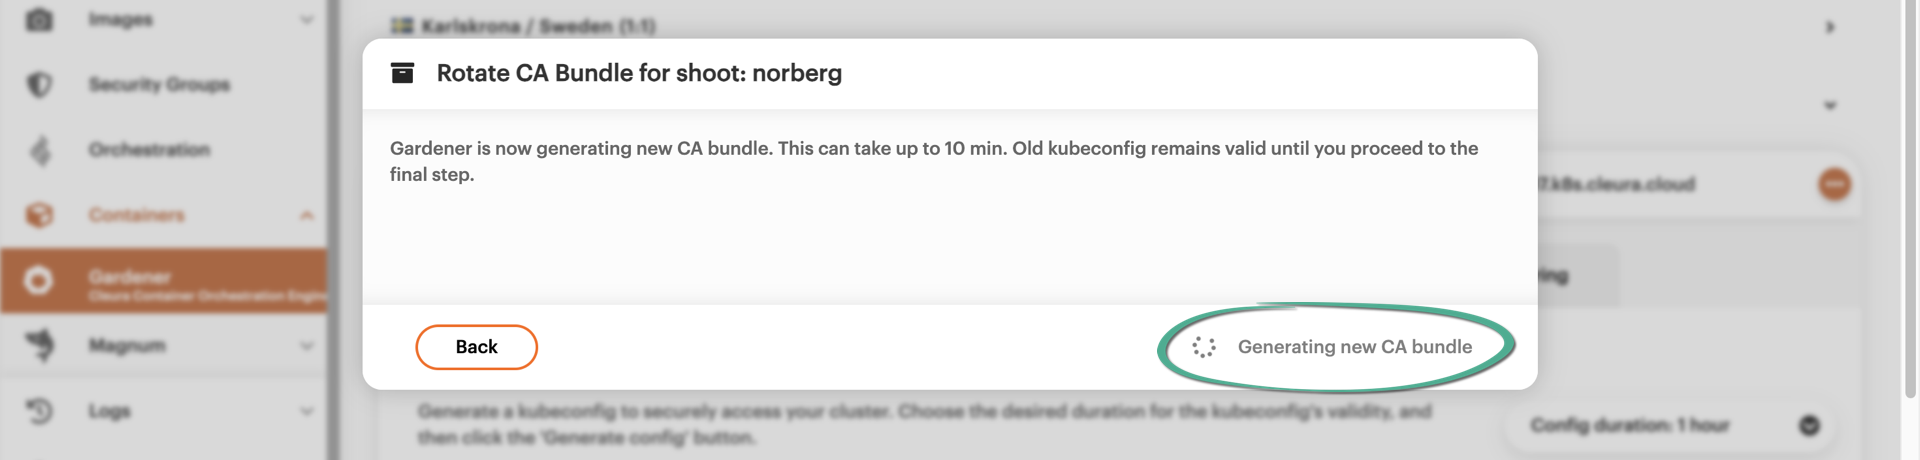
When the new CA bundle is ready, you remove the existing one by clicking the red Remove old CA bundle button. As soon as you click it, the existing kubeconfig stops working.
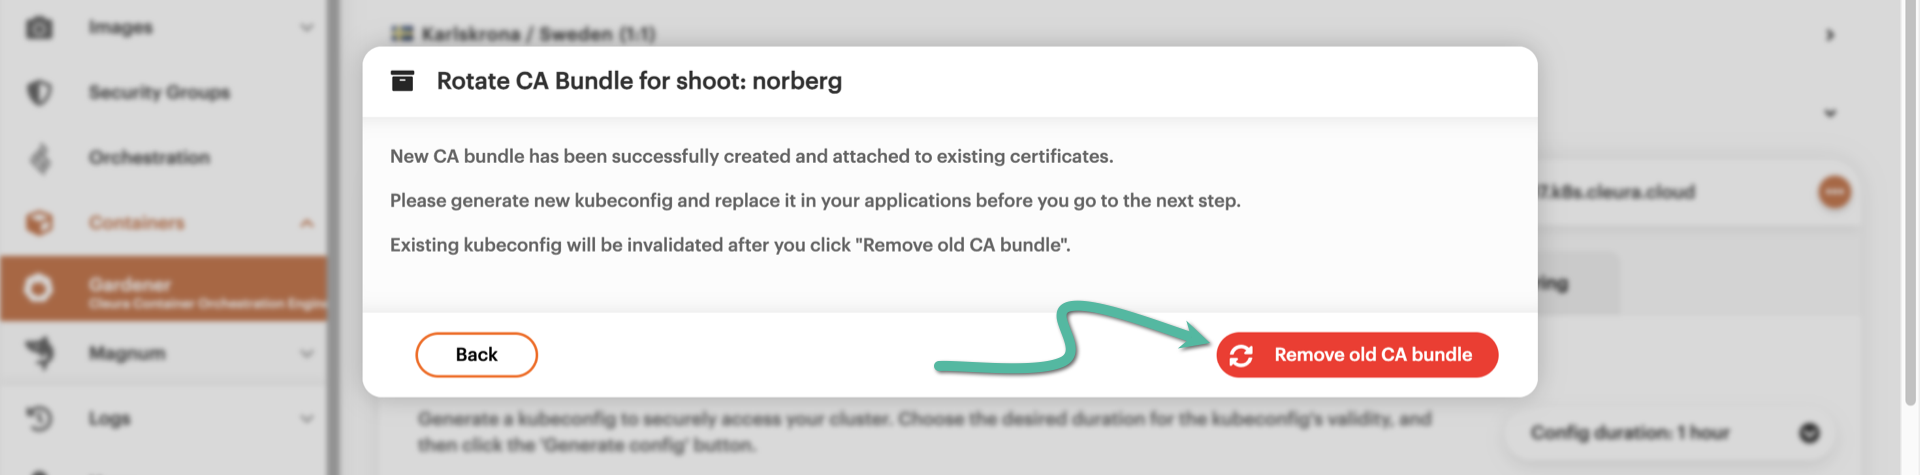
The old CA bundle removal process may take up to ten minutes. Notice the gray animated icon, indicating the process is ongoing.
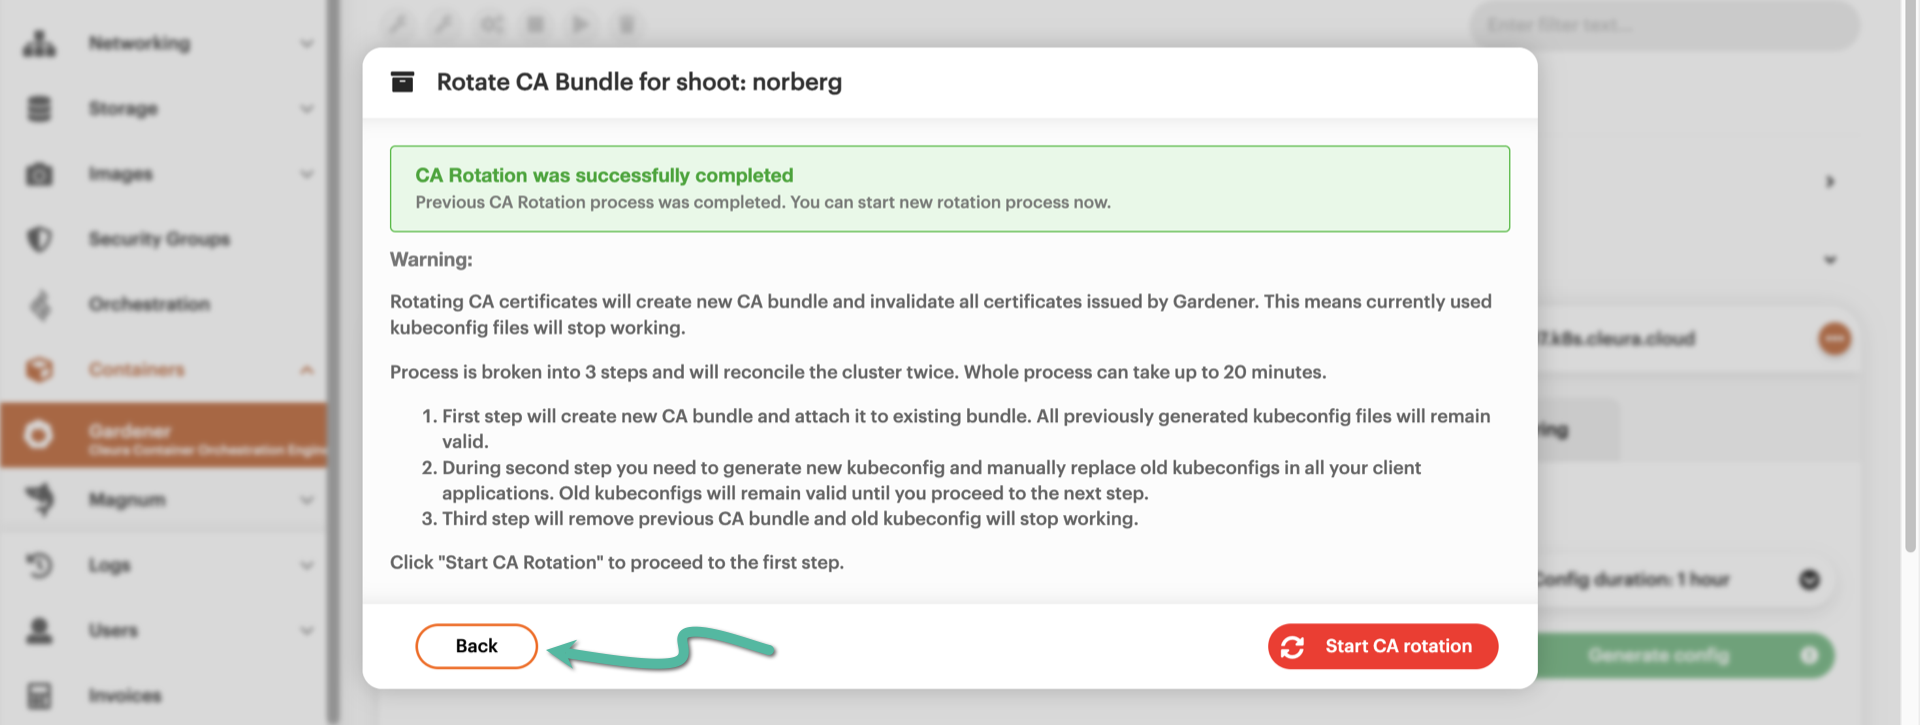
It is now time to create a new certificate-based kubeconfig, which will be based on the new CA bundle. This time, click the Back button, or the CA bundle creation process will start over.
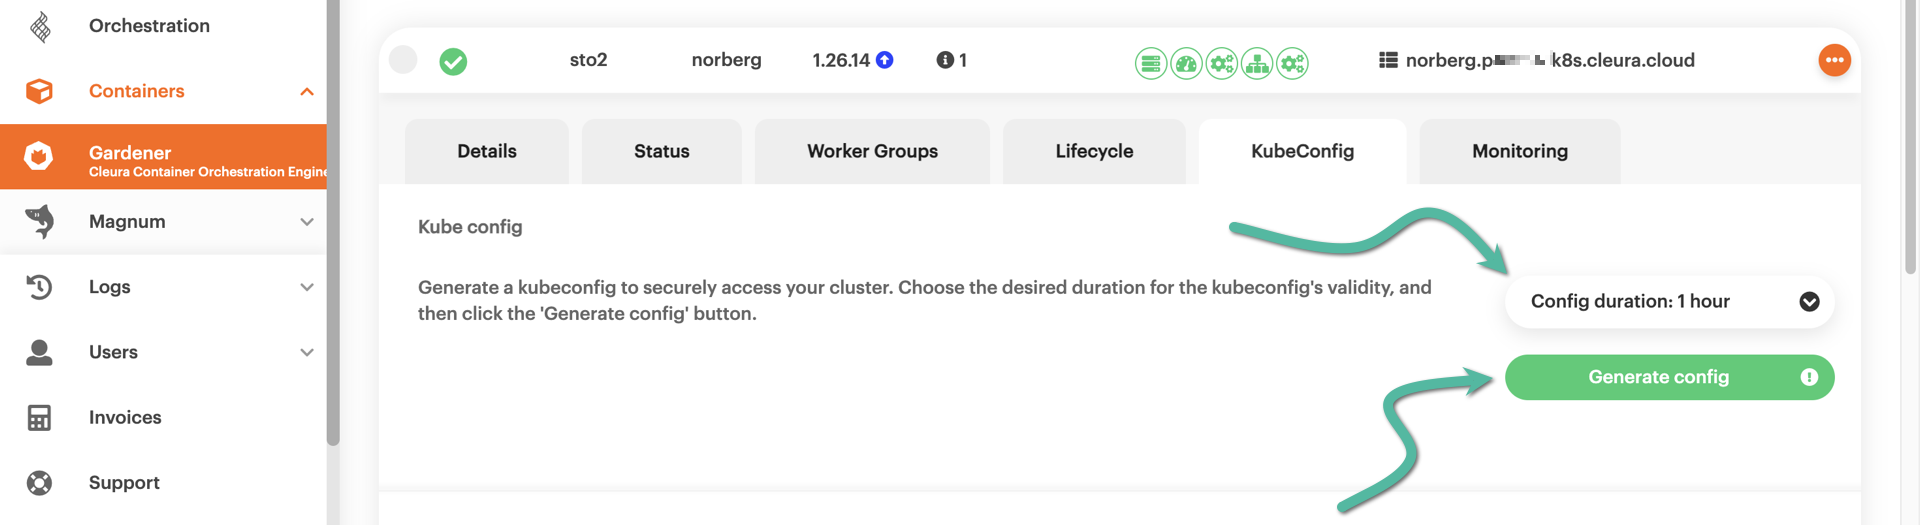
Choose a duration for the new kubeconfig, then click the green Generate config button.
To get your new certificate-based kubeconfig file, click the blue Download KubeConfig button.